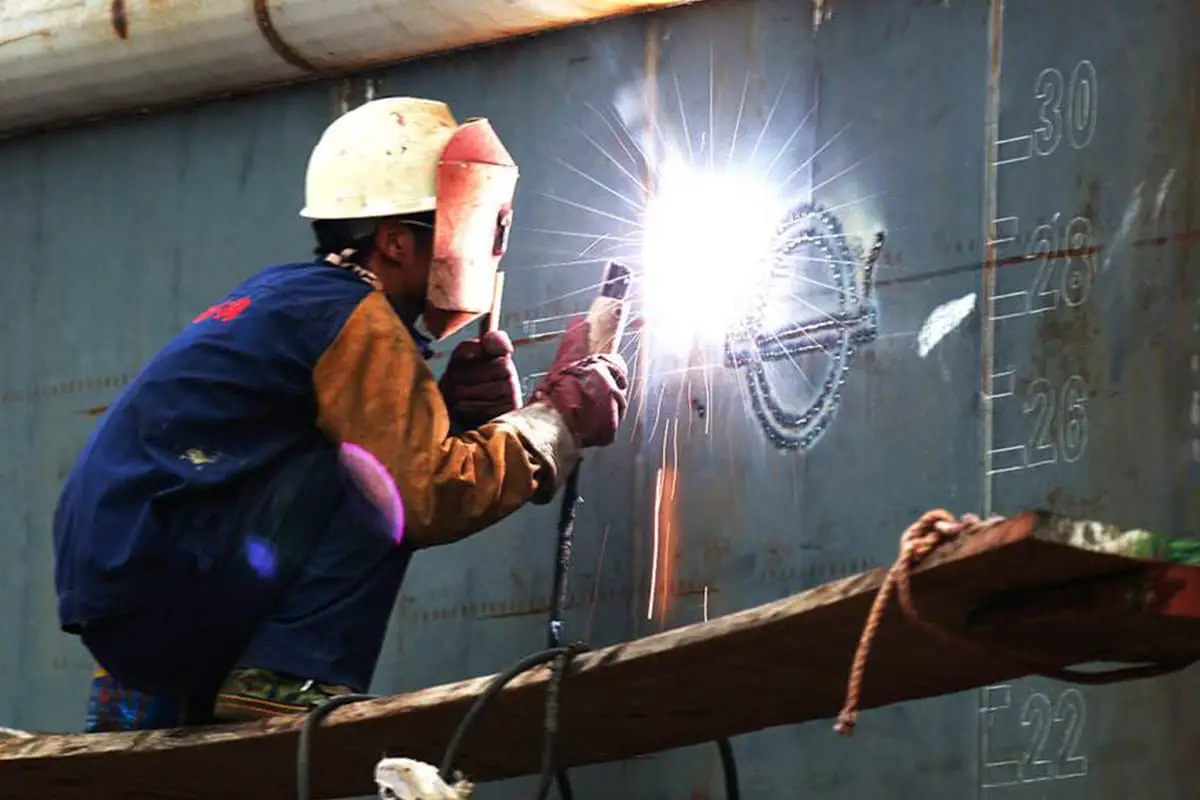
Have you ever wondered how complex machinery stays connected seamlessly? This article dives into the fascinating world of butt welding—a high-efficiency method used to join metals. You’ll learn about its applications, types, and the science behind its effectiveness. Get ready to uncover the secrets of this essential welding technique!
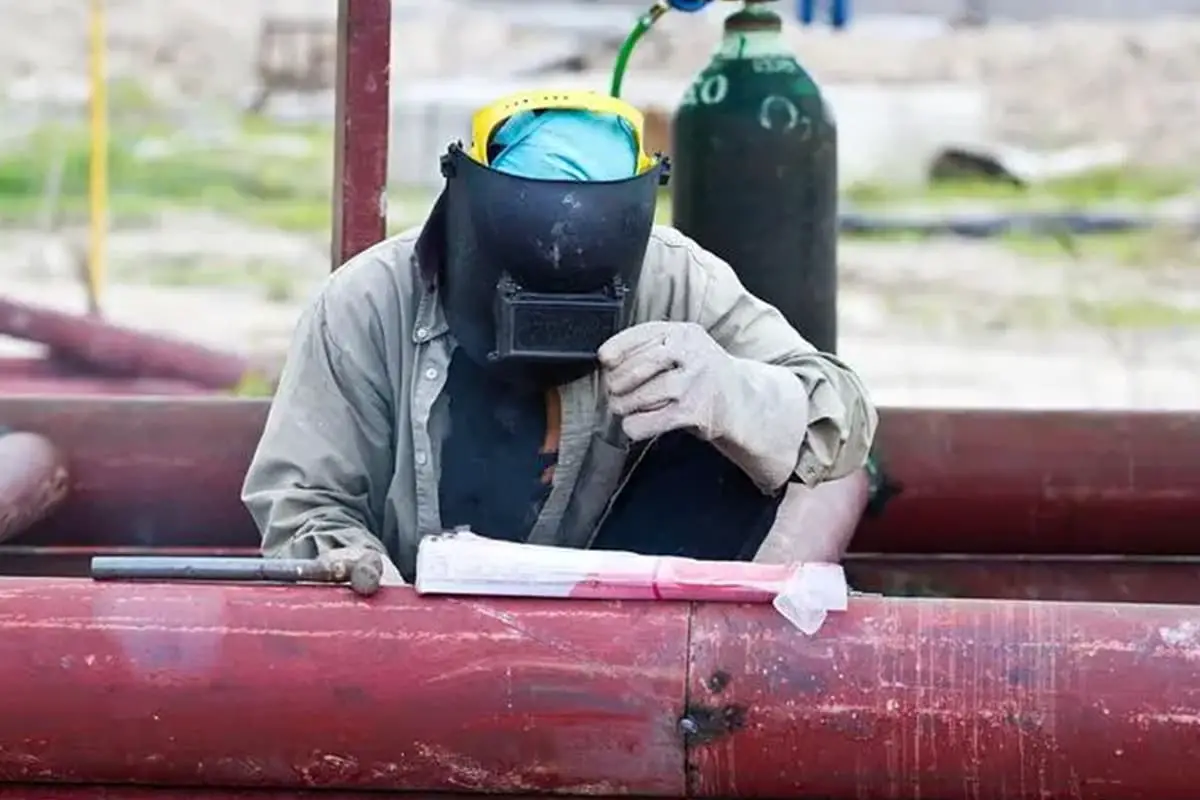
Butt resistance welding, commonly referred to as butt welding, is a sophisticated resistance welding technique that utilizes electrical resistance-generated heat to simultaneously join two workpieces along their entire end faces. This process creates a strong, continuous weld seam without the need for filler material.
Butt welding’s high productivity, ease of automation, and versatility have led to its widespread adoption across various industries. Its applications can be categorized into four main areas:
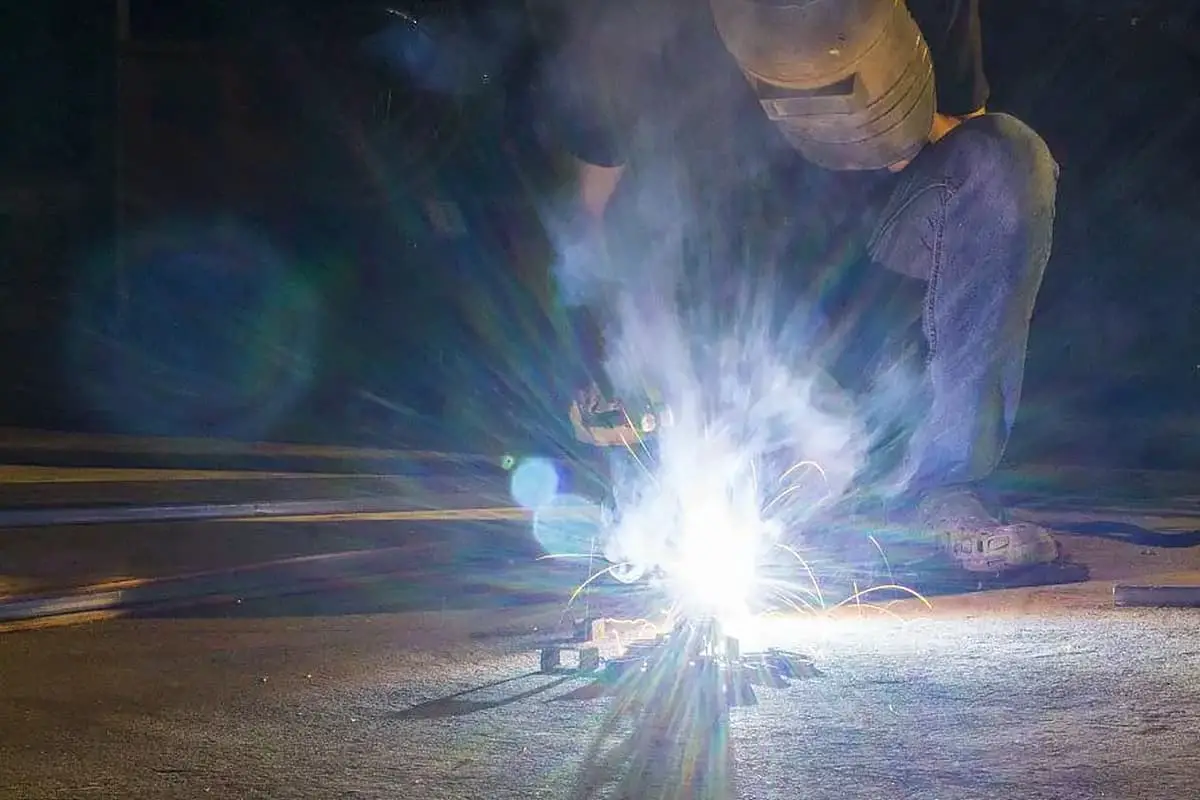
Butt welding is classified into resistance butt welding and flash butt welding.
Resistance butt welding involves continuously pressing the end faces of two workpieces together, heating them to a plastic state using resistance heat, and then quickly applying upset forging pressure (or maintaining the welding pressure without adding upset forging pressure) to complete the welding.
(1) Resistance and Heating in Resistance Butt Welding
The resistance distribution during butt welding is as shown in Figure 14-2. The total resistance can be represented by the following formula:
R=2Rω+Rc+2Reω
Where,
Since the contact resistance between the workpiece and the electrode is small and located far from the joint surface, it is often disregarded. The internal resistance of the workpiece is proportional to the resistivity ρ of the welded metal and the length l0 of the workpiece extending from the electrode, and inversely proportional to the cross-sectional area s of the workpiece.
As with spot welding, the contact resistance in resistance butt welding depends on the surface state, temperature, and pressure of the contact surface. When there are noticeable oxides or other impurities on the contact surface, the contact resistance increases. Increases in temperature or pressure will decrease the contact resistance due to an increase in the actual contact area.
At the beginning of welding, the current density on the contact point is high; once the end face temperature rapidly increases, the contact resistance dramatically decreases. When heated to a certain temperature (600 degrees for steel, 350 degrees for aluminum alloy), the contact resistance disappears entirely.
Like spot welding, the heat source for butt welding also comes from resistance heat generated in the welding area. During resistance butt welding, the contact resistance exists for an extremely short time, and the heat produced accounts for less than 10-15% of the total heat.
However, since this portion of heat is generated in a very narrow area near the contact surface, it will cause a rapid increase in temperature in this area and a rapid increase in internal resistance. Even if the contact resistance completely disappears, the heat intensity in this area is still higher than in other areas.
The harder the welding conditions used (i.e., the larger the current and the shorter the electrification time), and the smaller the workpiece’s compressive force, the more pronounced the impact of contact resistance on heating.
(2) Butt Resistance Welding Cycle, Process Parameters, and Workpiece Preparation
1) Welding Cycle:
During resistance butt welding, two workpieces are always pressed together. When the end face temperature rises to the welding temperature Tω, the distance between the two workpieces end faces is only a few angstroms, and the atoms between the end faces interact with each other, producing common grains at the joint, forming a weld.
There are two types of welding cycles in resistance butt welding: isobaric and increased forging pressure.
The former has a simple pressurizing mechanism and is easy to implement. The latter helps improve welding quality, mainly used for resistance butt welding of alloy steel, non-ferrous metals and their alloys.
To obtain enough plastic deformation and further improve joint quality, an electric current upsetting program should also be set.
2) Process Parameters:
The main process parameters of resistance butt welding are: protrusion length, welding current (or welding current density), welding power-on time, welding pressure and upsetting pressure.
(a) Protrusion length l0:
The length that the workpiece protrudes beyond the clamp electrode end face. When choosing the protrusion length, two factors must be considered: the stability of the workpiece during upsetting and the heat dissipation to the clamp.
If l0 is too long, the workpiece will be unstable and bent during upsetting. If l0 is too short, due to the enhanced heat dissipation to the clamp, the workpiece will cool too much, making plastic deformation difficult. For a workpiece with a diameter of d, generally low carbon steel: l0=(0.5-1)d, aluminum and brass: l0=(1-2)d, copper: l0=(1.5-2.5)d.
(b) Welding current Iω and welding time tω:
During resistance butt welding, the welding current is often expressed in terms of current density jω. jω and tω are the two main parameters that determine the heating of the workpiece. The two can be adjusted accordingly within a certain range. Both large current density and short time (strong conditions), or small current density and long time (weak conditions) can be adopted.
However, if the conditions are too strong, it is easy to produce non-penetration defects; if the conditions are too soft, it will cause serious oxidation of the interface end face, coarse grains in the joint area, and affect the joint strength.
(c) Welding pressure Fω and upsetting pressure Fu:
Fω affects both the heat generation and plastic deformation at the joint. Reducing Fω is beneficial for heat generation but not for plastic deformation.
Therefore, it is easy to heat with a smaller Fω and upset with a much larger Fu. However, Fω cannot be too low, otherwise it will cause spatter, increase end face oxidation, and cause looseness near the interface.
3) Workpiece Preparation:
In resistance butt welding, the end face shape and size of the two workpieces should be the same to ensure consistent heating and plastic deformation of the workpieces. The end face of the workpiece and the surface in contact with the clamp must be strictly cleaned.
Oxides and dirt on the end face will directly affect the quality of the joint. Oxides and dirt on the workpiece surface in contact with the clamp will increase the contact resistance, causing surface burning of the workpiece, increased clamp wear, and increased power loss.
The workpiece can be cleaned using mechanical means such as grinding wheels and wire brushes, or it can be acid washed.
Oxide inclusions are easily produced in resistance welded joints. For rare metals, some alloy steels and non-ferrous metals with high welding quality requirements, protective atmospheres such as argon and helium are often used.
Although resistance butt welding has advantages such as smooth joints, small burrs, and simple welding process, its joint mechanical properties are relatively low, and the preparation of the workpiece end face requires high, so it is only used for butt welding of small cross-section (less than 250mm2) metal profiles.
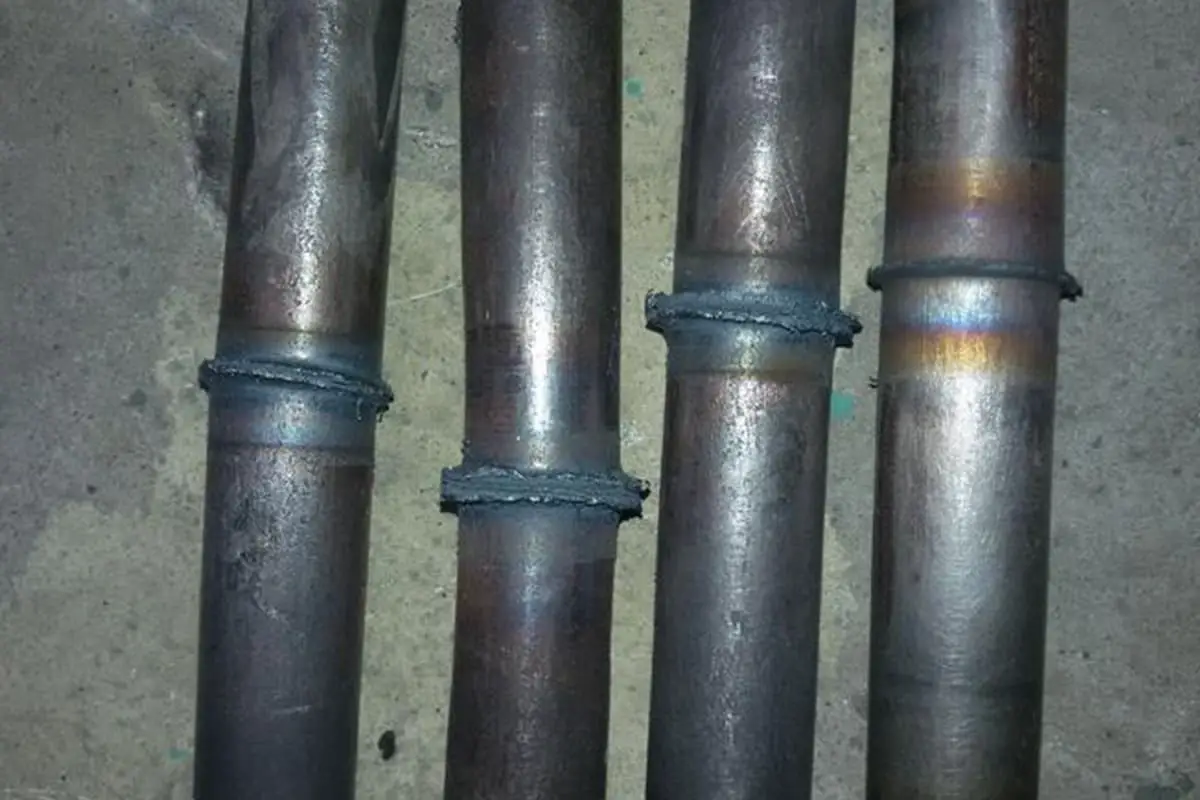
Flash butt welding can be divided into continuous flash butt welding and preheating flash butt welding. Both consist of two main phases: the flashing phase and the forging phase. Preheating flash butt welding just adds a preheating phase before the flashing phase.
1. The Two Stages of Flash Butt Welding
1. Flashing Phase
The primary function of flashing is to heat the workpieces. In this phase, the power supply is first switched on, and the ends of the two workpieces are brought into slight contact, creating numerous contact points. When the current passes through, the contact points melt, forming liquid metal bridges that connect the two ends.
Because of the extremely high current density in these bridges, the liquid metal evaporates and the bridges burst. As the movable clamp slowly advances, new bridges are continuously formed and burst. Under the action of vapor pressure and electromagnetic force, liquid metal particles are continually sprayed out from the gap between the joints, forming a spark jet, or flash.
During the flashing process, the workpieces gradually shorten, and the temperature of the ends also gradually increases. As the end temperature rises, the rate of bridge burst will accelerate, and the advance speed of the movable clamp must also gradually increase.
Before the end of the flashing process, it’s necessary to form a layer of liquid metal across the entire end surface of the workpiece, and to bring the metal to a plastic deformation temperature at a certain depth.
Due to the strong oxidation of the metal vapor and metal particles produced by the burst of the bridge, the oxygen content of the gas medium in the interfacial gap decreases, reducing its oxidation capacity and thus improving the quality of the joint.
However, the flashing must be stable and intense. Stability means that no open circuit or short circuit occurs during the flashing process. An open circuit weakens the self-protection of the welding joint, leading to easy oxidation of the joint. A short circuit can cause the workpiece to be overburned, leading to the scrap of the workpiece.
Intensity refers to a considerable number of bridge bursts per unit time. The more intense the flashing, the better the self-protection of the welding joint, especially in the later stage of flashing.
2. Forging Phase
At the end of the flashing phase, a sufficient end pressure is immediately applied to the workpieces, the gap between the joints quickly decreases, the bridge stops bursting, and the forging phase begins.
The purpose of forging is to seal the gap and the fire hole left by the bridge burst on the end surface of the workpiece, to extrude the liquid metal and oxidized inclusions from the end surface, to make clean plastic metal come into close contact, and to produce certain plastic deformation in the joint area. This promotes recrystallization, forms common grains, and obtains a firm joint.
Although there is melted metal during the heating process of flash butt welding, it is essentially a plastic state welding.
Preheating flash butt welding first heats the workpiece with intermittent current pulses before entering the flashing and forging phases.
The purposes of preheating are as follows:
(a) Reduce power consumption: Larger workpieces can be welded on a smaller capacity welding machine. Without preheating the workpiece to a certain temperature, it is impossible to initiate a continuous flashing process when the capacity of the welding machine is insufficient.
(b) Lower the cooling rate after welding: This is beneficial for preventing quenched steel joints from producing quenched structures and cracks during cooling.
(c) Shorten the flashing time: This can reduce the flashing allowance and save precious metals.
The downsides of preheating are:
(a) It prolongs the welding cycle and reduces productivity.
(b) It makes the automation of the process more complex.
(c) Preheating control is more difficult. If the degree of preheating is inconsistent, it will reduce the stability of the joint quality.
2. Resistance and Heating in Flash Butt Welding
The contact resistance (Rc) during flash butt welding is the total resistance across the liquid metal bridges between the end faces of the two workpieces. The magnitude of Rc is determined by the number and cross-sectional area of these bridges, both of which are influenced by the cross-sectional area of the workpiece, the current density, and the rate at which the workpieces approach each other. As these parameters increase, the number and cross-sectional area of the bridges also increase, thus decreasing Rc.
Flash butt welding has a significantly higher Rc compared to resistance welding, persisting throughout the entire flash phase. Even though its resistance gradually decreases, it remains larger than the internal resistance of the workpiece until the moment forging begins, at which point Rc completely disappears.
Figure 14-5 depicts the typical variations in Rc, 2Rω, and R during flash butt welding. The decrease in Rc is attributed to the increase in the number and size of bridges due to the increasing temperature of the end faces and the growing approach speed of the workpieces during the flash process.
Because Rc is large and lasts throughout the entire flash phase, heating in flash butt welding joints primarily relies on Rc.
3. Welding Cycle, Process Parameters, and Workpiece Preparation for Flash Butt Welding
1. Welding Cycle
The welding cycle of flash butt welding, as shown in Figure 14-7, includes the reset time – the time it takes for the movable clamping jaws to return to their original position after releasing the workpiece. There are two methods of preheating: resistance preheating and flash preheating.
2. Process Parameters
The main parameters of flash butt welding include: protrusion length, flash current, flash volume, flash speed, upset volume, upset speed, upset pressure, upset current, and clamping force of the clamp. Figure 14-8 illustrates the volumes and protrusion lengths in continuous flash butt welding. Below are explanations of how each parameter affects welding quality and the principles for their selection:
(a) Protrusion length (l0)
Like resistance welding, l0 affects the temperature distribution along the workpiece axis and the plastic deformation of the joint. Furthermore, as l0 increases, the impedance of the welding circuit and the required power also increase. For rod materials and thick-walled tubing, l0 is typically (0.7-1.0)d, where d is the diameter of the round rod material or the side length of the square rod material.
For thin sheets (δ=1-4mm) to ensure stability during upsetting, l0 is usually (4-5)δ.
When welding different metals, in order to achieve consistent temperature distribution across both workpieces, the l0 of the metal with lower electrical and thermal conductivity should be smaller. Table 1 provides reference values for l0 when flash butt welding different metals.
(b) Flash current (If) and upset current (Iu)
If is determined by the cross-sectional area of the workpiece and the current density (jf) required for flashing. The magnitude of jf is related to the physical properties of the metal being welded, flash speed, the area and shape of the workpiece cross-section, and the heating condition of the end face. During the flash process, as vf gradually increases and Rc decreases, jf will also increase. During upsetting, as Rc quickly disappears, the current will surge to the upset current (Iu).
Table 1 Protrusion Lengths for Flash Butt Welding of Different Metals
| Types of Metals | Extended Length (mm) | ||
| Left | Right | Left | Right |
| Low-carbon steel | Austenitic Steel | 1.2d | 0.5d |
| Medium-carbon steel | High-Speed Steel | 0.75d | 0.5d |
| Steel | Brass | 1.5d | 1.5d |
| Steel | Copper | 2.5d | 1.0d |
Note: d refers to the diameter of the workpiece (mm).
When welding large cross-section steel parts, to increase the heating depth of the workpiece, a slower flashing speed should be adopted, and the average current density used generally does not exceed 5A/mm2. Table 2 shows the reference values for current density (jf) and electric energy (ju) when flash butt welding workpieces with a cross-sectional area of 200-1000mm2.
Table 2: Reference values for current density (jf) and electric energy (ju) during flash butt welding
| Types of Metals | jf (A/mm2) | jf(A/mm2) | |
| Average Value | Maximum Value | ||
| Low Carbon Steel | 5-15 | 20-30 | 40-60 |
| High Alloy Steel | 10-20 | 25-35 | 35-50 |
| Aluminum Alloy | 15-25 | 40-60 | 70-150 |
| Copper Alloy | 20-30 | 50-80 | 100-200 |
| Titanium Alloy | 4-10 | 15-25 | 20-40 |
The magnitude of the current is determined by the no-load voltage, U20, of the welding transformer. Thus, in actual production, the secondary no-load voltage is typically set. In selecting U20, it’s necessary to consider the impedance of the welding circuit. Higher impedance requires a corresponding increase in U20. When welding large cross-sectional workpieces, a method of adjusting the secondary voltage in stages is sometimes used. Initially, a higher U20 is used to initiate arcing, and then it is reduced to an appropriate value.
(c) Flash Flow Rate δf
Flashing volume, δf, should be chosen so that a layer of molten metal is formed on the entire end face of the workpiece at the end of flashing, while also reaching the plastic deformation temperature at a certain depth. If δf is too small, it can’t meet these requirements, affecting the welding quality. Conversely, if δf is too large, it results in a waste of metal material and reduces productivity. The selection of δf should also consider whether preheating is involved, as preheating flash butt welding can reduce δf by 30-50% compared to continuous flash butt welding.
(d) Flash Speed vf
The flash speed, vf, must be sufficient to ensure the intensity and stability of the flash. However, if vf is too high, it narrows the heating zone, increasing the difficulty of plastic deformation. Moreover, the required welding current increases, deepening the notch depth after beam burst, thereby reducing joint quality. In selecting vf, the following factors should be considered:
1) The composition and properties of the material to be welded. Materials with many easily oxidized elements or good conductivity and thermal conductivity require a larger vf. For example, welding austenitic stainless steel and aluminum alloys requires a higher vf than welding low carbon steel.
2) Whether preheating is involved. Preheating makes it easier to initiate a flash, hence vf can be increased.
3) A strong flash should be present before upsetting. vf should be high to ensure a uniform metal layer on the end face.
(e) Upset Forging Flow Rate δu
The upsetting volume, δu, influences the expulsion of liquid metal and the degree of plastic deformation. If δu is too small, liquid metal remains in the interface, which may cause defects such as looseness, shrinkage, and cracks. If δu is too large, the joint’s impact toughness is reduced due to severe grain boundary bending. δu is selected based on the cross-sectional area of the workpiece, increasing as the cross-sectional area increases.
During upsetting, to prevent interface oxidation, the current isn’t immediately cut off before the end face interfaces are closed. Therefore, the upsetting volume should include two parts – the volume with current and the volume without current, with the former being 0.5-1 times the latter.
(f) Upsetting forging speed vu
The upsetting speed, vu, should be as fast as possible to avoid difficulties in the expulsion of liquid metal and plastic metal deformation at the interface due to metal cooling, as well as to prevent oxidation of the end face metal. The minimum upsetting speed depends on the metal’s properties.
For example, the minimum upsetting speed for welding austenitic steel is twice that of pearlitic steel. Materials with good thermal conductivity, like aluminum alloys, require a high upsetting speed (150-200mm/s). For the same metal, a greater temperature gradient at the interface requires a higher upsetting speed due to faster cooling of the joint.
(g) Upset Forging Pressure Fu
The upsetting pressure, Fu, is typically represented as a pressure per unit area, also known as the upsetting stress. The magnitude of the upsetting stress should be sufficient to expel liquid metal from the interface and generate a certain amount of plastic deformation at the joint. If the upsetting stress is too low, there is insufficient deformation, reducing joint strength. If the upsetting stress is too high, the deformation is excessive, causing severe grain boundary bending and thereby reducing joint impact toughness.
The magnitude of the upsetting stress depends on the metal’s properties, temperature distribution characteristics, upsetting volume and speed, and the shape of the workpiece’s cross-sectional area. Metals with high-temperature strength require a high upsetting stress.
Increasing the temperature gradient also necessitates a higher upsetting stress. Due to the increased temperature gradient caused by a high flash speed, welding metals with good thermal conductivity, such as copper and aluminum alloys, requires a high upsetting stress (150-400Mpa).
(h) Preheating Parameters for Flash Butt Welding:
Apart from the aforementioned process parameters, the preheating temperature and duration should also be considered. The preheating temperature is chosen according to the cross-section and material properties of the workpiece. When welding low-carbon steel, the temperature generally should not exceed 700-900 degrees Celsius.
As the cross-sectional area of the workpiece increases, the preheating temperature should increase correspondingly. Preheating duration is dependent on the power of the welding machine, the size of the workpiece cross-section, and the properties of the metal, and can vary within a broad range. It’s dependent on the required preheating temperature. During the preheating process, the reduction caused by preheating is small and is not established as a process parameter.
(i) The clamping force (Fc) of the clamp must ensure that the workpiece does not slip during forging.
Fc is related to the forging pressure (Fu) and the friction coefficient (f) between the workpiece and the clamp, with the relationship being: Fc≥Fu/2f. Usually, F0= (1.5-4.0)Fu, with compact cross-section low carbon steel at the lower limit and cold-rolled stainless steel plate at the upper limit. When the clamp is equipped with a support device, the clamping force can be greatly reduced, and at this time Fc=0.5Fu is sufficient.
3. Workpiece Preparation:
The preparation of the workpiece for flash butt welding includes: the geometry of the end surface, the machining of the blank end, and surface cleaning. When flash butt welding, the geometric shape and size of the joining faces of the two workpieces should be essentially identical.
Otherwise, it will not be possible to ensure consistent heating and plastic deformation of the two workpieces, thereby affecting the quality of the joint. In production, the difference in the diameter of circular workpieces should not exceed 15%, and that of square and tubular workpieces should not exceed 10%.
When flash butt welding workpieces with a large cross-section, it’s best to chamfer one end of the workpiece to increase current density and facilitate flash initiation. In this case, preheating or increasing the secondary voltage at the beginning of the flash is unnecessary.
The machining of the blank end for butt welding can be performed on shearing machines, punching machines, lathes, or using plasma or flame cutting, followed by end-face cleaning. When flash butt welding, the end metal is burned off during the flash, so the cleaning requirements for the end face are not very strict. However, the cleaning requirements for the contact surface between the clamp and the workpiece should be the same as for resistance butt welding.
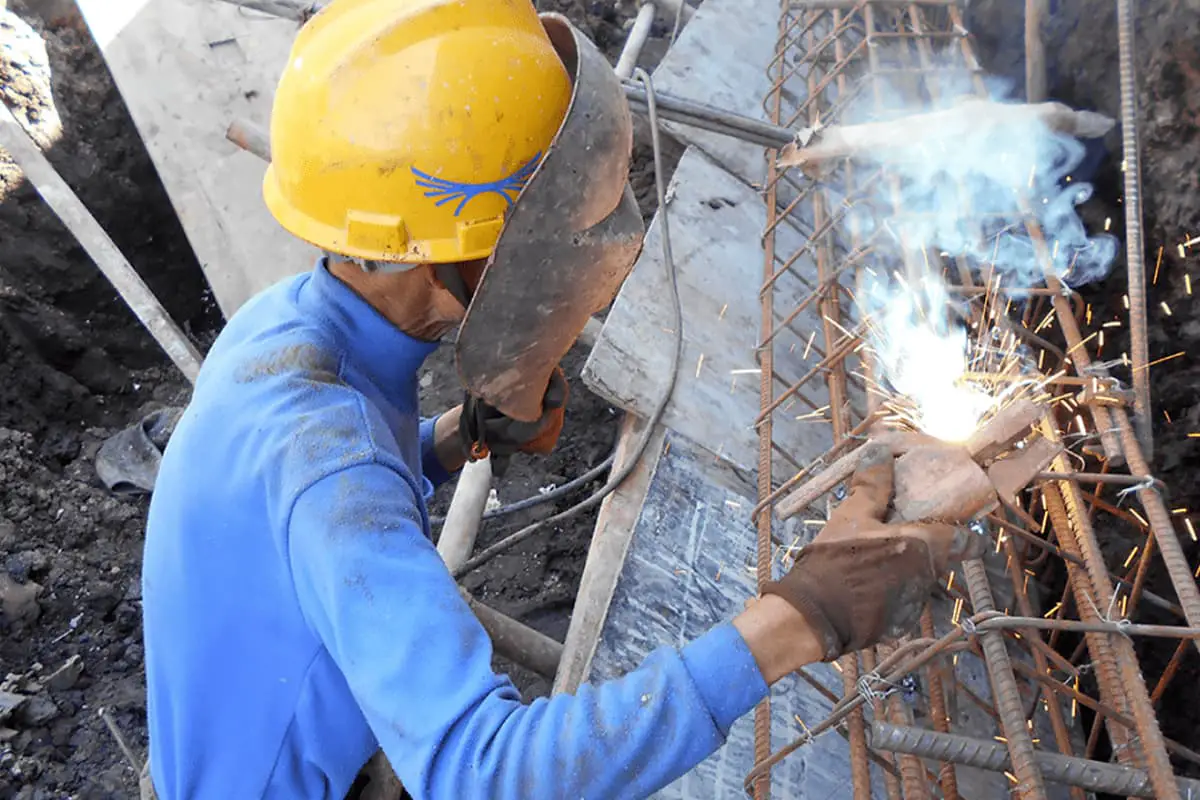
4. Flash Butt Welding of Common Metals:
Almost all steels and non-ferrous metals can be flash butt welded, but to achieve high-quality joints, it’s necessary to take appropriate process measures according to the relevant properties of the metal. The analysis is as follows:
(1) Electrical and Thermal Conductivity:
For metals with good electrical and thermal conductivity, a higher specific power and flash speed, and shorter welding time should be used.
(2) High-Temperature Strength:
For metals with high high-temperature strength, it’s necessary to widen the thermoplastic region and use a larger forging force.
(3) Crystallization Temperature Range:
The wider the crystallization temperature range, the wider the semi-melted zone. A larger forging pressure and forging retention should be used to extrude all the melted metal in the semi-melted zone, to prevent shrinkage holes, looseness, cracks, and other defects from remaining in the joint.
(4) Heat Sensitivity:
There are two common situations. The first is quenched steel, which after welding, is prone to a quenching structure in the joint, causing increased hardness and decreased plasticity. In severe cases, quenching cracks can form.
Quenched steel usually uses wide heating zone preheat flash butt welding, and slow cooling and tempering measures are taken after welding. The second situation involves metals strengthened by cold working (like austenitic stainless steel), where the joint and heat-affected zone soften during welding, reducing the strength of the joint. In welding such metals, a larger flash speed and forging pressure are usually used to minimize the softened zone and mitigate the degree of softening.
(5) Oxidation: Oxide inclusions in joints seriously impair their quality. Therefore, preventing and removing oxidation is crucial to improving joint quality. The formation of oxidation varies with the composition of the metal. If the melting point of the formed oxide is lower than the metal being welded, the oxide possesses good fluidity and is easily squeezed out during forging.
If the melting point of the oxide is higher than the metal being welded, such as SiO2, Al2O3, Cr2O3, they can only be expelled when the metal is still in a molten state. Thus, when welding alloy steels containing significant amounts of silicon, aluminum, chromium, and similar elements, strict process measures should be adopted to completely eliminate oxides.
Here are the characteristics of flash welding commonly used metal materials:
1) Flash Welding of Carbon Steel: These materials have high resistance coefficients, protect the interface by oxidizing carbon elements to provide CO and CO2 atmospheres during heating, and do not contain elements that form high-melting-point oxides.
Thus, they are relatively easy to weld. As the carbon content in steel increases, the resistance coefficient, crystallographic range, high-temperature strength, and hardening tendency also increase.
Therefore, it is necessary to increase the forging pressure and the amount of forging accordingly. To mitigate the effects of hardening, preheating flash welding can be used, followed by post-weld heat treatment.
When flash welding carbon steel, the carbon diffuses towards the heated end face and is strongly oxidized. During forging, the semi-melted zone’s molten metal with a high carbon content is squeezed out, forming a carbon-depleted layer (appearing white, also called a bright strip) at the joint.
The width of the carbon-depleted layer increases with increasing steel content and extended preheating time; it decreases with increased carbon content and a reduction in gas medium oxidation tendency. A prolonged heat treatment can eliminate the carbon-depleted layer.
Carbon steel flash welding is the most commonly used. If welding conditions are chosen correctly, difficulties are generally not encountered. This applies even to cast iron, which is difficult to weld by fusion.
Cast iron typically uses preheated flash welding, as continuous flash welding can easily result in white mouth formation. Due to its high carbon content, a significant amount of CO and CO2 protective atmospheres are produced during flashing, providing strong self-protection.
Even with significant fluctuations in process parameters, only a small amount of oxide inclusions exist in the interface.
2) Flash Welding of Alloy Steel: The influence of alloy element content on steel performance and the process measures that should be taken are as follows:
1) Aluminum, chromium, silicon, and molybdenum in steel easily form high-melting-point oxides; flashing and forging speed should be increased to reduce their oxidation.
2) As the content of alloying elements increases, the high-temperature strength improves, requiring an increase in forging pressure.
3) For pearlitic steels, as alloy elements increase, the tendency for hardening increases, measures should be taken to prevent hardening brittleness.
The table below provides reference values for the process parameters of flash welding for carbon steel and alloy steel.
Reference values for the main parameters of flash welding for various types of steel.
| Category | Average Flash Speed (mm/s) | Maximum flash speed (mm/s) | Forging Speed (mm/s) | Top Forging Pressure (Mpa) | Post-weld heat treatment | ||
| Preheating Flash | Continuous Flash | Preheating Flash | Continuous Flash | ||||
| Low Carbon Steel | 1.5-2.5 | 0.8-1.5 | 4-5 | 15-30 | 40-60 | 60-80 | No quenching required |
| Low Alloy Steel | 1.5-2.5 | 0.8-1.5 | 4-5 | ≥30 | 40-60 | 100-110 | Tempering with slow cooling |
| High Carbon Steel | ≤1.5-2.5 | 0.8-1.5 | 4-5 | 15-30 | 40-60 | 110-120 | Tempering heat |
| Pearlitic High Alloy Steel | 3.5-4.5 | 2.5-3.5 | 5-10 | 30-150 | 60-80 | 110-180 | Normalizing heat |
| Austenitic Steel | 3.5-4.5 | 2.5-3.5 | 5-8 | 50-160 | 100-140 | 150-220 | Generally not required |
The welding characteristics of low-alloy steel are similar to those of medium-carbon steel, showing a hardening tendency, necessitating appropriate heat treatment methods. This type of steel has high high-temperature strength and tends to form oxide inclusions. It requires higher forging pressure and faster flashing and forging speeds.
High carbon alloy steel not only exhibits the characteristics of high carbon steel but also contains a certain amount of alloy elements. Due to its high carbon content and wide crystallization temperature range, the semi-melted zone at the interface is broad.
If the forging pressure is insufficient, or the plastic deformation is not enough, the liquid metal remaining in the semi-melted zone will form a porous structure. Additionally, the presence of alloy elements can lead to high-melting-point oxide inclusions. Therefore, higher flashing and forging speeds, higher forging pressure, and a larger amount of forging are required.
The main alloy elements in austenitic steel are Cr and Ni. This steel has high high-temperature strength, poor electrical and thermal conductivity, a low melting point (compared to low carbon steel), and contains a large number of alloy elements that can easily form high-melting-point oxides (such as Cr).
Thus, it requires significant forging pressure and high flashing and forging speeds. High flashing speed can reduce the heating zone, effectively preventing the rapid growth of grains in the heat-affected zone and a decrease in corrosion resistance.
3. Flash Welding of Aluminum and its Alloys:
These materials have good electrical and thermal conductivity, a low melting point, are easily oxidized with high melting point oxides, and have a narrow plastic temperature range, making welding challenging.
The weldability of aluminum alloy butt welding is poor. If process parameters are not appropriately selected, it is prone to oxide inclusions, porosity, and other defects, leading to a significant reduction in joint strength and plasticity. During flash welding, very high flashing and forging speeds, large forging volume, and forced forging modes must be adopted. The required power factor also needs to be much higher than that for steel.
4. Flash Welding of Copper and its Alloys:
Copper conducts heat better than aluminum and has a higher melting point, making it more difficult to weld than aluminum. During flash welding of pure copper, it is challenging to form a liquid metal layer on the end face, maintain a stable flashing process, and achieve a good plastic temperature range. Therefore, very high final flashing speed, forging speed, and forging pressure are required during welding.
Copper alloys (such as brass, bronze) are easier to weld than pure copper. During the welding of brass, the evaporation of zinc reduces the joint performance. To decrease zinc evaporation, very high final flashing speed, forging speed, and forging pressure should be adopted.
The process parameters for flash welding of aluminum, copper, and their alloys can be referenced in the table below:
Welding conditions for flash welding of non-ferrous metals and their alloys.
| Process Parameters | Material Dimensions (mm) | |||||||||||||||
| Copper | Brass (H62) | Brass (H59) | The thickness of the brass strip (QSn6.5-1.5). | Aluminum rod, diameter | Aluminum Alloy | |||||||||||
| LD5 | LF6 | |||||||||||||||
| Rod material with a diameter of 10 | tube material measuring 9.5 by 1.5 | sheet material measuring 44.5 by 10. | Rod Diameter | Sheet Metal Thickness | Sheet Metal Thickness | |||||||||||
| 6.5 | 10 | 6.5 | 10 | 1-4 | 4-8 | 20 | 25 | 30 | 38 | 4 | 6 | 4-7 | ||||
| No-load Voltage (V) | 6.1 | 5.0 | 10.0 | 2.17 | 4.41 | 2.4 | 7.5 | – | – | – | – | – | – | – | – | – |
| Maximum Current (KA) | 33 | 20 | 60 | 12.5 | 24.3 | 13.5 | 41 | – | – | 58 | 63 | 6 | 6 | 6 | 6 | 6 |
| Extended Length (mm) | 20 | 20 | – | 15 | 22 | 18 | 25 | 25 | 40 | 38 | 43 | 50 | 50 | 50 | 50 | 50 |
| Flash Amount (mm) | 12 | – | – | 6 | 8 | 7 | 10 | 15 | 25 | 17 | 20 | 22 | 22 | 22 | 22 | 22 |
| Flash Duration (s) | 1.5 | – | – | 2.5 | 3.5 | 2.0 | 2.2 | 3 | 10 | 1.7 | 1.9 | 2.8 | 2.8 | 2.8 | 2.8 | 2.8 |
| Average Flash Speed (mm/s) | 8.0 | – | – | 2.4 | 2.3 | 3.5 | 4.5 | 5 | 2.5 | 11.3 | 10.5 | 7.9 | 7.9 | 7.9 | 7.9 | 7.9 |
| Maximum Flash Speed (mm/s) | – | – | – | – | – | – | – | 12 | 6 | – | – | – | – | – | – | – |
| Upset Forging Remainder (mm) | 8 | – | – | 9 | 13 | 10 | 12 | – | – | 13 | 13 | 14 | 14 | 14 | 14 | 14 |
| Upset Forging Speed (mm/s) | 200 | – | – | 200-300 | 200-300 | 200-300 | 200-300 | 125 | 125 | 150 | 150 | 150 | 150 | 150 | 150 | 150 |
| Upset Forging Pressure (Mpa) | 380 | 290 | 224 | – | 230 | – | 250 | – | 60-150 | 64 | 170 | 190 | 190 | 190 | 190 | 190 |
| Current Forging Amount (mm) | 6 | – | – | – | – | – | – | – | – | 6.0 | 6.0 | 7.0 | 7.0 | 7.0 | 7.0 | 7.0 |
| Power Factor (KVA/mm2) | 2.6 | 2.66 | 1.35 | 0.9 | 1.35 | 0.95 | 2.7 | 0.5 | 0.25 | – | – | – | – | – | – | – |
Aluminum and copper flash-welded transition joints are widely used in the motor industry. Due to the significant difference in their melting points, with aluminum melting 4-5 times faster than copper, it is necessary to correspondingly increase the protrusion length of aluminum. The process parameters for aluminum and copper flash welding can be referred to in the following table.
When aluminum and copper are welded, an intermetallic compound, CuAl2, may form, increasing the brittleness of the joint. Therefore, it is essential to expel as much CuAl2 as possible from the interface during forging.
Copper and Aluminum Flash Welding Conditions:
| Welding cross-section(mm2) | ||||
| Rod Diameter | Strip Material | |||
| 20 | 25 | 40*50 | 50*10 | |
| Maximum Current (KA) | 63 | 63 | 58 | 63 |
| Extended Length (mm) for Copper and Aluminum | 334 | 438 | 330 | 436 |
| Burn-off Residue (mm) | 17 | 20 | 18 | 20 |
| Flash Time (s) | 1.511.3 | 1.910.5 | 1.611.3 | 1.910.5 |
| Average Flash Speed (mm/s) | 13 | 13 | 6 | 8 |
| Forging Allowance (mm) | 100-120 | 100-120 | 100-120 | 100-120 |
| Forging Speed (mm/s) | 190 | 270 | 225 | 268 |
5. Flash Welding of Titanium and its Alloys
The main issue with flash welding titanium and its alloys is that quenching and the absorption of gases (such as hydrogen, oxygen, and helium) reduce the plasticity of the joint. The tendency of titanium alloys to quench is related to the added alloy elements. If β-stabilizing elements are added, the tendency to quench increases, and plasticity will be further reduced.
Satisfactory joints can be achieved by using continuous flash welding with intense flashing and without protective gas. When using preheating flash welding with lower flashing and forging speeds, welding should be done in an Ar or He protective atmosphere. The preheating temperature is 1000-1200 degrees, the process parameters are basically the same as when welding steel, except that the flash allowance is slightly increased. At this time, joints with higher plasticity can be obtained.

Wire materials with a diameter of d≤5mm often use resistance welding, and their process parameters can be referred to in the following table:
Wire Material Resistance Welding Conditions:
| Metal Type | Diameter (mm) | Protrusion Length (mm) | Welding Current (A) | Welding Time (s) | Upsetting Pressure (N) |
| Carbon Steel | 0.8 | 3 | 300 | 0.3 | 20 |
| Carbon Steel | 2.0 | 6 | 750 | 1.0 | 80 |
| Carbon Steel | 3.0 | 6 | 1200 | 1.3 | 140 |
| Copper | 2.0 | 7 | 1500 | 0.2 | 100 |
| Aluminum | 2.0 | 5 | 900 | 0.3 | 50 |
| Nickel-Chromium Alloy | 1.85 | 6 | 400 | 0.7 | 80 |
Note: The forging allowance equals the wire diameter, and the current forging allowance equals 0.2-0.3 times the diameter.
Very small diameter wires, wires made of different materials, and wires with stamped parts (such as resistor and diode end caps) can be welded using capacitive energy storage welding.
The feature of this type of welding is that the welding conditions are very rigid and the heating range is extremely narrow, greatly reducing the impact of the thermal physical properties of the welded metal on the formation of the joint.
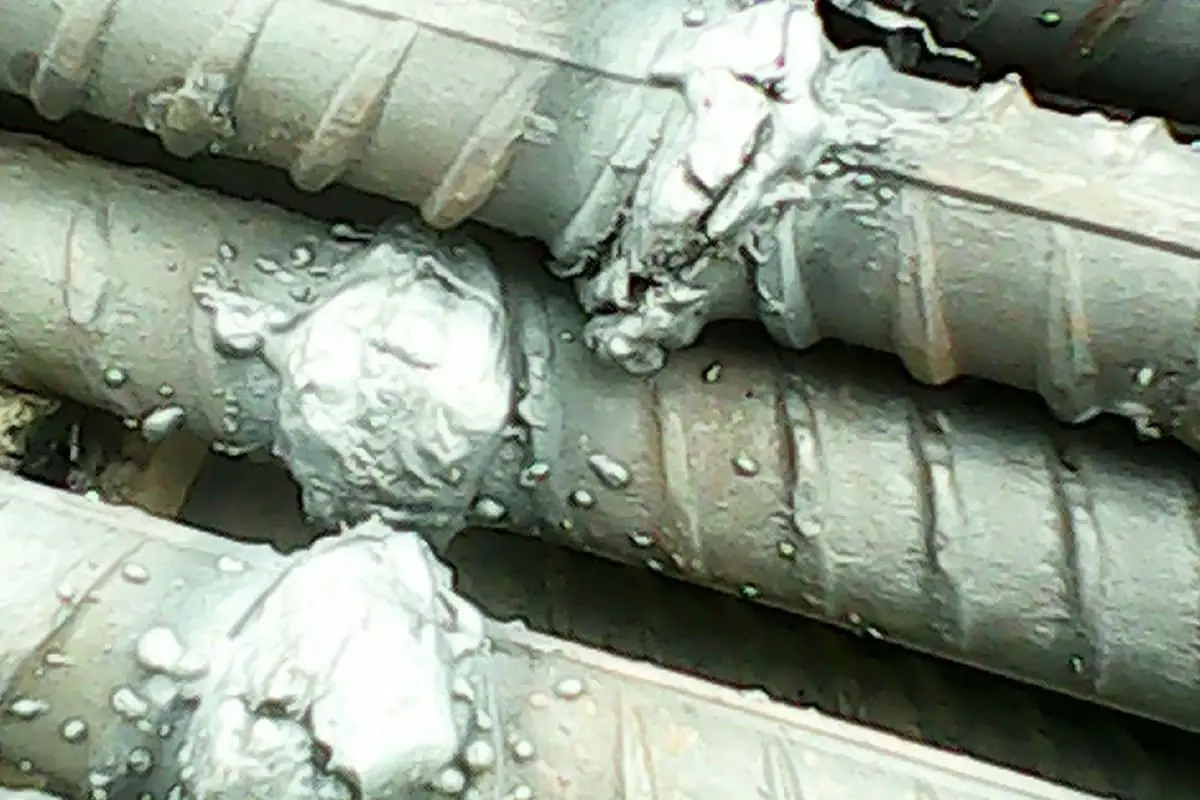
Most commonly used in the construction industry, rebar welding usually uses resistance welding for diameters d<10mm; continuous flash welding for d>10mm; and preheated flash welding for d>30mm. When using a manual welding machine, due to the low power of the welding machine (usually not exceeding 50KVA), preheating flash welding is generally used when d=15-20mm.
During rod welding, semi-circular or V-shaped clamp electrodes can be used, with the latter being used for various diameters, thus widely applied. Rods have a solid cross-section and high rigidity, allowing for longer protrusion lengths. The process parameters of low-carbon steel rod resistance welding and flash welding can be referred to in the following tables:
Low Carbon Steel Rod Resistance Welding Conditions:
| Cross-Sectional Area (mm2) | Protrusion Length (mm2) | Welding Shrinkage Amount (mm) | Current Density (A/mm2) | Welding Time (s) | Welding Pressure (MPa) | |
| Powered On | No Power | |||||
| 25 50 100 250 | 6+6 8+8 10+10 12+12 | 0.5 0.5 0.5 10 | 0.9 0.9 1.0 1.8 | 200 160 140 90 | 0.6 0.8 1.0 1.5 | 10-20 |
1) Increase by 20-30% when welding quenched steel.
2) For quenched steel, increase by 100%.
The timing and flow of flash welding for low carbon steel rods.
| Welding Diameter (mm) | Preheating Flash Butt Welding | Preheating Flash Butt Welding | |||||||
| Reserve Measurement (mm) | Time (s) | Reserve Measurement (mm) | Time (s) | ||||||
| Total Flow Rate | Preheating and Flashing | Upset Forging | Preheating | Flash and Forging | Total Flow Rate | Flash | Upset Forging | ||
| 5 | – | – | – | – | – | 6 | 4.5 | 4.5 | 2 |
| 10 | – | – | – | – | – | 8 | 6 | 6 | 3 |
| 15 | 9 | 6.5 | 2.5 | 3 | 4 | 13 | 10.5 | 10.5 | 6 |
| 20 | 11 | 7.5 | 3.5 | 5 | 6 | 17 | 14 | 14 | 10 |
| 30 | 16 | 12 | 4 | 8 | 7 | 25 | 21.5 | 21.5 | 20 |
| 40 | 20 | 14.5 | 5.5 | 20 | 8 | 40 | 35.5 | 35.5 | 40 |
| 50 | 22 | 15.5 | 6.5 | 30 | 10 | – | – | – | – |
| 70 | 26 | 19 | 7 | 70 | 15 | – | – | – | – |
| 90 | 32 | 24 | 8 | 120 | 20 | – | – | – | – |
Pipe welding is widely used in boiler manufacturing, pipeline engineering, and petroleum equipment manufacturing. Depending on the cross-section and material of the pipe, continuous or preheated flash welding is selected. The clamp electrode can be semi-circular or V-shaped.
Generally, when the ratio of pipe diameter to wall thickness is greater than 10, a semi-circular shape can be chosen to prevent the pipe from being flattened. A V-shape can be chosen when the ratio is less than 10.
To prevent the pipe from slipping in the clamp electrode, the clamp electrode should have an appropriate working length. When the pipe diameter is 20-50mm, the workpiece length is 2-2.5 times the pipe diameter; when the pipe diameter is 200-300mm, it is 1-1.5 times. The process parameters for the continuous flash welding of low-carbon steel and alloy steel pipes can be referred to in the following table:
Welding Conditions of Continuous Flash Welding for 20# Steel, 12Cr1MoV, and 12Cr18Ni12Ti Steel Pipes:
| Steel Type | Size (mm) | Secondary No-load Voltage (V) | Extension Length 2L (mm) | Flash Offset (mm) | Average Flash Speed (mm/s) | Forging Clearance (mm) | Current Forging Amount (mm) |
| 20 | 25×3 32×3 32×4 32×5 60×3 | 6.5-7.0 | 60-70 | 11-12 11-12 15 15 15 | 1.37-1.5 1.22-1.33 1.25 1.0 1.15-1.0 | 3.5 2.5-4.0 4.5-5.0 5.0-5.5 4.0-4.5 | 3.0 3.0 3.5 4.0 3.0 |
| 12Cr1MoV | 324 | 6-6.5 | 60-70 | 17 | 1.0 | 5.0 | 4.0 |
| 12Cr18Ni12Ti | 324 | 6.5-7.0 | 60-70 | 15 | 1.0 | 5.0 | 4.0 |
Large-diameter, thick-walled steel pipes are typically flash welded using a preheating process, with the technical parameters as referenced in the following table:
The welding conditions for flash welding of large cross-section low-carbon steel pipes after preheating.
| Pipe Cross-Section (mm2) | Secondary No-Load Voltage (v) | Extended Length 2L (mm) | Preheating Time (Seconds) | Flash Allowance (mm) | Average Flash Speed (mm/s) | Upset Allowance (mm) | Electrical Upset Amount (mm) | |
| Total Time | Pulse Duration | |||||||
| 4000 | 6.5 | 240 | 60 | 5.0 | 15 | 1.8 | 9 | 6 |
| 10000 | 7.4 | 340 | 240 | 5.5 | 20 | 1.2 | 12 | 8 |
| 16000 | 8.5 | 380 | 420 | 6.0 | 22 | 0.8 | 14 | 10 |
| 20000 | 9.3 | 420 | 540 | 6.0 | 23 | 0.6 | 15 | 12 |
| 32000 | 10.4 | 440 | 720 | 8.0 | 26 | 0.5 | 16 | 12 |
Thin plate butt welding is widely used in continuous production lines for rolling steel plates in the metallurgical industry. The width of the plates ranges from 300 to over 1500mm, and the thickness ranges from less than 1mm to several millimeters. Materials include carbon steel, alloy steel, and non-ferrous metals and their alloys, etc.
After plate butt welding, the joint will undergo rolling and produce a great deal of plastic deformation, so it should not only have a certain strength, but also high plasticity. For steel plates with a thickness of less than 5mm, continuous flash butt welding is generally used with a flat electrode conducting on one side. When the plate is thick, preheated flash butt welding is used with conduction on both sides to ensure uniform heating along the entire end face.
When welding thin plates, the ratio of the length to width of the cross-section is large, the area is dispersed, the joint cools quickly, and the self-protection during the flashing process is weak.
At the same time, the liquid bridge is small, and the layer of liquid metal on the end face is thin, which is prone to oxidation and solidification.
Therefore, it is necessary to increase the speed of flashing and forging. After welding, burrs should be removed while the joint is still hot using a burr cutting device. The process parameters for the flash welding of low carbon steel and stainless steel plates can be referred to in the following two tables:
Flash and Forging Retention of Low Carbon Steel Plate:
| Thickness (mm) | Width (mm) | Allowance(mm) | ||||
| Total Flow | Flash Remainder | Forging Allowance | ||||
| Total Flow | With Power | Without Power | ||||
| 2 | 100 | 9.5 | 7 | 2 | 1 | 1 |
| 400 | 11.05 | 9 | 2.5 | 1.5 | 1 | |
| 1200 | 15 | 11 | 4 | 2 | 2 | |
| 2000 | 17.5 | 15 | 4.5 | 2 | 2.5 | |
| 3 | 100 | 12 | 9 | 3 | 2 | 1 |
| 400 | 15 | 11 | 4 | 2.5 | 2 | |
| 1200 | 16 | 13 | 5 | 2 | 3 | |
| 2000 | 20 | 14 | 6 | 3 | 3 | |
| 4-5 | 100 | 14 | 10 | 4 | 2 | 2 |
| 400 | 17 | 12 | 5 | 2 | 2 | |
| 1200 | 20 | 14 | 6 | 3 | 3 | |
| 2000 | 21 | 15 | 6 | 3 | 3 | |
Flow rate for flash welding of stainless steel plates.
| Thickness (mm) | Final Clamp Distance (mm) | Flash Allowance (mm) | Upset Allowance (mm) | Total Protrusion Length (mm) |
| 1.0 | 3 | 5.5 | 1.5 | 10 |
| 1.5 | 5 | 8 | 2 | 15 |
| 2 | 6 | 10.5 | 2.5 | 19 |
| 2.5 | 7 | 13 | 3.0 | 23 |
| 3 | 9.5 | 15 | 3.5 | 27 |
| 4 | 11 | 15 | 4 | 30 |
| 5 | 15 | 18 | 5 | 38 |
| 6 | 16 | 18 | 6 | 40 |
| 10 | 18 | 20 | 7 | 55 |
| – | – | – | – | – |
When welding ring pieces (such as wheel rims, chain rings, bearing rings, jet engine mounting edges, etc.), in addition to considering the general rules of butt welding, the effects of shunting and deformation springback of the ring pieces should also be noted. Due to the existence of shunting, the power required needs to be increased by 15-50%. Shunting increases with the decrease in ring piece diameter, the increase in cross-section, and the decrease in material resistivity.
When butt welding ring pieces, the selection of forging pressure must consider the impact of deformation rebound. However, since shunting has a heating effect on the ring back, the increase in forging pressure is not large.
Bicycle, motorcycle steel rims, and car wheel rims all use continuous flash butt welding. The front end of the clamp electrode must match the workpiece cross-section. During forging, to prevent the rebound force from affecting the joint quality or even opening the joint, the non-current forging time needs to be extended.
Anchor chains, drive chains, and other chain rings are mostly made of low carbon steel and low alloy steel. When the diameter d < 20mm, resistance butt welding can be used. When d > 20mm, preheating flash butt welding can be used. The purpose of preheating is to ensure uniform heating at the interface and to easily produce a certain plastic deformation during forging.
The process parameters for chain ring butt welding can be referred to in the following two tables:
Flash Butt Welding Conditions for Anchor Chains:
| Anchor Chain Diameter (mm) | Secondary Voltage (V) | Primary Current (A) | Number of preheating interruptions | Welding Power-on Time (s) | Upsetting Speed (mm/s) | Flashing Speed (mm/s) | 留量(mm) | ||||||
| Flash | Short Circuit | Natural Clearance | Constant Speed | Acceleration | With Electrical Component | Without Electrical Component | Total | ||||||
| 28 | 9.27 | 420 | 550 | 2-4 | 19±1 | 45-50 | 0.9-1.1 | 1.5 | 4 | 2 | 1.0-1.5 | 1.5 | 10-11 |
| 31 | 10.3 | 450 | 580 | 3-5 | 22±1.5 | 45-50 | 0.9-1.1 | 2 | 4 | 2 | 1.0-1.5 | 1.5 | 10-11 |
| 34 | 10.3 | 460 | 620 | 3-5 | 24±2 | 45-50 | 0.8-1.0 | 2 | 4 | 2 | 1.5 | 1.5 | 11-12 |
| 37 | 8.85 | 480 | 680 | 4-6 | 28±2 | 30 | 0.8-1.0 | 2.5 | 5 | 2 | 1.5 | 1.5-2 | 12-13 |
| 40 | 10.0 | 500 | 720 | 5-7 | 30±2 | 30 | 0.7-0.9 | 2 | 5 | 2 | 1.5-2 | 2 | 12-13 |
Welding conditions for resistance welding of small diameter chain rings.
| Diameter (mm) | Rated Power of Welding Machine (KVA) | Secondary Voltage (V) | Welding Time (Seconds) | Number of chain links welded per minute. | |
| Power On | Power Off | ||||
| 19.8 | 250 | 4.4-4.55 | 4.5 | 1.0 | 6.4 |
| 16.7 | 250 | 3.4-3.55 | 5.0 | 1.0 | 6.4 |
| 15.0 | 175 | 3.8-4.0 | 3.0 | 1.0 | 6.6 |
| 13.5 | 175 | 3.8-4.0 | 2.5 | 1.0 | 8.8 |
| 12.0 | 175 | 2.8 | 1.5 | 0.8 | 8.6 |
Tool butt welding is currently one of the manufacturing methods used in the tool manufacturing industry for manufacturing blanks, mainly involving the butt welding of high-speed steel (W8Cr4V, W-9Cr4V2) and medium carbon steel. Tool butt welding has the following characteristics:
1) High-speed steel and medium carbon steel have significant differences in thermal conductivity and resistivity. At room temperature, for medium carbon steel, λ=0.42W/(cm℃), ρ0=18-22μΩcm; for high-speed steel, λ=0.23W/(cm℃), ρ0=48Ωcm. To make the temperature distribution on both sides of the joint basically the same, the protrusion length of high-speed steel should be 30-50% smaller than that of medium carbon steel. Generally, the protrusion length of high-speed steel is (0.5-1.0)d. To prevent heat dissipation too quickly, the protrusion length is not less than 10mm.
2) High-speed steel has a high tendency to quench, and the hardness will greatly increase after welding, and quenching cracks may occur. In order to prevent cracks, preheating flash butt welding can be used. During preheating, the metal within a range of 5-10mm near the interface is heated to 1100-1200℃. After welding, annealing is performed by holding at 600-700℃ in an electric furnace for 30 minutes.
3) When high-speed steel is heated to high temperatures, grain enlargement may occur or ledeburite eutectics may form on semi-melted grain boundaries, making the joint brittle. Ledeburite eutectic cannot be eliminated by heat treatment. Therefore, sufficient forging is needed to eliminate this structure. The process parameters for tool butt welding can be referred to in the table below:
Tool Butt Welding Conditions:
| Diameter (mm) | Area (mm2) | Secondary Voltage (V) | Extended Length (mm) | Margin (mm) | |||||||
| Preheating | Flash | Upsetting Forging | Total Flowrate | Tool Steel Reserve | Carbon Steel Reserve | ||||||
| Tool Steel | Carbon Steel | Powered | Unpowered | ||||||||
| 8-10 | 50-80 | 3.8-4 | 10 | 15 | 1 | 2 | 0.5 | 1.5 | 5 | 3 | 2 |
| 11-15 | 80-180 | 3.8-4 | 12 | 20 | 1.5 | 2.5 | 0.5 | 1.5 | 6 | 3.5 | 2.5 |
| 16-20 | 200-315 | 4-4.3 | 15 | 20 | 1.5 | 2.5 | 0.5 | 1.5 | 6 | 3.5 | 2.5 |
| 21-22 | 250-380 | 4-4.3 | 15 | 20 | 1.5 | 2.5 | 0.5 | 1.5 | 6 | 3.5 | 2.5 |
| 23-24 | 415-450 | 4-4.3 | 18 | 27 | 2 | 2.5 | 0.5 | 2 | 7 | 4 | 3 |
| 25-30 | 490-700 | 4.3-4.5 | 18 | 27 | 2 | 2.5 | 0.5 | 2 | 7 | 4 | 3 |
| 31-32 | 750-805 | 4.5-4.8 | 20 | 30 | 2 | 2.5 | 0.5 | 2 | 7 | 4 | 3 |
| 33-35 | 855-960 | 4.8-5.1 | 20 | 30 | 2 | 2.5 | 0.5 | 2 | 7 | 4 | 3 |
| 36-40 | 1000-1260 | 5.1-5.5 | 20 | 30 | 2.5 | 3 | 0.5 | 2 | 8 | 5 | 3 |
| 41-46 | 1320-1660 | 5.5-6.0 | 20 | 30 | 2.5 | 3 | 1.0 | 2.5 | 9 | 5.5 | 3.5 |
| 47-50 | 1730-1965 | 6.0-6.5 | 22 | 33 | 2.5 | 3 | 1.0 | 2.5 | 9 | 5.5 | 3.5 |
| 51-55 | 2000-2375 | 6.5-6.8 | 25 | 40 | 2.5 | 3 | 1.0 | 3.5 | 10 | 6 | 3.5 |
| 55-30 | – | 7.0-8.0 | 25 | 40 | 2.5 | 4 | 1.5 | 4 | 12 | 7 | 5 |
1) Program-controlled Reduced Voltage Flash Butt Welding:
This method is characterized by using a higher secondary open-circuit voltage at the beginning of the flash stage to facilitate initiating the flash. After the temperature of the end surface increases, a lower voltage flash is used while keeping the flash speed constant to improve thermal efficiency.
When nearing the forging stage, the secondary voltage is increased again to intensify the flash and enhance the self-protective effect. Compared with preheating flash butt welding, program-controlled reduced voltage flash butt welding has advantages like shorter welding time, lower power requirement, and more uniform heating.
2) Pulse Flash Butt Welding:
The feature of this method is that during the forward movement of the dynamic clamp, a reciprocating vibration journey is superimposed through a hydraulic vibration device. The amplitude is 0.25-1.2mm, and the frequency is uniformly adjustable between 3-35Hz. The vibration causes the workpiece’s end surfaces to short-circuit and separate alternately, thus generating pulsed flashes.
Compared with ordinary flash butt welding, pulse flash butt welding can more than double the thermal efficiency due to the absence of spontaneous explosion over the beam. The spatter particles are smaller, and the fire mouth is shallow, allowing the forging allowance to be reduced to 2/3-1/2.
The above two methods are primarily designed to meet the needs of large-section workpiece flash butt welding.
3) Rectangular Wave Flash Butt Welding:
Compared with industrial frequency AC sinusoidal wave flash butt welding, this method can significantly improve the stability of the flash. Because when the voltage of the sinusoidal wave power supply is close to zero, it will cause the flash to interrupt instantly, while the rectangular wave can generate flashes uniformly throughout the whole cycle, irrespective of the voltage phase.
The number of flashes per unit time of a rectangular wave power source is 30% higher than that of industrial frequency AC, and the spatter metal particles are fine, with a shallow fire mouth and high thermal efficiency. The rectangular wave frequency can be adjusted within a range of 30-180Hz. This method is often used for continuous flash butt welding of thin plates and aluminum alloy wheel rims.
Butt weld seams include penetrated butt welds and T-shaped joints combined with corner joints (hereinafter referred to as butt welds), as well as partially penetrated butt welds and T-shaped joints combined with corner joints.
Since the force experienced by partially penetrated butt welds is similar to that of corner welds, this will be discussed in the next section.
Butt welds often require the workpieces to be made into a groove, hence they are also called groove welds. The form of the groove is related to the thickness of the workpiece. When the thickness of the workpiece is very small (manual welding 6mm, submerged arc welding 10mm), a straight edge seam can be used.
For workpieces of general thickness, a single-sided V-shaped or V-shaped weld with a sloped groove can be adopted.
The sloped groove and root gap c jointly form a welding space where the welding rod can rotate, making the weld seam easy to penetrate; the blunt edge p plays a role in supporting the molten metal.
For thicker workpieces (t>20mm), U-shaped, K-shaped, and X-shaped grooves are used (Figure 3.2.1). For V-shaped and U-shaped seams, the root of the weld seam needs to be filled.

(a) Straight edge groove
(b) Single-sided V groove
(c) V groove
(d) U groove
(e) K groove
(f) X groove
At the junction of butt welds, when the width of the workpiece varies or the thickness difference exceeds 4mm, a bevel angle no greater than 1:2.5 should be formed on one or both sides in the width or thickness direction (3.2.2). This facilitates smoother cross-sectional transition and reduces stress concentration.
Defects such as arc pits often occur at the start and end of the weld seam, significantly impacting the load-bearing capacity.
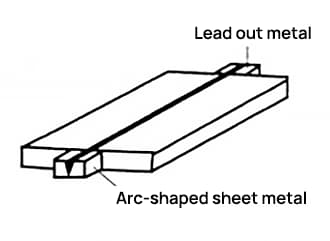
Therefore, it’s common practice to set up an arc strike plate and an arc run-off plate (Figure 3.2.3) during welding, which are removed afterward. When it’s challenging to set up an arc strike (run-off) plate for structures under static loads, it’s permissible not to arrange them.
In this case, the calculated length of the weld seam can be equal to the actual length minus 2t (where t is the thickness of the thinner workpiece).
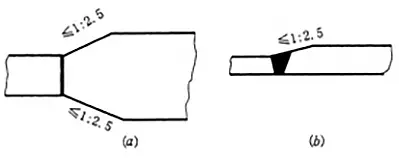
(a) Change the width.
(b) Change the thickness.
The strength of a butt weld joint relates to several factors such as the grade of steel used, the type of welding rod, and the quality inspection standards of the weld seam.
If there are no defects in the weld, the strength of the weld metal exceeds that of the parent metal. However, due to welding technology issues, defects such as porosity, slag inclusion, undercut, and incomplete penetration may be present in the weld.
Experiments have shown that welding defects have little impact on the compressive and shear strength of butt weld joints. Hence, it is assumed that the compressive and shear strength of butt weld joints equals the strength of the parent material.
Yet, tensile butt weld joints are highly sensitive to defects. When the ratio of the defect area to the cross-sectional area of the weldment exceeds 5%, the tensile strength of the butt weld joint will noticeably decrease. Since welds that undergo a third-level inspection are allowed more defects, their tensile strength is 85% of the parent metal strength.
On the other hand, the tensile strength of welds that undergo first or second-level inspections can be considered equal to the strength of the parent material.
As the butt weld joint forms part of the weldment cross-section, the stress distribution in the weld is almost identical to the original weldment. Therefore, the calculation method is the same as that used for the strength calculation of structural components.
(1) Axial Load Butt Welds
In butt joints and T-joints, the strength of the butt welds perpendicular to axial tensile or compressive forces (N) (Figure 3.2.4) should be calculated using the following formula:

In the equation:
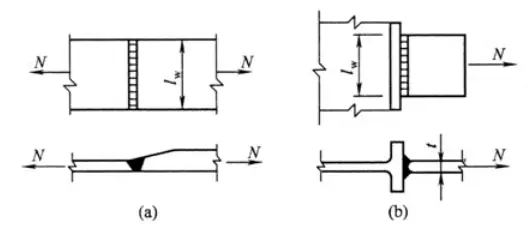
In compliance with construction and acceptance standards, arc striking plates should be applied in all butt welds to prevent arc initiation and termination defects at both ends of the weld seam.
Thus, the calculated length of the weld seam should be equivalent to the actual length. However, in certain special cases, such as T-joints, if it is challenging to apply the striking plate, the calculated length of each weld seam should be reduced by 2t.
Therefore, under general arc striking plate welding conditions, all compressed and sheared butt welds, as well as first and second level tension welds, are equal in strength to the parent metal and do not require calculation. Only the third level tension welds need to be calculated.
If direct weld seams cannot meet the strength requirements, oblique butt welds can be used. The axial tension oblique weld shown in Figure 3.2.5 can be calculated using the following formula:

In the formula, lw represents the calculated length of the weld seam: when the arc plate is added, l = b/sinθ; without the arc plate, lw = b/sinθ – 2t.
Fvw – Design value of shear strength for butt weld seam.

When the inclination angle θ of the oblique weld seam is less than or equal to 56.3°, or in other words, when the tangent of θ is less than or equal to 1.5, it can be considered as strong as the parent material, and no calculations are required.
Oblique butt weld seams were widely used in the 1950s. However, due to the large consumption of materials and inconvenient construction process, they gradually fell out of use and were replaced by straight butt weld seams.
Straight seams are typically welded with a lead arc plate. If the tensile strength does not meet the requirements, a secondary inspection standard can be adopted, or the joint position can be moved to a place with less internal force.
[Example 3-1] Test the strength of the butt weld seam of the steel plate shown in Figure 3.2.6. In the figure, a = 540mm, t = 22mm, and the design value of the axial force is N = 2500kN. The steel is Q235-B, manually welded, with E43 type welding rod, third-level inspection standard of the weld seam, and a lead arc plate is added during welding.

[Solution] The calculated length of the straight seam connection is lw=54cm. The normal stress of the weld seam is:

If not meeting the requirements, use a diagonal butt weld, with a cutting slope of 1.5:1, i.e. 8=56 °, and a weld length of:

Therefore, the normal stress at this moment is:

The shear stress is:

This indicates that when tanθ ≤ 1.5, the weld strength can be guaranteed and there is no need for verification.
(2) Butt Weld Seams Subjected to the Combined Effect of Bending Moment and Shear Force
The butt joint depicted in Figure 3.2.7(a) endures the combined influence of bending moment and shear force.
Given that the weld seam’s cross-section is rectangular, the normal stress and shear stress profiles manifest as triangular and parabolic shapes respectively. Their maximum values should fulfill the following strength conditions.

In the formula:
Figure 3.2.7(b) illustrates a joint of an I-section beam, employing a butt weld. Apart from separately verifying the maximum tensile stress and shear stress, for areas subjected to significant tensile and shear stresses, such as the junction of the web and the flange, the equivalent stress should also be verified using the following equation:

In the formula, σ1 and τ1 represent the normal stress and shear stress at the verification point in the weld seam, respectively.
1.1 – Taking into consideration that the maximum equivalent stress only appears locally, we increase the strength design value appropriately.
(3) Butt Weld Seams Under the Combined Action of Axial Force, Bending Moment, and Shear Force
When axial force is combined with bending moment and shear force, the normal stress caused by axial force and bending moment in the weld seam should be superimposed. The shear stress should still be verified according to test (3.2.5), and the equivalent stress should still be verified according to test (3.2.6).
Aside from considering whether the length of the weld seam is reduced or the strength of the weld seam needs to be discounted, the calculation method for the butt weld seam is completely identical to the strength calculation of the parent material.
