Did you know that the hidden flaws in fastener raw materials can lead to catastrophic failures in critical applications? This article explores the various defects found in fastener materials, such as surface and internal cracks, decarburization, and inclusion defects. These imperfections, if not addressed, can compromise the integrity and performance of fasteners. By understanding these defects, you can ensure higher reliability and safety in your mechanical projects. Dive into the specifics to learn how to identify and mitigate these issues, enhancing the durability and performance of your fasteners.
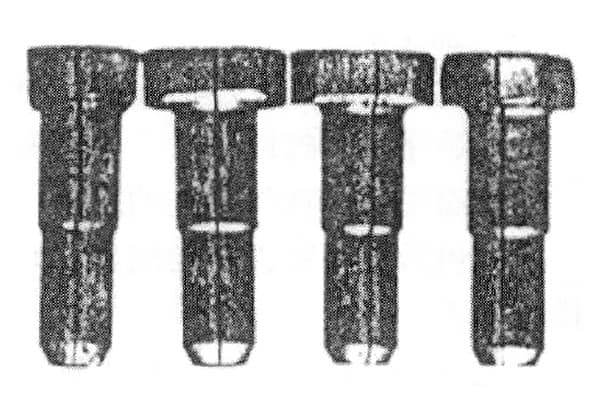
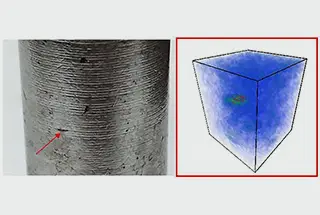
There are cracks present on the surface of raw materials. If these cracks are not removed during fastener processing or if they are allowed to expand during the forming process, they can result in cracks on the surface of fasteners. This is demonstrated in the figure below:

Due to the improper rolling process of the steel mill, the fastener raw material bar exhibits longitudinal cracks extending along the rolling direction on its surface. These cracks are generally linear and consistent with the main deformation direction of rolling.
There are multiple reasons for the occurrence of longitudinal cracks in raw materials. For example, scratch type defects on the surface of rolled billets can cause cracks along the scratches during cooling due to stress concentration. Similarly, internal defects of raw materials may deform along the streamline direction of rolling and surface on bars, eventually cracking under stress.
The figure below displays the morphology of longitudinal cracks on the surface of a superalloy bar’s raw material.
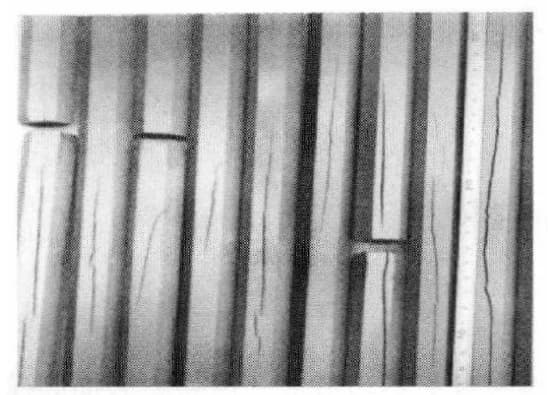
Fasteners are made from bars as raw material. However, due to incorrect head cutting processes in the steel plant or improper extrusion process parameters, the surface of the bar’s head may have transverse cracks. The figure below illustrates the transverse equilines present on the surface of the superalloy bar’s raw material.
It is important to note that transverse surface cracks are more harmful than longitudinal cracks.

Internal cracks in raw materials are a common defect. Typically, these cracks have a zigzag pattern with a thin tail and local bifurcations.
If there is decarburization on both sides of the crack, along with an oxide layer inside the crack, it indicates that the crack existed before the heat treatment process.
The figure below displays the metallographic appearance of the transverse and longitudinal sections of the internal crack in the bolt raw material.
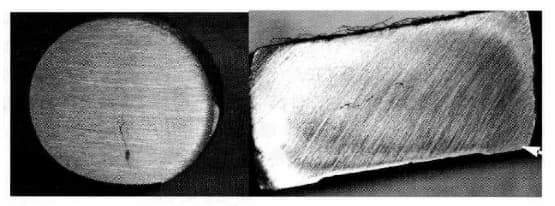
Internal cracks are often associated with material defects, including looseness and inclusions. This is particularly true during the extrusion of bars, where the deformation of the centerline is theoretically zero.
In this process, any pre-existing defects within the material become deformed unevenly due to the greater extrusion stress on the outer surface compared to the center, resulting in additional cracking.
Improper production processes at steel plants can lead to folding or even cracks on the surface of alloy bars used for fasteners.
Inaccurate sizing of grooves on rolls or burrs generated on the wear surface of grooves during the rolling process of metal billets are the main causes of folding in fasteners. This results in folding at a specific angle with the material surface.
The figure below displays folding cracks on the surface of raw materials for nuclear fasteners.

The decarburization present on the surface of raw materials is primarily caused by improper annealing during drawing in the steel plant. This layer of decarburization is distributed on the surface of fastener materials, while no decarburization is found on the machined end faces at either end.
During usage, decarburization can significantly reduce the overall strength of fasteners. Moreover, the decarburized layer on the surface has low strength, making it susceptible to surface cracks and early fracture failure of fasteners. This reduction in thread strength is particularly pronounced in threads, which increases the likelihood of tooth loss, tripping, and other failures.
The decarburization structure present on the screw surface is depicted in the figure below.

A common defect that occurs on extruded bars made of aluminum alloy, magnesium alloy, and steel is the appearance of coarse crystal rings on the surface of the raw materials. The thickness of these rings typically increases gradually from the start to the end of the extrusion process.
However, the existence of coarse crystal rings can be reduced or even avoided after heat treatment if lubrication conditions during extrusion are good.
When coarse crystal rings occur on the surface of fasteners as a result of the raw material, it can significantly reduce the performance of the fastener. This is especially true on the interface between the coarse and fine crystal rings, which have differing strengths, leading to incompatible deformation and cracks.
The image below shows an example of the coarse crystal ring on the surface of a bolt rod. As can be seen, the interface between the coarse crystal ring and the normal tissue area is apparent, and this interface is highly susceptible to cracking.

If coarse grains are present on the surface of raw materials, cold extrusion or pier forming can result in poor surface roughness of fasteners, exhibiting orange peel characteristics in severe cases. This is particularly evident in fasteners made of low-strength materials such as aluminum or magnesium alloys.
Orange peel refers to a network of micro-cracks on the surface along the grain boundary, which can expand and become macro-cracks during use.
Improper cold drawing deformation of raw materials is the main cause of the formation of coarse crystal rings. For instance, in the case of high-temperature alloy cold-drawn bars, if the deformation of the last cold drawing before the finished product is not correctly controlled, the material surface may fall into the critical deformation zone, causing grains in the area to grow and form coarse crystal rings after solution heat treatment.
The residual shrinkage cavity in raw materials is primarily caused by the incomplete removal of the ingot cap by the steel mill. This cap remains in the raw materials during opening and rolling.
In areas where residual shrinkage cavities are dense, other defects such as inclusions, porosity, and segregation tend to occur.
Raw materials with residual shrinkage cavities, after deformation or processing of fasteners, will result in the appearance of through holes and irregular internal cracks in the center of the fasteners.
Crack propagation easily causes the failure of fasteners. TB3 titanium alloy screws have broken multiple times during assembly.
Analysis reveals that the screw fracture is caused by the incomplete removal of the residual shrinkage cavity in the raw material, which was not welded during the forging process.
Due to repeated forging deformation, the defect cracks along the original β grain boundary. When the screw is subjected to axial assembly stress, the fracture occurs.
The fracture morphology of the broken screw is shown in figure (a) below, and the shrinkage cavity in the center is clearly visible.
The free surface characteristics of the enlarged shrinkage cavity surface are shown in figure (b) below.

Impurity elements in raw materials primarily stem from various sources, including the materials used in the smelting process, pollutants in the atmosphere, and the furnace wall or crucible materials during smelting. Additionally, impurities can arise from alloy ingots or master alloys and during the casting process of parts.
During the forming process, if inclusions cluster or align in a chain along the deformation direction, they can easily cause fasteners to crack during processing and use.
The figure below depicts a longitudinal crack in a GH2036 superalloy nut due to inclusions after processing.
Upon observing the crack fracture, numerous inclusion particles were found on the fracture, as illustrated in the figure below.

