Ever wondered why your CNC machined parts aren’t turning out perfect? This article explores nine common CNC machining errors, from tool wear to thermal deformation, and offers practical tips to avoid them. By understanding these errors, you’ll improve your machining accuracy and save both time and resources. Dive in to discover how small adjustments can lead to flawless parts every time.
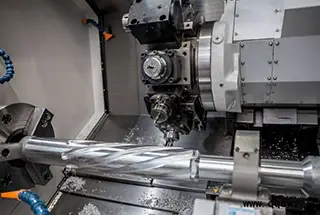
Machining error refers to the deviation between the actual geometric parameters (dimensions, shape, and mutual position) and the ideal geometric parameters. Machining accuracy is determined by the degree of conformity between the actual and ideal geometric parameters.
The smaller the machining error, the higher the degree of conformity and machining accuracy. Both machining error and machining accuracy are used to measure the same issue. Hence, the size of the machining error indicates the level of machining accuracy.

The main manufacturing errors in machine tools include errors in the spindle rotation, guide rail, and transmission chain.
The spindle rotation error refers to the deviation of the actual spindle axis at any given moment from its average axis, which directly affects the accuracy of the processed workpiece.
The causes of spindle rotation error include errors in the coaxiality of the spindle, bearing errors, coaxiality errors between bearings, and spindle winding.
The guide rail serves as a reference for determining the relative positions of machine tool components and also guides machine tool movement. Guide rail error can be caused by manufacturing errors in the guide rail, uneven wear, and poor installation quality.
The transmission chain error refers to the relative motion errors between the transmission elements at both ends of the chain and is caused by manufacturing and assembly errors in each link and wear during use.
In any cutting process, wear on the tool will result in changes to the size and shape of the workpiece. The impact of tool geometric errors on machining errors varies depending on the type of tool. With fixed-size tools, the manufacturing errors will directly affect the machining accuracy of the workpiece. On the other hand, for general tools (such as turning tools), the manufacturing errors do not have a direct impact on machining errors.
The purpose of a fixture is to ensure that the workpiece is correctly positioned relative to the cutter and machine tool. As a result, the geometric errors in the fixture have a significant impact on the machining errors, particularly on positional errors.
The positioning error primarily consists of inaccuracies in the reference datum and manufacturing inaccuracies in the positioning pair.
When machining the workpiece on the machine tool, certain geometric elements on the workpiece must be selected as the reference datum. If the chosen reference datum does not align with the design datum (the datum used to determine the size and position of a specific surface in the part drawing), a datum non-coincidence error will occur.
The positioning surface of the workpiece and the positioning elements of the fixture form the positioning pair. The maximum positional variation of the workpiece caused by inaccuracies in manufacturing the positioning pair and the fit gap between the positioning pairs is known as the manufacturing inaccuracies of the positioning pair.
The inaccuracies in the positioning pair can only occur when the adjustment method is used, not in the trial cutting method.
Workpiece stiffness
In a processing system, if the workpiece has lower stiffness compared to the machine tool, tool, and fixture, then under the influence of cutting forces, the deformation due to the insufficient stiffness of the workpiece will have a significant impact on machining errors.
Tool stiffness
The rigidity of a cylindrical turning tool in the normal (y) direction of the machined surface is very high, and its deformation can be disregarded. However, when boring an inner hole with a smaller diameter, the cutter bar has poor rigidity and the force-induced deformation of the cutter bar greatly affects the machining accuracy of the hole.
Stiffness of machine tool components
Machine tool parts are comprised of many components, and currently, there is no simple calculation method available for determining their stiffness. The stiffness of machine tool parts is primarily evaluated through experimentation. Factors that affect the stiffness of machine tool parts include deformation of joint surfaces during contact, friction force, low stiffness components, and clearance.
Thermal deformation in the processing system has a significant impact on machining errors, particularly in precision machining and machining of large workpieces. In some cases, the machining errors caused by thermal deformation can account for up to 50% of the total error in the workpiece.
In every machining process, the processing system must be adjusted in some way. However, since the adjustment cannot be perfectly accurate, there will be adjustment errors. The mutual positional accuracy of the workpiece and cutter on the machine tool is ensured through adjustments to the machine tool, cutter, fixture, or workpiece.
When the original accuracy of the machine tool, cutter, fixture, and workpiece blank meet the process requirements without taking dynamic factors into account, the adjustment error becomes the primary factor in determining the machining error.
When measuring parts during or after machining, the accuracy of the measurement is directly impacted by the measurement method, the accuracy of the measuring instrument, the workpiece, and both subjective and objective factors.
Stress that exists within a part without any external force is known as internal stress. Once internal stress is generated in a workpiece, the metal is in a state of high energy potential and instability. To reach a state of lower energy and stability, the metal undergoes deformation, causing the loss of the workpiece’s original machining accuracy.
