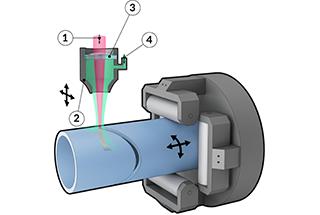
Ever wondered how to perfect the focus of your laser cutting machine for precision and efficiency? This article explores three methods to accurately adjust the focus: NC point locating, bevel focus cautery, and direct cauterization. By understanding and applying these techniques, you can achieve cleaner cuts and enhance your machine’s performance. Dive in to learn the step-by-step processes and practical tips that will transform your laser cutting results.
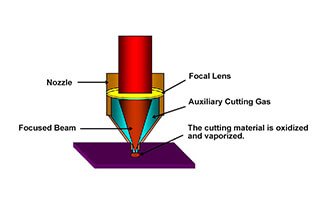
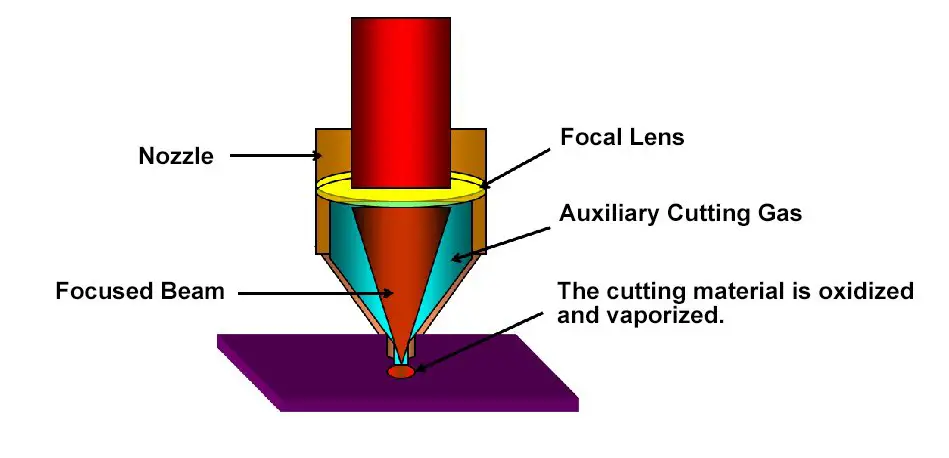
To determine the laser focus position, place a flat, smooth piece of white cardboard on the workbench and position the laser cutting head above it.
Initially, set the height of the focusing lens approximately 10mm closer to the cardboard than the lens’s focal length. For instance, with a 127mm focal length lens, position it about 117mm from the cardboard surface.
Program the CNC system to execute a series of movements:
At each position, pulse the laser to create 20 perforations. This process results in a total Z-axis height increase of 20mm over the entire sequence.
Examine the resulting pattern of perforations. You’ll observe that the hole diameters progressively change, initially decreasing in size, reaching a minimum, then increasing again.
Identify the position where the aperture diameter is at its smallest and record this point precisely. The distance from the cardboard surface to the lens at this position represents the actual laser beam focus – the optimal focal length for your specific setup.
This empirical method accounts for any slight variations in the stated focal length of the lens and ensures the most accurate focus for your laser cutting operations, optimizing cut quality and efficiency.
The focal point calibration method for laser cutting is as follows:
Position a straight, flat wooden board diagonally on the workbench at a precise 10-degree incline. This angle ensures a gradual height change for accurate focus determination.
Initialize the cutting head at Point A, setting the standoff distance (from the focusing lens to the workpiece surface) 20mm less than the focal length of the lens. This offset allows for a comprehensive scan through the focal range.
Program the CNC system to move the cutting head continuously along either the X-axis or Y-axis for a distance of 230mm. This travel ensures capturing the full focal range variation.
Synchronize laser output with head movement: activate a 200W continuous wave laser as motion begins and terminate emission when the cutting head stops. This power level is sufficient for visible marking without excessive material damage.
Observe the resulting laser beam burn trace on the wooden surface. The pattern will transition from wide to narrow and back to wide, forming a characteristic hourglass shape.
Identify and mark the narrowest point of the trace. This represents the optimal focal position where the laser energy density is highest.
Measure the distance from the focusing lens to the wooden board at this narrowest point. This measurement indicates the actual focal length of the laser system under operating conditions.
For enhanced precision, consider repeating this process multiple times and averaging the results. Additionally, implement this calibration procedure periodically or after any significant system changes to maintain optimal cutting performance.
To determine the laser beam focus position, position a flat, untreated wooden board at an 85-degree angle on the cutting table. Adjust the cutting head height so that the focal length of the focusing lens is approximately 1.5 times the distance from the table surface.
Activate the laser shutter and emit a continuous 200W laser beam. Gradually move the wooden board horizontally beneath the focusing lens, maintaining a constant speed.
The laser beam will create a burn pattern on the wooden surface, transitioning from wide to narrow and back to wide as it passes through the focal point. This trace accurately represents the laser beam’s focusing profile.
Identify the narrowest point of the burn pattern, which corresponds to the focal position. Measure and record the distance between this point and the focusing lens to determine the actual focal length of the laser beam.
For optimal results, use a hardwood board with consistent grain structure, such as maple or oak. The board’s moisture content should be below 10% to ensure consistent burning characteristics.
Implement proper safety protocols during this procedure:
Note that while this manual method is effective for basic focal length determination, more precise results can be achieved using automated beam profiling systems or knife-edge measurement techniques for critical applications.

