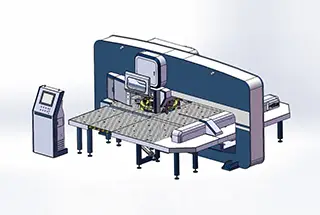
Ever wondered why your turret punch dies wear out so quickly? This article dives into common problems and their solutions, such as die clearance, material sticking, and spring fatigue. By following these guidelines, you’ll enhance processing quality, extend the service life of your dies, and reduce equipment costs. Discover how proper maintenance and usage techniques can keep your punching operations running smoothly and efficiently.

The level of technology and maintenance of molds are crucial factors in enhancing the processing quality, prolonging the mold’s service life, and controlling equipment operation costs.
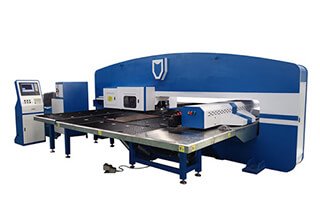
This post focuses on the common issues encountered while using NC turret punch dies and provides corresponding technical points and precautions for die maintenance.

Mold with material will cause waste rebound, and the influencing factors are:
(1) The sharpness of the die edge is crucial. The larger the fillet of the edge, the easier it is to cause waste rebound.
(2) A small mold entry modulus is more likely to cause waste rebound.
(3) Check if the clearance of the mold is reasonable.
(4) Ensure there is not much oil on the surface of the processed plate.
(5) Consider fatigue damage of the die spring.
(6) Ensure proper lubrication to prevent waste rebound.
During the use of a die, the amount of wear on each side of the die punch core can vary. Certain areas may have large scratches and experience faster wear and tear, while other parts may wear more slowly. This is particularly noticeable in thin and narrow rectangular dies.
The main reasons for this problem are as follows:
(1) The turret design or machining accuracy of the machine tool cannot meet the requirements, especially the alignment of the die mounting base of the upper and lower turntables is not good.
(2) The design or machining accuracy of the mold cannot meet the requirements.
(3) The accuracy of the guide sleeve of the die punch does not meet the required standards.
(4) The die clearance is either too large or too small.
(5) Due to long-term use and wear, the mold mounting base or mold guide sleeve may not be well-aligned.
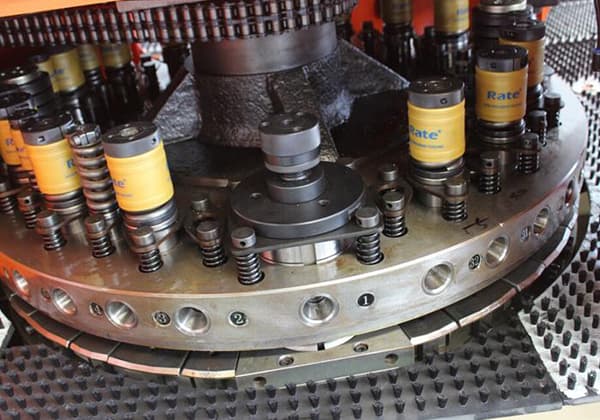
The die spring of CNC turret punch is often overlooked during usage and maintenance.
Different punch equipment and dies require specific spring specifications. Springs have different performance and service life, therefore they need to be regularly maintained or replaced.
Ignoring this maintenance can lead to material getting stuck in the mold or causing significant damage such as to the mold and guide sleeve.
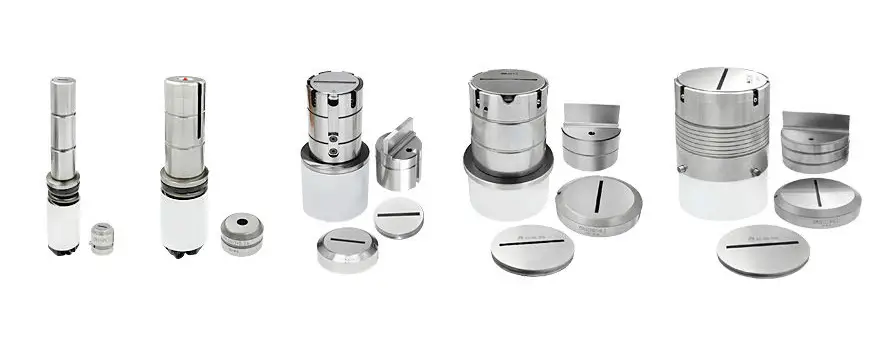
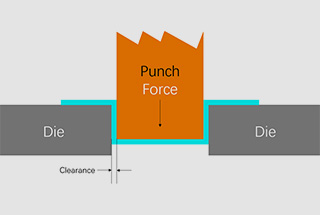
Die clearance refers to the sum of the clearance on both sides when the punch enters the lower die.
The choice of die clearance depends on the plate thickness, material, and stamping process. A corresponding die clearance should be selected for each different plate thickness or material.
If the clearance is too small or too large, it can damage the die and affect the punching quality.
Properly selecting the die clearance can ensure good punching quality, reduce burrs and collapses, keep the sheet flat, effectively prevent material carrying, and prolong the service life of the die.
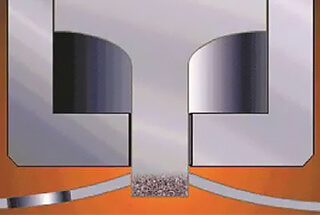
The die clearance is mainly determined by checking the stamping waste.
If the waste has a rough, undulating fracture surface and a small bright surface, it indicates that the gap is too large.
The angle between the fracture surface and the bright surface is directly proportional to the gap.
The larger the gap, the more curling and fracture will occur during punching, and even a thin edge protrusion may appear.
During the stamping process, the pressure and heat generated can cause the fine particles of the sheet to bond to the surface of the punch, which can affect the quality of the punch.
To prevent overheating and reduce friction, lubrication is commonly used.
If lubrication is not possible or waste rebound occurs, the method of stamping with punches of the same size can be adopted alternatively. This allows each punch to have sufficient cooling time before use.
To remove any sticking material on the punch, a fine oilstone can be used for grinding. It is important to maintain a consistent grinding direction with the movement of the punch. Avoid using coarse abrasive cloth as it can make the punch surface rough and cause it to stick again.
When a plate is punched with numerous holes, it can lead to deformation of the plate. This is caused by the accumulation of punching shear stress during each punching action, resulting in the material around the hole deforming downwards. This creates tensile stress on the upper surface and compressive stress on the lower surface.
Punching a few holes doesn’t significantly impact the plate’s quality. However, when numerous holes are punched, the tensile and compressive stress on the upper and lower surfaces accumulate at a certain point, leading to material irregularity and deformation.
To prevent this deformation, the punching sequence of the holes needs to be changed. Punching every other hole and then returning to punch the remaining holes can effectively reduce the stress accumulation during sequential stamping in the same direction.
Although this punching method also produces stress, it offsets the stress of the front and rear groups of holes, preventing deformation of the sheet.
When using a die to cut a plate that has a width less than its thickness, the punch will bend and deform due to lateral force. On the other side, the wear will worsen due to the small gap. In severe cases, the lower die will get scratched or both the upper and lower dies will get damaged.
Additionally, when cutting a strip that is too narrow, the sheet will not get completely cut off but will tend to bend into the opening of the lower die or even get wedged into the side of the die.
To prevent this type of die wear, it is advisable to avoid narrow strips with a step width that is too small, particularly those that are less than 2.5 times the thickness of the sheet.
If narrow blanking cannot be avoided, it is recommended to use a return plate or a fully guided die.
The surface hardening of a punch typically involves techniques such as titanium plating and nitriding. The resulting hardening layer is not just a surface coating but also a part of the punch matrix with a molecular structure that ranges in thickness from 12 to 60μm.
By subjecting the punch to surface hardening, the wear and tear on the die can be reduced when working with special materials like stainless steel plates. However, it should be noted that the surface hardening of the die does not extend its service life. Maintenance methods for surface-hardened punches remain conventional, such as proper lubrication, timely grinding, and operation according to regulations.
Despite being hardened, the punch can still be sharpened using the usual techniques.
Case hardened punches may be used in the following cases:
(1) The molds should be regularly cleaned and lubricated, and inspected for dirt before installation and use. Lubricating oil or stamping oil should be applied to the sliding parts and cutting edges of the die at regular intervals during production. After production, the mold should be thoroughly inspected and cleaned. Following cleaning, apply anti-rust lubricating oil, seal the mold, and store it to maintain its cleanliness for future use.
(2) When installing male and female dies on the rotary table, they must be installed in strict accordance with the installation process to ensure that the installation direction of the male and female dies is consistent. Dies with specific installation direction requirements must be installed with caution to avoid accidents due to installation errors.
(3) Soft metals such as aluminum or copper should be used as the operating tool when installing the mold. Using an operating tool with excessive hardness can cause damage to the mold during the installation process, resulting from knocking, smashing, or other actions.
During transportation, the mold should be handled with care to avoid damage to the cutting edge and guide. When replacing the mold and grinding, safety should be a priority before and after starting the equipment to prevent damage to the equipment, mold, and personnel.
(1) Timely grinding:
The amount of edge grinding on a punch die is limited, and when the edge is worn, it should be ground promptly. Continuing to use a worn edge will accelerate wear, reduce punching quality, and shorten the die’s service life.
Practice has proven that it is crucial to determine the appropriate grinding time and not wait until it is necessary to grind. Regular micro-grinding can reduce blanking force, ensure good workpiece quality, and double the die’s service life. Furthermore, mastering the correct grinding method can also help improve the die’s service life.
To prevent the mold from cracking or annealing due to overheating, it is essential to add the high-quality coolant required by the manufacturer during grinding.
After grinding, it is necessary to remove the edge burrs with an oilstone and grind the edge into a flat fillet with a radius of 0.03~0.05mm to prevent cracking. Additionally, the cutting edge surface cannot be magnetic, and demagnetization must be performed to prevent material blockage. Finally, demagnetize the punch and spray lubricating oil to prevent rust.
(2) Timely replace the spring:
During the mold maintenance process, it is common for the spring and other elastic components to be overlooked, even though springs are prone to damage such as fractures and deformations.
It is crucial to replace any damaged springs promptly with ones that match the same specifications and model. Failing to do so may lead to issues with mold functionality or even damage the mold due to mismatched parts.
(3) Check whether the fasteners are loose or whether the parts are damaged at any time.
Regularly check the condition of the accessories of the mold installation base and other parts to avoid any damage. Any looseness or displacement must be promptly detected and fixed to prevent any accidents that may damage the mold or cause other problems.

