How can you ensure a right-angle precision in your manufacturing process? This article delves into various methods for inspecting perpendicularity between surfaces and lines. By mastering these techniques, you’ll enhance the accuracy and quality of your products, avoiding costly errors. Explore straightforward yet effective inspection methods that can transform your approach to precision measurement.
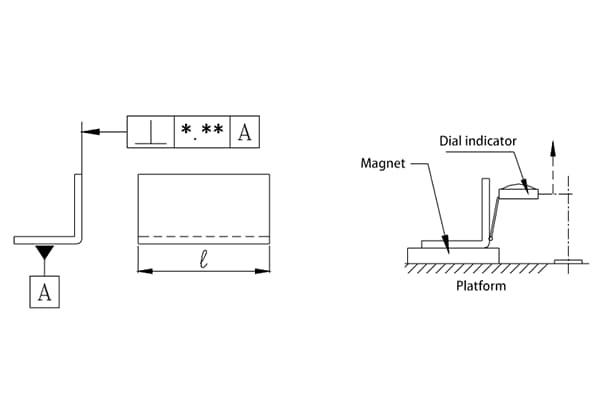
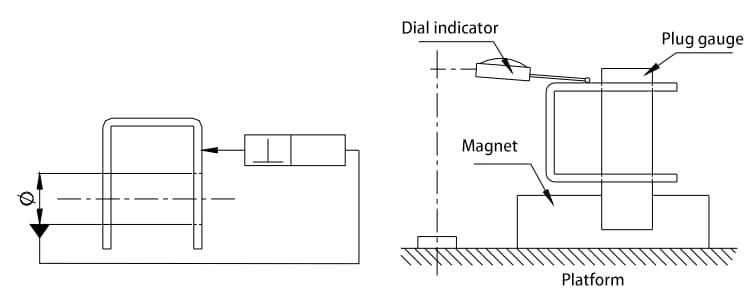
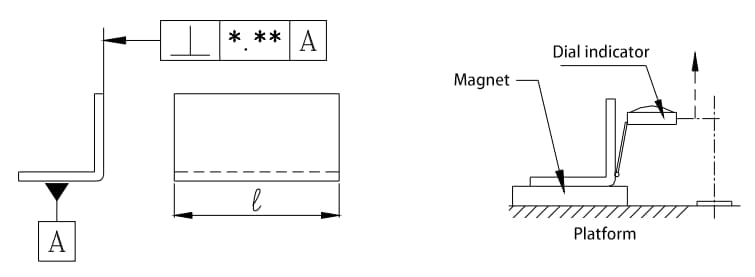
(1) Support the benchmark surface parallel to the platform with a magnet.
(2) Move the dial gauge from the curved root to the front end to obtain the maximum difference in readings as the perpendicularity value.
Note: The measurement is taken across the entire length.
(1) Support the object to be measured on the platform using a magnet as shown in the diagram.
(2) Touch the dial gauge on the object to be measured, zero it at point B, and confirm it at point C.
(3) Move the dial gauge up and down across the entire range of indication while touching it on the object being measured.
(4) Repeat the measurement at 0° and 90°.
(5) Calculate the maximum difference between each reading using the following formula.
The resulting value is the perpendicularity value (maximum difference in reading at 0° → X; maximum difference in reading at 90° → Y):

(1) Insert suitable plug gauges into two reference holes and support them at right angles to the platform using a magnet.
(2) Measure all points on the measuring surface with a dial gauge (or height gauge), and take the maximum difference in readings as the perpendicularity value.
