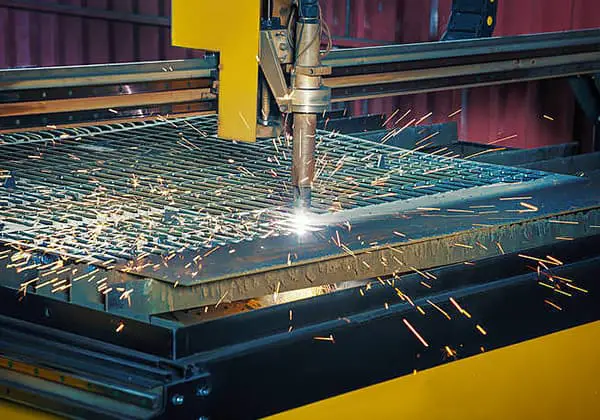
Have you ever struggled with a plasma cutter that just won’t strike an arc? As an experienced mechanical engineer, I’ll share insider tips to troubleshoot this frustrating issue. From voltage instability to air pressure problems, we’ll dive into the common culprits behind arc failure and provide practical solutions to get your plasma cutter back in action. Get ready to master the art of plasma cutting and achieve flawless results every time!
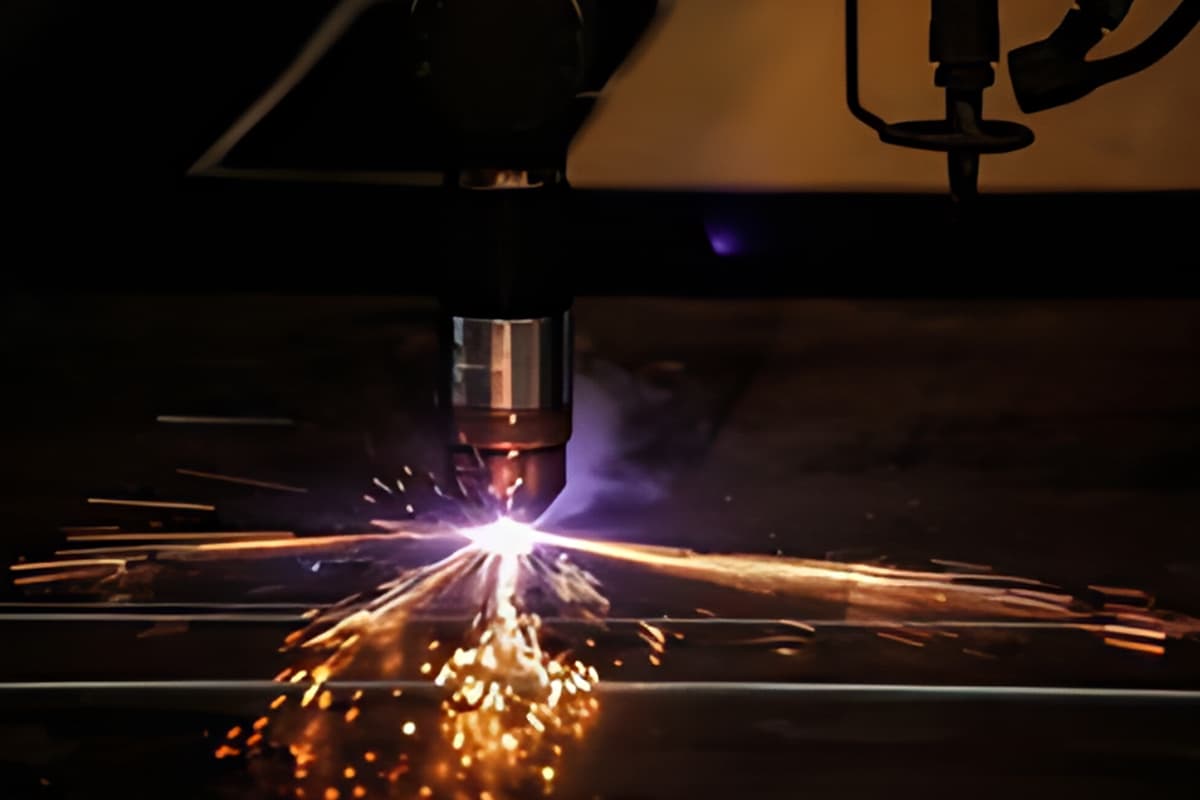
Various factors may cause a plasma cutting machine not to generate an arc.
Firstly, voltage instability is a common issue, as plasma power sources typically need to be connected to a three-phase 380V voltage. Phase absence or inadequate voltage capacity can result in an inability to strike an arc. Secondly, air intake issues are another significant factor.
Lack of intake or insufficient air pressure can affect the normal arc initiation of the plasma cutting machine.
Solutions to these problems include checking the power supply, replacing the contactor, repairing the internal wiring, and closely monitoring the air compressor’s output pressure display to ensure sufficient pressure.
If you encounter issues with inadequate air pressure, it may be due to insufficient air input from the air compressor, too low pressure regulation by the air regulator valve, blockages in the solenoid valve, or a non-smooth air path.
Therefore, addressing the issue of a plasma cutting machine not generating an arc requires considering all these possibilities and taking appropriate measures.
The stability of the arc in an NC plasma cutting machine is crucial for the quality of the cuts produced.
If the plasma arc is unstable, it can lead to problems such as uneven cuts, the buildup of edges, decreased performance of the control system components, and the need for frequent replacements of nozzles and electrodes.

Based on the analysis of this phenomenon, the solutions proposed are as follows:
If the input air pressure exceeds 0.45Mpa, it can have a negative impact on the plasma cutting process.
The excessive airflow will cause the plasma arc to disperse, weakening the concentration and intensity of the arc column, and reducing its cutting power.
Causes of high air pressure include:
The solution to the problem is:
When using a plasma cutting machine, if the working pressure is significantly lower than the required pressure specified in the specifications, this can negatively impact the cutting quality.
A low working pressure means a weakened plasma arc ejection speed and reduced input airflow, which will prevent the formation of a high-energy and high-speed plasma arc.
This can result in poor cutting quality, incomplete cuts, and the buildup of unwanted material on the cutting edge.
The causes of low air pressure include:
The solution to the problem is:
Before operating the plasma cutting machine, it is crucial to inspect the air compressor’s output pressure display and make any necessary adjustments.
If the air pressure input meets the required standards, it is equally important to confirm that the air filter pressure relief valve is properly adjusted and the pressure display meets the plasma cutting requirements.
Proper maintenance of the air filter pressure relief valve must be performed regularly to guarantee the input air is clean and oil-free.
Contaminated air can cause oil buildup in the solenoid valve, making it challenging to open the valve core and leading to an insufficiently opened valve port.
When the torch nozzle pressure is too low, replacing the electromagnetic valve may be necessary.
A reduction in the gas channel cross-section can also lead to low air pressure. In such cases, the air tube can be replaced following the provided instructions.
Proper grounding is an essential step before using a plasma cutting machine.
If the appropriate grounding tool is not utilized, or if the workpiece surface is not properly grounded, the connection between the ground wire and the workpiece will be weak.
It is advisable to use specialized grounding tools to detect any insulation that could negatively impact the connection between the ground wire and the workpiece surface.
Using worn or old ground wires should be avoided.
The causes of premature damage of nozzle:
The solution to the problem is:
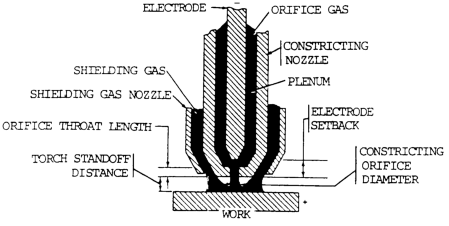
When the plasma cutting machine is in use, the first step is to ignite the plasma arc.
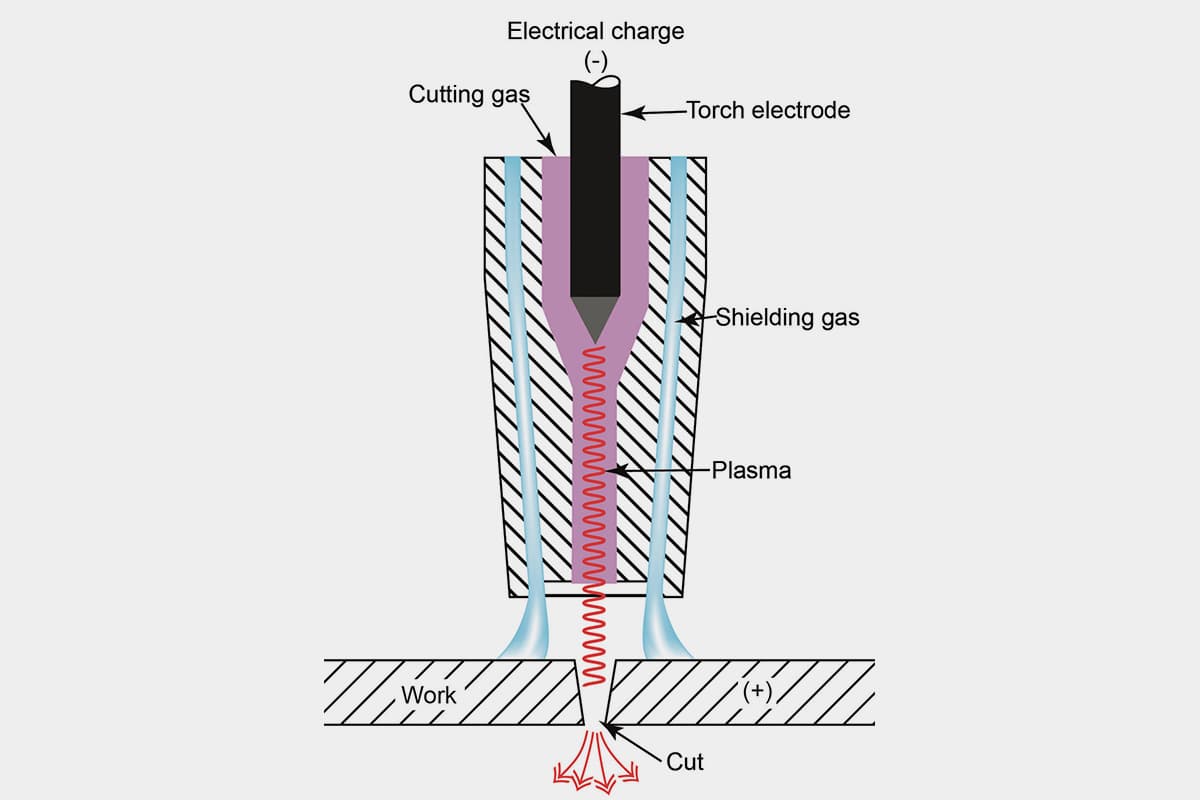
The high-frequency oscillator triggers the gas between the electrode and the nozzle’s inner wall to form a high-frequency discharge that partially ionizes the gas and creates a small arc.
This small arc is then expelled from the nozzle by the compressed air, igniting the plasma arc.
This is the main function of the spark generator.
Typically, the spark generator operates for only 0.5 to 1 second.
If the arc cannot be automatically broken, it is usually because the components of the control circuit board are imbalanced or the gap between the spark generator’s discharge electrode is not set optimally.
The solution to the problem is:
There are significant electrical facilities located on the site where the plasma cutting machine is used.
The malfunction of critical circuit components in the plasma cutting machine can result in an input AC voltage that is insufficient.
To address this problem, the following steps should be taken:
It is important to verify that the power grid connected to the plasma cutting machine has adequate load capacity and complies with the necessary power line specifications.
The plasma cutting machine should be located in a place that is distant from large electrical equipment and areas with electrical interference.
It is recommended to regularly clean dust and debris from components within the plasma cutter and check for worn wires during use.
Aside from the previously mentioned causes, the stability of the plasma arc can also be impacted by factors such as a cutting speed that is too slow, the angle of the cutting torch in relation to the workpiece, and the operator’s level of expertise in using the plasma cutter. It is essential for users to keep these factors in mind.
Below are answers to some frequently asked questions:
When a plasma cutter fails to arc, several common issues can be the cause. One prevalent reason is grounding issues; a poor ground connection can often prevent arcing. Ensuring that the earth clamp is securely attached to the workpiece and that the wire connected to the ground clamp is not loose or damaged is essential. Another common issue is the condition of the consumables. Worn or damaged components, such as the cutting tip, electrode, and ceramic cap, can impede arc formation, so inspecting and replacing these parts if necessary is crucial.
Air pressure and flow also play a significant role. Insufficient air pressure or inconsistent flow can hinder the ignition of the arc. Ensuring the compressor provides the required air pressure and that the air flow remains steady can address this problem. Additionally, maintaining the correct distance between the torch and the workpiece is important, as being too far can result in losing the arc. Contaminants on the workpiece, such as oil, dirt, or other substances, can also disrupt the arc, so keeping the workpiece clean is necessary.
Switch and torch issues, such as a malfunctioning torch switch or a damaged swirl ring, can also prevent arc formation. Testing the switch and inspecting the swirl ring for cracks or chips can help identify these problems. Incorrect settings, including improper amperage, voltage, or gas pressure, can also prevent arcing. Ensuring that these settings align with the operator’s manual recommendations is vital.
Lastly, regular maintenance is crucial. Regularly replacing consumable parts and ensuring proper gas and coolant flow helps maintain the health of the plasma cutter and prevent issues with arcing. By addressing these common issues, you can effectively troubleshoot and resolve problems with a plasma cutter that is not arcing.
To check and secure the ground connection on your plasma cutter, start by locating the grounding column or jack on the unit, typically found near the input connections for the cutting torch. Ensure the ground cable is firmly attached to this jack. Next, inspect the clamp at the end of the ground cable, making sure it is clean and free from any paint, rust, or insulating material to ensure a good conductive surface.
Attach the ground clamp directly to the workpiece or the cutting table, ensuring a solid, conductive connection to maintain the electrical circuit and avoid erratic cutting behavior. Double-check that the ground cable is securely connected both to the plasma cutter and the workpiece.
If additional grounding is needed to address electrical noise or for safety, consider installing an earth grounding rod. Drive the rod about 8 feet into the ground next to your work area, and run the work cable from the plasma cutter directly to the rod, securing it with a bolt rather than a clamp.
Regularly inspect the ground connections and cables for any signs of wear, corrosion, or damage, and replace any compromised components to prevent electrical hazards. Ensure all grounding practices comply with the National Electrical Code (NFPA 70) and OSHA standards to maintain safety and functionality. By following these steps, you can ensure a reliable ground connection for your plasma cutter, reducing the risk of operational issues and improving overall safety.
When a plasma cutter is not arcing, it’s important to inspect several key consumable components to identify and resolve the issue. First, check the electrode, which is crucial for conducting electrical current to generate the plasma arc. Look for signs of wear, such as erosion or discoloration, and ensure the emitter rod has not worn down too much. Next, inspect the nozzle for any blockages, debris, or wear. The orifice should be perfectly round without any nicks or deposits.
The swirl ring, which regulates gas flow and aligns the electrode with the nozzle, should be examined for cracks, damage, or debris buildup. Ensure the electrode moves freely within the swirl ring. The shield, which protects the nozzle from spatter and debris, should also be checked for damage or slag buildup. Additionally, if your plasma cutter uses a start cartridge, make sure it is clean, undamaged, and that the spring-loaded ring moves freely. Lastly, inspect the retaining cap and O-rings for dryness, damage, or over-lubrication, ensuring the retaining cap moves smoothly.
By carefully inspecting these consumables and maintaining them properly, you can resolve issues that prevent your plasma cutter from arcing and ensure optimal performance.
To verify and adjust the air pressure for your plasma cutter, follow these steps to ensure optimal performance and troubleshoot issues like the cutter not arcing:
First, refer to your plasma cutter’s manual to check the recommended air pressure settings, as different models have specific requirements. Typically, plasma cutters need an inlet pressure between 80 to 120 psi, with the torch pressure set between 65 to 75 psi.
Ensure the raw inlet pressure from your air compressor falls within the recommended range, usually 90 to 135 psi, to maintain the correct flow and pressure at the torch nozzle. Use a high-pressure regulator to control the air supply, ensuring it delivers the required pressure and flow rate. If the compressor is far from the plasma cutter, use a separate regulator near the cutter to compensate for any pressure drop along the hose.
Adjust the torch pressure using the regulator’s adjusting knob, aiming for the optimal range of 65 to 75 psi, depending on material thickness and specific model recommendations. Monitor the pressure in real-time by installing an air gauge at the back of the plasma cutter to identify any drops below the recommended specs during operation.
Ensure your air compressor has sufficient capacity to maintain the required flow rate, typically a minimum of 5 scfm at 90 psi. If the plasma cutter is not arcing, check that the air pressure is within the specified range. Too low a pressure can prevent the arc from firing, while too high a pressure can shorten the life of consumables or cause misfires. Ensure the air system is free from water and contaminants by cooling and filtering the air if the compressor runs continuously.
Some plasma cutters have internal regulators, so if you cannot adjust the pressure beyond a certain point, check for internal adjustments as per the manual’s instructions. Following these steps will help ensure your plasma cutter receives the correct air pressure, crucial for proper operation and maintaining cut quality.
To prevent your plasma cutter from failing to arc, regular maintenance is essential. Start by consistently cleaning all components of the plasma cutter, including the torch body, power supply, torch leads, nozzles, and air filters. This involves daily, weekly, and periodic deep cleaning routines to ensure optimal performance. Ensure that torch threads, nozzle, and electrode seating locations are free from contamination by using a cotton swab or hydrogen peroxide.
Regularly replace consumable parts such as nozzles, electrodes, and swirl rings, especially if you notice poor cut quality or signs of wear like nozzle oxide residues and gouging. Store these consumables in a clean, dust-free environment to prevent contamination.
Check the gas and coolant pressure daily to ensure proper flow. For autogas systems, use the “Test Preflow” and “Test Cutflow” functions to confirm the correct pressure. Make sure the plasma gas is dry and clean to avoid early torch failure and short consumable life.
Inspect the earth clamp and ensure the wire attached to it is securely connected, as an incomplete ground connection can prevent the torch from producing an arc. Additionally, check the ceramic cap for cracks or holes and the swirl ring for cracks or chips, replacing any damaged parts as necessary.
If the edges around the electrode holder are rough, smooth them out to facilitate arc formation. Test the torch switch by making a short circuit with a screwdriver on low voltage systems if no plasma is coming out of the torch.
Always disconnect the power supply before performing maintenance, and keep the work area clear to avoid losing small parts and to reduce safety risks. Ensure all components are properly set up and aligned to maintain efficient gas and coolant flow and electric contact. Avoid using the torch as a hammer to prevent damage and contamination.
Lastly, use only the required amount of O-ring lubricant and anti-spatter compounds, as excess use can cause arcing problems and damage to the torch. By following these maintenance practices, you can significantly reduce the likelihood of your plasma cutter failing to arc and ensure it operates efficiently and safely.
Firstly, it’s crucial to check if the power supply of the plasma cutting machine is operating normally, ensuring the voltage is stable.
In addition, the grounding of the plasma cutting machine should be inspected to confirm it’s well-grounded. This is because proper grounding can enhance the stability of arc initiation.
On-site, if there are large power-consuming facilities or internal main circuit component failures within the cutting machine, it may result in an excessively low input AC voltage. Therefore, it’s necessary to inspect these situations.
Lastly, further assurance of voltage stability can be achieved by checking the voltage detector or motor regulator for proper functioning. Through these steps, we can more accurately detect and ensure the voltage stability of the plasma cutting machine.
The common issues with the air intake system of a plasma cutting machine primarily include solenoid valve malfunctions, improper air pressure adjustments, insufficient air pressure, interrupted or inadequate gas supply, and intake blockage or moisture. The solutions to these issues are as follows:
Solenoid Valve Issues: If the plasma cutter isn’t emitting air, the intake solenoid valve should be checked for damage. If the valve is faulty, it needs to be replaced.
Improper Air Pressure Adjustment: Check the air pressure adjustment filter on the back panel of the air plasma cutter, ensuring that the air pressure is neither too high nor too low. Generally, the air pressure should be maintained at about 0.35MPa to ensure the normal formation and arcing of the plasma.
Insufficient Air Pressure: Causes for insufficient air pressure might include inadequate air input from the air compressor, excessively low pressure adjustment of the cutting machine’s air control valve, oil contamination inside the solenoid valve, or an obstructed air path. The solution is to monitor the output pressure of the air compressor before use, adjust the air control valve’s pressure setting as needed, clean the oil contamination inside the solenoid valve, and ensure an unobstructed air path.
Interrupted or Insufficient Gas Supply: Check and reconnect the gas pipeline, increase gas pressure to ensure the continuity and adequacy of the gas supply.
Intake Blockage or Moisture: If the intake is blocked or slightly damp, it needs to be cleaned or replaced to ensure smooth entry of gas into the interior of the cutting machine.
To determine if the input air pressure of a plasma cutter is appropriate, you first need to understand the air pressure range required for the normal operation of a plasma cutter. According to various sources, the air pressure of an air plasma cutter is generally adjusted between 0.4~0.6MPa, but it is also suggested to adjust the back pressure to 0.2-0.3MPa according to the actual situation.
This indicates that the specific requirements for air pressure may vary depending on the type, thickness of the cutting material, and the cutting speed.
In practical operations, if you encounter situations where the arc does not cut or the cutting effect is poor, it may be due to inappropriate input air pressure.
For example, if the input air pressure is significantly lower than the normal range, it may cause the arc not to start. Therefore, checking the air compressor’s output pressure display to ensure it meets the requirement is an important step in determining whether the air pressure is appropriate.
Also, pay attention to whether the adjustment of the air filter pressure reducer is correct and whether there are any failures, which could cause the air pressure to be too high or too low.
The appropriateness of the input air pressure of a plasma cutter can be determined through the following steps:
By following these steps, you can accurately determine whether the input air pressure of a plasma cutter is appropriate, thus ensuring the smooth progress of the cutting process.
What are the common causes of damage to the plasma cutter torch and electrode, and what is the guide for their replacement?
These factors can severely affect the function of the plasma system, leading to damage to the torch and electrode.
Regarding the replacement guide, the first step is to turn off the plasma cutter and disconnect the power supply to ensure the equipment is in a safe state.
Then, based on the instructions in the equipment manual, determine the type and location of the consumable parts that need to be replaced, and use appropriate tools such as wrenches and screwdrivers for gentle disassembly.
Consumables like electrodes and nozzles that are prone to wear should be replaced regularly for efficient cutting. During the replacement process, you can consider replacing the entire machine torch and cable assembly, or replace individual components. In addition, using a clean lint cloth to wipe the inside of the nozzle can eliminate oxides, which is an important measure to prevent torch damage.

