Have you ever considered the importance of proper positioning and clamping in manufacturing? In this article, we’ll explore how these crucial techniques ensure precision, safety, and efficiency in various machining processes. Our expert insights will reveal the key principles and best practices you need to know, helping you optimize your manufacturing operations and achieve superior results.
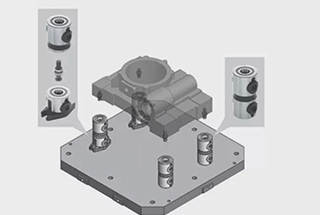
This is a summary of fixture design in the industry, but it’s not as straightforward as it seems. Through our research and discussions with various experts, we’ve discovered that preliminary design often faces positioning and clamping issues that are not adequately addressed.
Without proper solutions to these challenges, any innovative design will lack practical value. To ensure the success and integrity of fixture design and processing, it is crucial to have a solid understanding of the basics of positioning and clamping.
“When positioning the workpiece, such as the support, the most basic principle to follow is the three-point principle. This principle, also known as the support principle, is derived from the concept that “three points not on the same line determine a plane.”
With three points, a face can be determined, leading to the determination of a total of four faces. However, it can be challenging to locate the fourth point in the same plane, no matter the method used.”
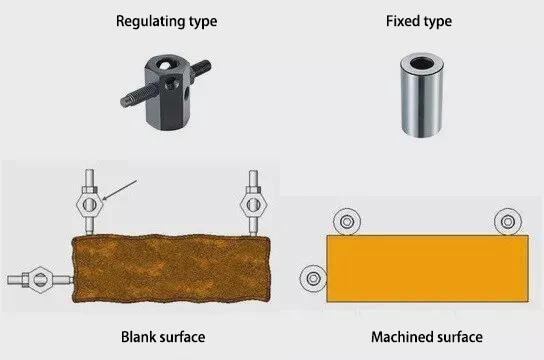
Three principles
For instance, when using four fixed height locators, only three of them may come into contact with the workpiece, leaving a high probability that the fourth one won’t. To address this issue, it is commonly recommended to configure the locator based on three points, with the distances between these points kept as wide as possible.
Furthermore, when setting up the positioner, it is important to determine the direction in which the processing load will be applied. This direction refers to the direction in which the tool handle or tool will travel. Neglecting to consider this can have a significant impact on the overall accuracy of the workpiece.
When positioning the blank surface of the workpiece, a bolt type adjustable positioner is typically used. For positioning the processing surface, a fixed positioner (where the workpiece contact surface is ground) is utilized.
When positioning the workpiece, it is essential to use a pin with a tolerance that fits the holes processed in the previous step.
To achieve the desired positioning accuracy, the pin must have the same accuracy as the workpiece hole and match within the specified tolerance.
In addition, straight pins and diamond pins are commonly used for positioning, making it easier to assemble and disassemble the workpiece and reducing the likelihood of the workpiece and pin becoming stuck.
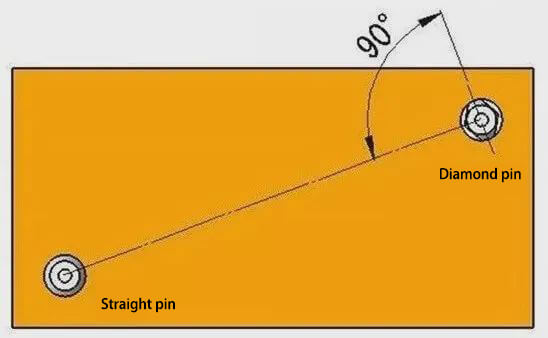
Use pin positioning
Of course, it’s possible to use straight pins for both positions by adjusting the fitting tolerance. However, for more precise positioning, it’s typically most effective to use a combination of a straight pin and a diamond pin.
When using both types of pins, the connection line of the diamond pin, at the point of contact with the workpiece, is typically perpendicular to the connection line of the straight pin, forming a 90-degree angle. This configuration method is used for angular positioning, specifically for determining the direction of workpiece rotation.
According to the clamping direction, it is generally divided into the following categories:
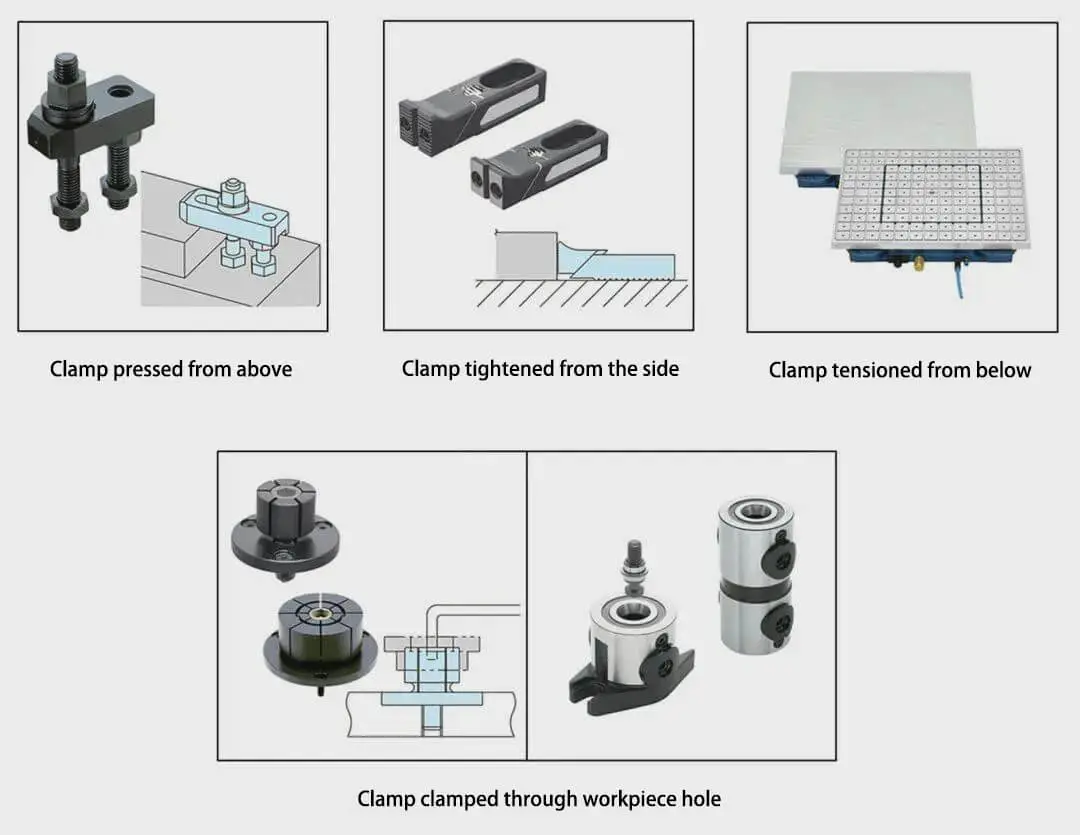
Next, let’s take a look at the characteristics of various clamps.
1. Clamp pressed from above
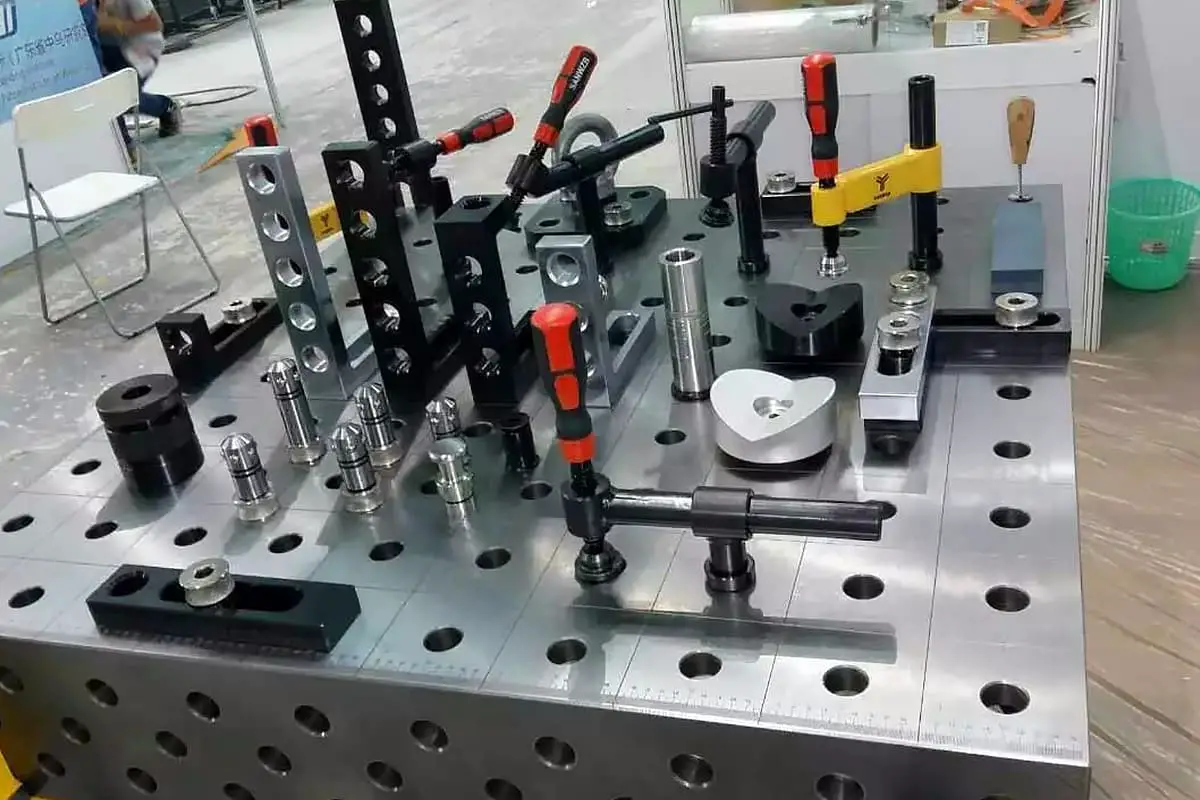
The clamping device that compresses from the top of the workpiece is the most stable and causes the least deformation during the clamping process. As a result, the first consideration in workpiece processing is to clamp from the top. The most commonly used fixture for this type of clamping is a manual mechanical fixture.
For instance, the “pine leaf” clamp is a type of clamping device that is commonly used. It is composed of a pressing plate, stud bolt, jack, and nut.
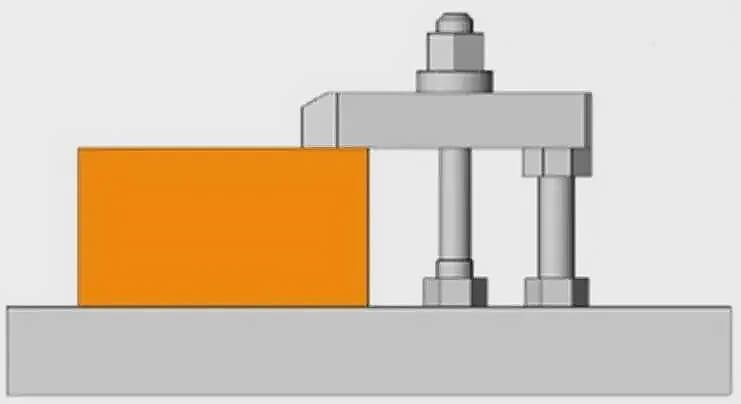
In addition, according to the shape of the workpiece, different shapes of pressing plates can be selected to correspond to different shapes of workpieces.
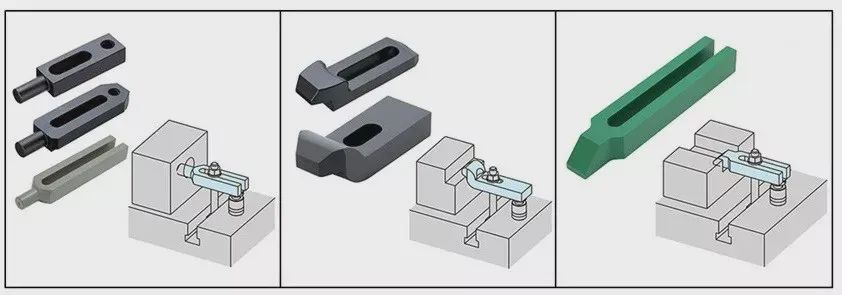
The relationship between the torque and clamping force of the pine leaf clamp can be calculated by the propulsion force of the bolt.

The simple calculation formula of clamping force is as follows:
F(kN) = T(N·m)/0.2d
(d refers to the nominal diameter of the bolt)
In addition to the pine leaf clamp, there are also the following similar clamps for clamping from above the workpiece.
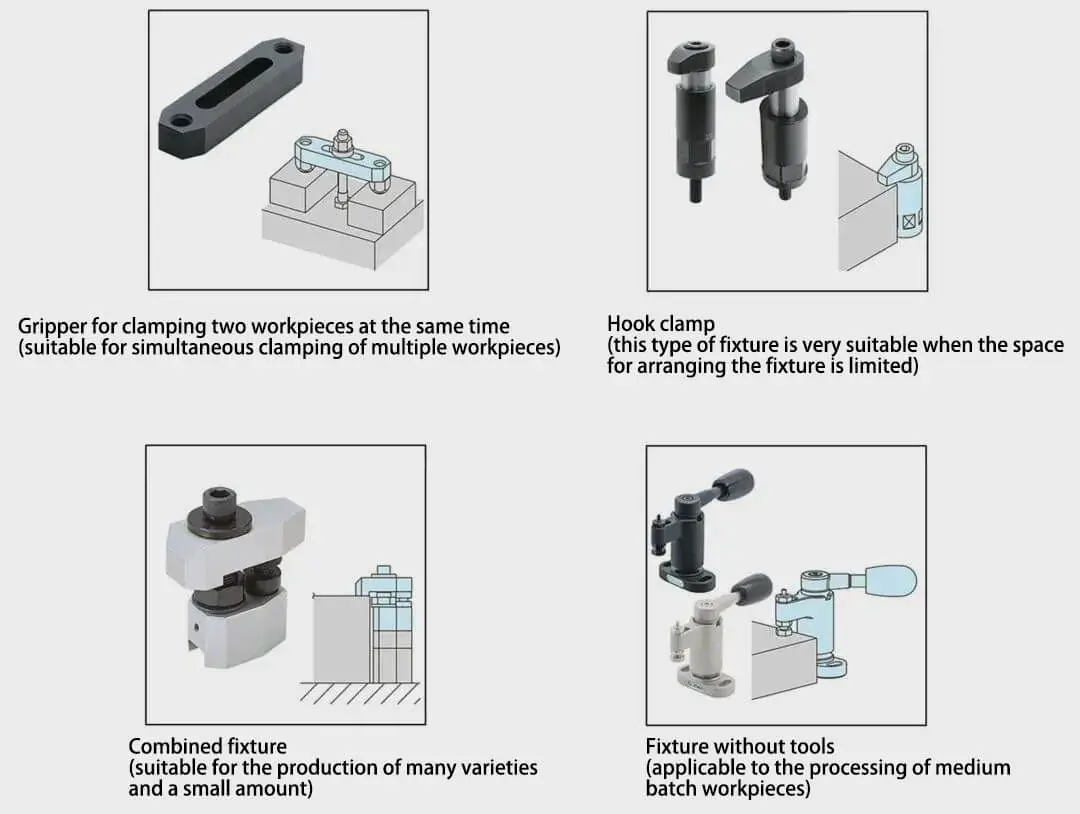
2. Clamp clamping from the side
The original method of clamping the workpiece from the top is the most stable and accurate, and also results in the least processing load on the workpiece.
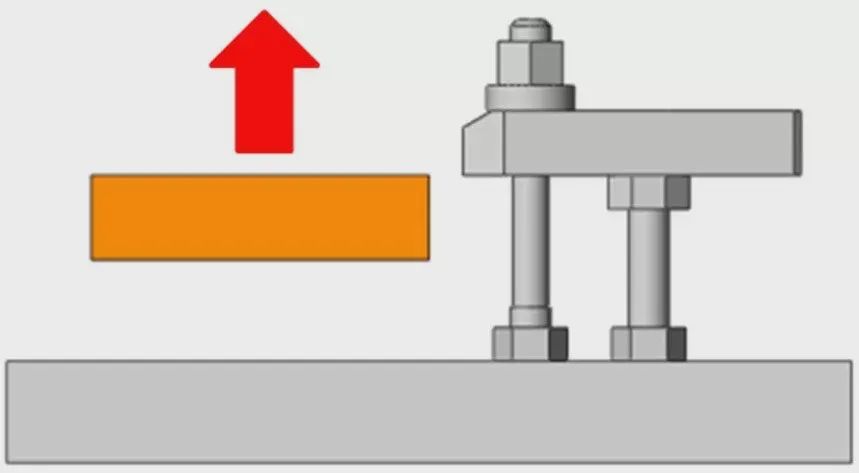
However, when clamping from the top is not feasible due to factors such as machining above the workpiece or inappropriateness, it may be necessary to clamp the workpiece from the side.
It should be noted, however, that clamping the workpiece from the side may result in an upward force. Careful consideration should be given to eliminating this force when designing the fixture.

In addition to the clamps shown in the figure above, there are also side clamps available.
These side clamps generate an oblique downward force when thrust is produced, effectively preventing the workpiece from floating.
There are also other similar clamps for clamping from the side.
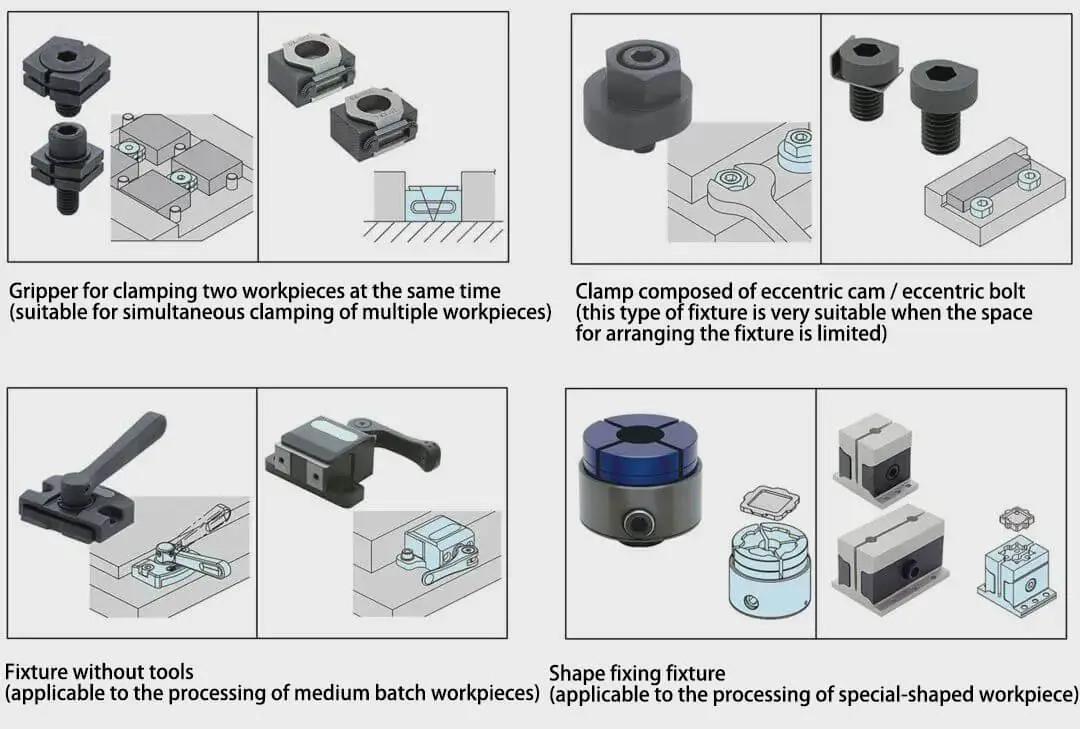
3. Clamp for tightening the workpiece from the pull-down
When processing the top surface of a thin plate workpiece, clamping it from the top is not possible, and compressing it from the side is not practical. The most feasible clamping method is to secure the workpiece from the bottom.
If the workpiece is made of iron, a magnetic clamp can usually be used to tighten it from below. For non-ferrous metal workpieces, vacuum suction cups can typically be utilized to secure them.
The clamping force is directly proportional to the contact area between the workpiece and the magnetic clamp or vacuum suction cup.
However, if the processing load is too high when processing small workpieces, the results may not be optimal.

In addition, when using a magnet or vacuum chuck, the contact surface with the magnet and vacuum chuck needs to be smooth to be safe and normal.
4. Clamp clamped with hole
When performing multi-facet simultaneous processing or mold processing on a 5-axis machine, it is advisable to use hole clamping to prevent the fixture and tools from affecting the outcome. This method is superior to top and side clamping as it applies less pressure to the workpiece, reducing the likelihood of deformation.
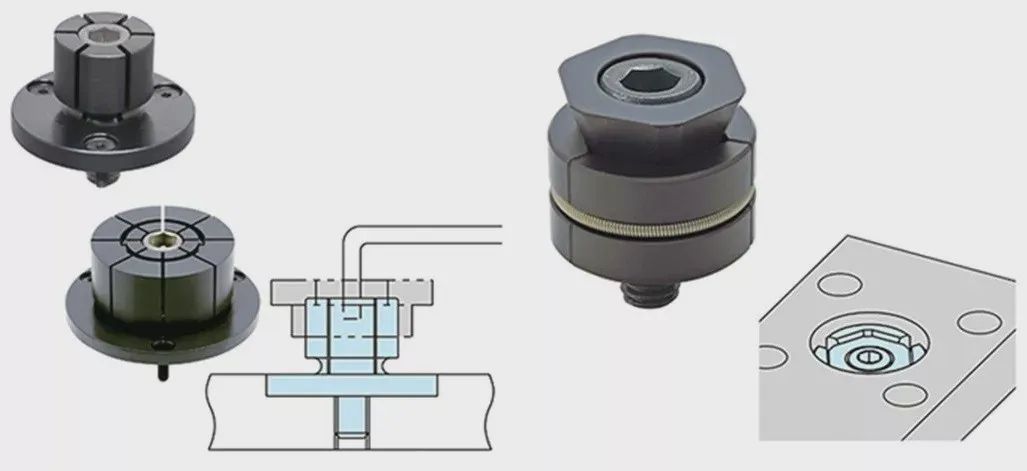
Machining directly with holes
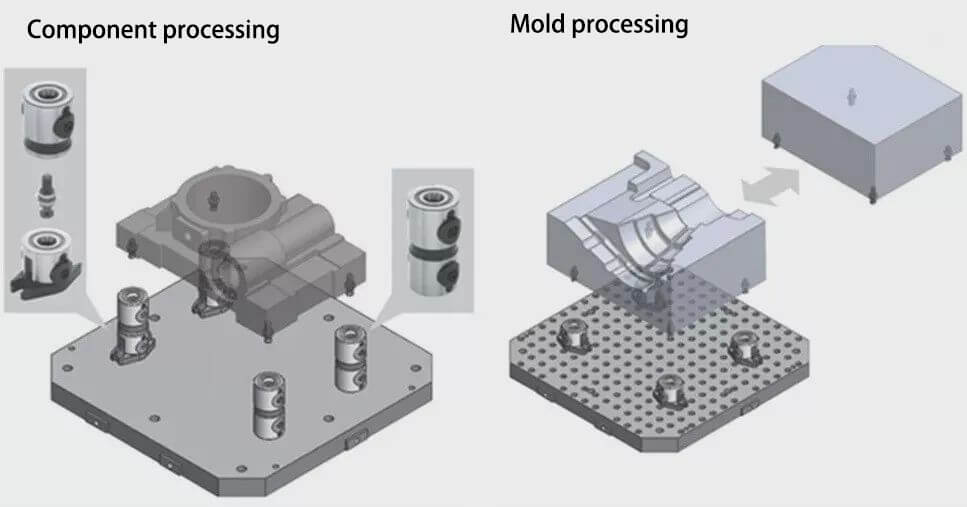
Set the pull pin for clamping
The main focus is on the attachment of the workpiece clamp. Improving operability and utilizing pre-clamping is also crucial.
When the workpiece is placed vertically on the base, gravity will cause it to fall downwards.
To prevent this, you need to manually hold and secure the workpiece while using the gripper to operate.
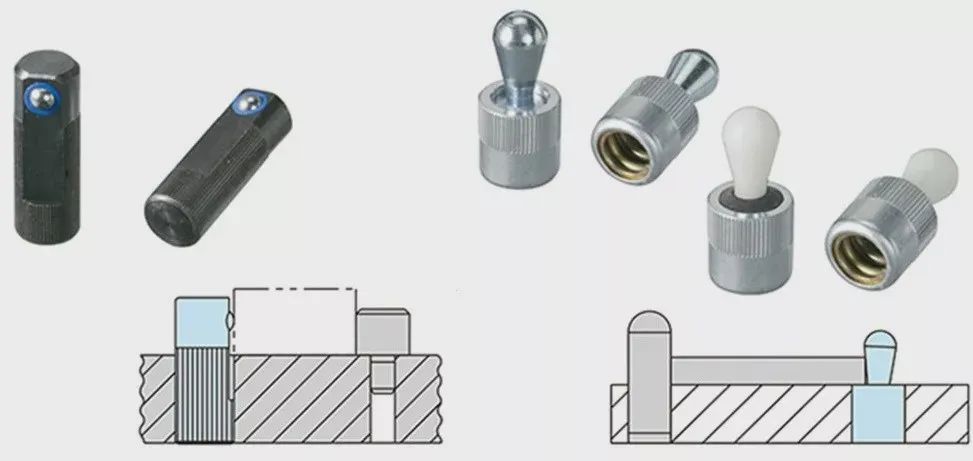
Pre clamping
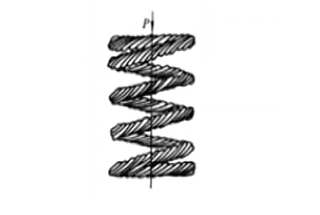
If the workpiece is heavy or multiple pieces are clamped simultaneously, operability will be significantly reduced and the clamping process will take a long time. In such situations, utilizing a spring pre-clamping product can help maintain the workpiece in a stable state while operating the gripper, significantly improving operability and reducing clamping time.
When multiple types of clamps are utilized in the same tooling setup, it is crucial to standardize the tools used for tightening and loosening them. This helps to minimize the operator’s workload and decrease the overall clamping time of the workpiece.
For instance, as shown in the figure on the left, the use of different wrench types for clamping operations can lead to an increased workload for the operator and longer clamping times.
On the other hand, as illustrated in the figure on the right, when the tools and wrenches are standardized and the bolt size is unified, the operation becomes much more convenient and efficient for on-site personnel.
Operability of workpiece clamping
Additionally, while setting up the clamp, it’s crucial to prioritize the ease of clamping the workpiece. If the workpiece must be clamped at an angle, it can become cumbersome to handle. This issue should be taken into account while designing fixture tooling to prevent inconvenience.


