Have you ever wondered about the difference between Rockwell and Brinell hardness scales? In this article, we’ll dive into the world of material hardness testing, exploring the key distinctions between these two widely used methods. Our expert mechanical engineer will guide you through the fundamentals, providing insights into their applications and the conversion process. Get ready to expand your knowledge and gain a deeper understanding of this crucial aspect of material science.
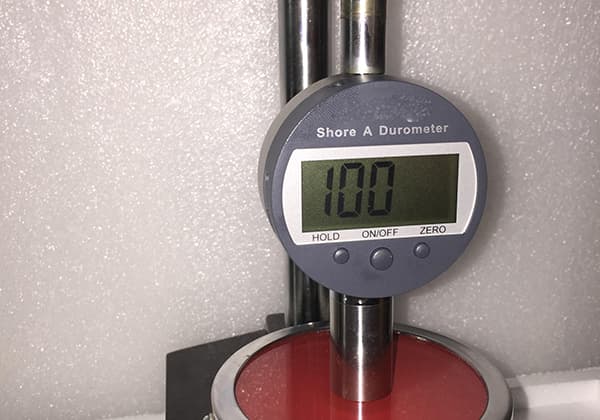
Hardness is a crucial performance index used to measure the resistance of materials to indentation or deformation caused by hard objects. This property is essential in various industrial applications, including material selection, quality control, and mechanical engineering.
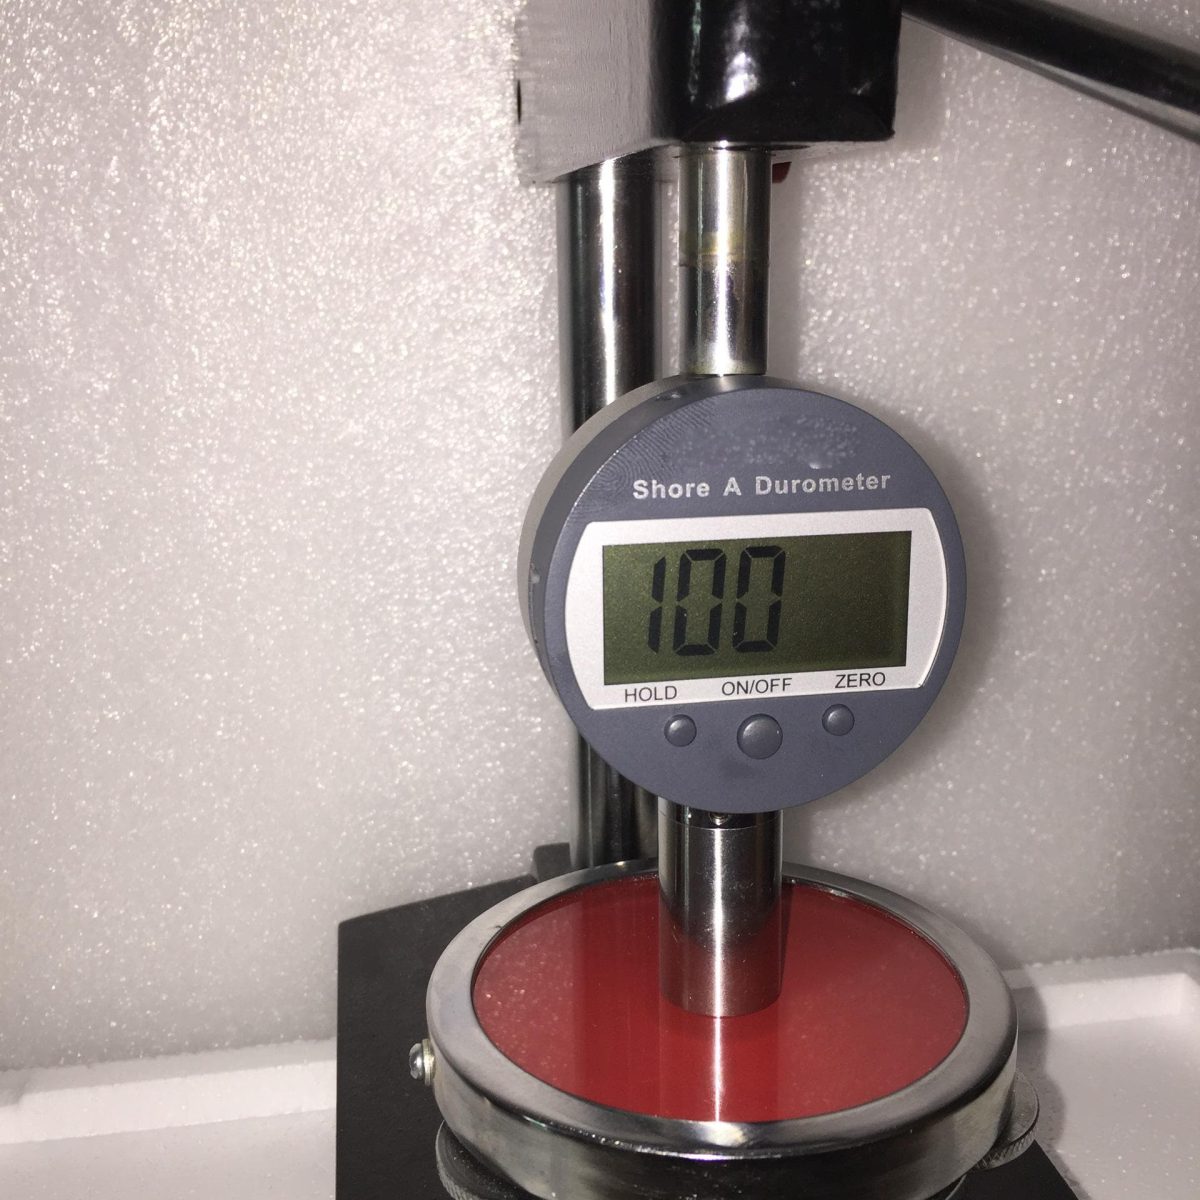
Hardness testing methods vary, each with unique principles and implications behind the measured values. The primary categories of hardness tests include static load indentation tests and rebound hardness tests.
Hardness is not a single physical quantity but a comprehensive performance index that reflects a material’s elasticity, plasticity, strength, and toughness. It is crucial in understanding a material’s wear resistance, durability, and suitability for specific applications.
The hardness of metals, particularly steel, is denoted by the code H. Various hardness testing methods provide a detailed understanding of steel’s properties:
● The conventional methods include Brinell (HB), Rockwell (HRC), Vickers (HV), and Leeb (HL) hardness tests. Among these, HB and HRC are more commonly used.
● HB has a wide range of applications, while HRC is suitable for materials with high surface hardness, such as those achieved through heat treatment.
The primary difference between these two tests is the type of probe used in the hardness tester. The Brinell hardness tester employs a steel ball as the probe, whereas the Rockwell hardness tester uses a diamond probe.
● HV – suitable for microscopic analysis. The Vickers hardness (HV) is measured by pressing a diamond square cone indenter with a top angle of 136° into the material surface with a load less than 120kg. The Vickers hardness value (HV) is obtained by dividing the surface area of the material indentation pit by the load value.
● The HL portable hardness tester is convenient for measurements. It works by bouncing after the impact ball head hits the hardness surface. The hardness is calculated using the ratio of the rebound speed and impact speed of the punch at 1mm from the sample surface, and the formula: Leeb hardness HL = 1000 × VB (rebound velocity) / VA (impact velocity).
● The most commonly used portable Leeb hardness tester can be converted to Brinell (HB), Rockwell (HRC), Vickers (HV), and Shore (HS) hardness after measuring with Leeb (HL). Alternatively, you can directly measure the hardness value using Brinell (HB), Rockwell (HRC), Vickers (HV), Leeb (HL), and Shore (HS) using the Leeb principle.
The TH series Leeb hardness tester, produced by Time Company, has this function, which is a useful supplement to the traditional desktop hardness machine! (For details, please click Leeb Hardness Tester TH140/TH160/HLN-11A/HS141 Portable Series).
1. HB – Brinell hardness:
Brinell hardness (HB) is typically used for soft materials, such as nonferrous metals, steel before heat treatment, or after annealing.
On the other hand, Rockwell hardness (HRC) is generally used for materials with higher hardness, such as those that have undergone heat treatment.
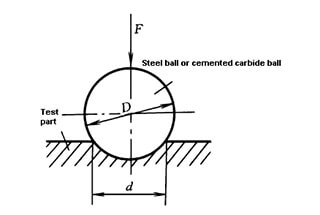
To measure Brinell hardness, a hardened steel ball or cemented carbide ball with a specific diameter is pressed into the surface of the material being tested under a specified test load, held for a set time, and then unloaded to measure the indentation diameter of the surface being tested.
The Brinell hardness value is calculated by dividing the load by the spherical surface area of the indentation.
Typically, a hardened steel ball with a diameter of 10mm is pressed into the material surface with a load of 3000kg for a certain duration. After unloading, the ratio of the load to the indentation area yields the Brinell hardness value (HB), measured in kilogram force per square millimeter (kgf/mm2 or N/mm2).
2. HR Rockwell hardness
Rockwell hardness (HR) is a method to determine the hardness index of a material based on the plastic deformation depth of indentation. The hardness is measured in units of 0.002 mm.
When the Brinell hardness test cannot be used, such as when the material’s HB value is greater than 450 or the sample size is too small, the Rockwell hardness test is used instead.
This test involves pressing either a diamond cone with a top angle of 120° or a steel ball with a diameter of 1.59 mm or 3.18 mm into the surface of the tested material under a specific load. The hardness of the material is then calculated from the depth of the indentation.
There are three different scales for Rockwell hardness measurements based on the hardness of the test material:
HRA: It’s a measure of hardness determined by using a diamond cone indenter and applying a 60kg load. This scale is used for materials that have extremely high hardness, such as cemented carbide.
HRB: It’s a measure of hardness determined by using a 1.59mm diameter hardened steel ball and applying a 100kg load. This scale is used for materials that have low hardness, such as annealed steel, cast iron, etc.
HRC: It’s a measure of hardness determined by using a diamond cone press and applying a 150kg load. This scale is used for materials that have high hardness, such as quenched steel, etc.
In addition:
(1) HRC stands for the Rockwell hardness C scale.
(2) HRC and HB are widely used in production.
(3) The HRC application range is from HRC 20 to 67, which is equivalent to HB225 to 650. If the hardness exceeds this range, the Rockwell hardness A scale (HRA) should be used. If the hardness is lower than this range, the Rockwell hardness B scale (HRB) should be used. The upper limit of Brinell hardness (HB650) cannot be exceeded.
(4) The indenter of the Rockwell hardness tester’s C scale is a diamond cone with a top angle of 120 degrees. The test load is a specific value, with a Chinese standard of 150 kg force.
The Brinell hardness tester uses a hardened steel ball (HBS) or cemented carbide ball (HBW) as the indenter, and the test load varies with the ball diameter, ranging from 3000 to 31.25 kgf.
(5) Rockwell hardness indentation is very small, and the measured value is localized, so it is necessary to measure the average value at several points. It is suitable for finished products and thin films and is classified as nondestructive testing.
Brinell hardness indentation is large, and the measured value is accurate. It is not suitable for finished products and thin films and is generally not considered nondestructive testing.
(6) The hardness value of Rockwell hardness is a dimensionless number and does not have a unit. Therefore, it is incorrect to refer to Rockwell hardness in terms of degrees. The hardness value of Brinell hardness has units and has an approximate relationship with tensile strength.
(7) Rockwell hardness can be displayed directly on the dial or digitally. It is easy to operate, fast, and intuitive, making it suitable for mass production. Brinell hardness requires a microscope to measure the indentation diameter and then check the table or perform calculations, which can be complicated.
(8) Under certain conditions, HB and HRC can be checked and exchanged. The mental calculation formula is roughly 1HRC ≈ 1/10HB.
The following are several common comparison tables:
1. National standard hardness HLD/HRC/HRB/HV/HB/HSD conversion table
2. According to the German standard DIN50150, the following is the comparison table between the tensile strength of steels in common range and Vickers hardness, Brinell hardness and Rockwell hardness:
Tensile strength Rm N/mm2 | HV | HB | HRC |
| 250 | 80 | 76.0 | – |
| 270 | 85 | 80.7 | – |
| 285 | 90 | 85.2 | – |
| 305 | 95 | 90.2 | – |
| 320 | 100 | 95.0 | – |
| 335 | 105 | 99.8 | – |
| 350 | 110 | 105 | – |
| 370 | 115 | 109 | – |
| 380 | 120 | 114 | – |
| 400 | 125 | 119 | – |
| 415 | 130 | 124 | – |
| 430 | 135 | 128 | – |
| 450 | 140 | 133 | – |
| 465 | 145 | 138 | – |
| 480 | 150 | 143 | – |
| 490 | 155 | 147 | – |
| 510 | 160 | 152 | – |
| 530 | 165 | 156 | – |
| 545 | 170 | 162 | – |
| 560 | 175 | 166 | – |
| 575 | 180 | 171 | – |
| 595 | 185 | 176 | – |
| 610 | 190 | 181 | – |
| 625 | 195 | 185 | – |
| 640 | 200 | 190 | – |
| 660 | 205 | 195 | – |
| 675 | 210 | 199 | – |
| 690 | 215 | 204 | – |
| 705 | 220 | 209 | – |
| 720 | 225 | 214 | – |
| 740 | 230 | 219 | – |
| 755 | 235 | 223 | – |
| 770 | 240 | 228 | 20.3 |
| 785 | 245 | 233 | 21.3 |
| 800 | 250 | 238 | 22.2 |
| 820 | 255 | 242 | 23.1 |
| 835 | 260 | 247 | 24.0 |
| 850 | 265 | 252 | 24.8 |
| 865 | 270 | 257 | 25.6 |
| 880 | 275 | 261 | 26.4 |
| 900 | 280 | 266 | 27.1 |
| 915 | 285 | 271 | 27.8 |
| 930 | 290 | 276 | 28.5 |
| 950 | 295 | 280 | 29.2 |
| 965 | 300 | 285 | 29.8 |
| 995 | 310 | 295 | 31.0 |
| 1030 | 320 | 304 | 32.2 |
| 1060 | 330 | 314 | 33.3 |
| 1095 | 340 | 323 | 34.4 |
| 1125 | 350 | 333 | 35.5 |
| 1115 | 360 | 342 | 36.6 |
| 1190 | 370 | 352 | 37.7 |
| 1220 | 380 | 361 | 38.8 |
| 1255 | 390 | 371 | 39.8 |
| 1290 | 400 | 380 | 40.8 |
| 1320 | 410 | 390 | 41.8 |
| 1350 | 420 | 399 | 42.7 |
| 1385 | 430 | 409 | 43.6 |
| 1420 | 440 | 418 | 44.5 |
| 1455 | 450 | 428 | 45.3 |
| 1485 | 460 | 437 | 46.1 |
| 1520 | 470 | 447 | 46.9 |
| 1555 | 480 | (456) | 47.7 |
| 1595 | 490 | (466) | 48.4 |
| 1630 | 500 | (475) | 49.1 |
| 1665 | 510 | (485) | 49.8 |
| 1700 | 520 | (494) | 50.5 |
| 1740 | 530 | (504) | 51.1 |
| 1775 | 540 | (513) | 51.7 |
| 1810 | 550 | (523) | 52.3 |
| 1845 | 560 | (532) | 53.0 |
| 1880 | 570 | (542) | 53.6 |
| 1920 | 580 | (551) | 54.1 |
| 1955 | 590 | (561) | 54.7 |
| 1995 | 600 | (570) | 55.2 |
| 2030 | 610 | (580) | 55.7 |
| 2070 | 620 | (589) | 56.3 |
| 2105 | 630 | (599) | 56.8 |
| 2145 | 640 | (608) | 57.3 |
| 2180 | 650 | (618) | 57.8 |
| 660 | 58.3 | ||
| 670 | 58.8 | ||
| 680 | 59.2 | ||
| 690 | 59.7 | ||
| 700 | 60.1 | ||
| 720 | 61.0 | ||
| 740 | 61.8 | ||
| 760 | 62.5 | ||
| 780 | 63.3 | ||
| 800 | 64.0 | ||
| 820 | 64.7 | ||
| 840 | 65.3 | ||
| 860 | 65.9 | ||
| 880 | 66.4 | ||
| 900 | 67.0 | ||
| 920 | 67.5 | ||
| 940 | 68.0 |
| HBA | HB | HV | HWB | HRC | |||
|---|---|---|---|---|---|---|---|
| GYZJ 934-1 | 10mm 500kg | 5kg | B | E | F | H | |
| 35 | 21 | 32 | |||||
| 36 | 22 | 35 | |||||
| 37 | 23 | 37 | |||||
| 38 | 24 | 40 | |||||
| 39 | 25 | 42 | |||||
| 40 | 25 | 26 | 45 | ||||
| 41 | 25 | 27 | 47 | ||||
| 42 | 26 | 28 | 49 | ||||
| 43 | 27 | 29 | 51 | ||||
| 44 | 27 | 30 | 54 | ||||
| 45 | 28 | 30 | 56 | ||||
| 46 | 29 | 31 | 58 | ||||
| 47 | 30 | 32 | 23 | 60 | |||
| 48 | 30 | 33 | 0.7 | 26 | 62 | ||
| 49 | 31 | 34 | 1.3 | 28 | 64 | ||
| 50 | 32 | 35 | 1.9 | 31 | 66 | ||
| 51 | 33 | 36 | 2.5 | 34 | 68 | ||
| 52 | 34 | 38 | 3.1 | 36 | 70 | ||
| 53 | 35 | 39 | 3.6 | 39 | 30 | 72 | |
| 54 | 37 | 40 | 4.2 | 41 | 34 | 73 | |
| 55 | 38 | 41 | 4.7 | 44 | 37 | 75 | |
| 56 | 39 | 43 | 5.3 | 46 | 40 | 77 | |
| 57 | 40 | 44 | 5.8 | 48 | 43 | 78 | |
| 58 | 42 | 45 | 6.3 | 50 | 46 | 80 | |
| 59 | 43 | 47 | 6.8 | 53 | 48 | 82 | |
| 60 | 45 | 49 | 7.3 | 55 | 51 | 83 | |
| 61 | 46 | 50 | 7.8 | 57 | 54 | 85 | |
| 62 | 48 | 52 | 8.3 | 59 | 56 | 86 | |
| 63 | 50 | 54 | 8.8 | 61 | 59 | 88 | |
| 64 | 51 | 56 | 9.2 | 63 | 61 | 89 | |
| 65 | 53 | 58 | 9.7 | 65 | 63 | 90 | |
| 66 | 55 | 60 | 10.1 | 67 | 66 | 92 | |
| 67 | 57 | 62 | 10.6 | 69 | 68 | 93 | |
| 68 | 60 | 65 | 11 | 71 | 70 | 94 | |
| 69 | 62 | 67 | 11.4 | 73 | 72 | 95 | |
| 70 | 64 | 70 | 11.8 | 17 | 75 | 74 | 97 |
| 71 | 67 | 72 | 12.2 | 23 | 76 | 75 | 98 |
| 72 | 69 | 75 | 12.6 | 28 | 78 | 77 | 99 |
| 73 | 72 | 78 | 12.9 | 33 | 80 | 79 | 100 |
| 74 | 75 | 81 | 13.3 | 38 | 81 | 80 | 101 |
| 75 | 78 | 85 | 13.7 | 42 | 83 | 82 | 102 |
| 76 | 80 | 88 | 14 | 47 | 84 | 83 | 103 |
| 77 | 84 | 92 | 14.3 | 51 | 86 | 85 | 104 |
| 78 | 87 | 95 | 14.7 | 55 | 87 | 86 | 105 |
| 79 | 90 | 99 | 15 | 59 | 89 | 88 | 106 |
| 80 | 94 | 103 | 15.3 | 63 | 90 | 89 | 106 |
| 81 | 97 | 108 | 15.6 | 66 | 91 | 90 | 107 |
| 82 | 101 | 112 | 15.9 | 70 | 92 | 91 | 108 |
| 83 | 105 | 117 | 16.2 | 73 | 94 | 92 | 109 |
| 84 | 109 | 121 | 16.4 | 76 | 95 | 93 | 109 |
| 85 | 113 | 126 | 16.7 | 79 | 96 | 94 | 110 |
| 86 | 117 | 131 | 16.9 | 81 | 97 | 95 | 111 |
| 87 | 121 | 137 | 17.2 | 84 | 98 | 96 | 111 |
| 88 | 126 | 142 | 17.4 | 86 | 99 | 97 | 112 |
| 89 | 130 | 17.6 | 88 | 100 | 98 | 112 | |
| 90 | 135 | 17.8 | 90 | 101 | 98 | 113 | |
| 91 | 140 | 18 | 102 | 99 | 114 | ||
| 92 | 145 | 18.2 | 103 | 100 | |||
| 93 | 18.4 | 103 | 100 | ||||
| 94 | 18.6 | 104 | 101 | ||||
| 95 | 18.7 | 105 | 102 | ||||
| 96 | 18.9 | 106 | 102 | ||||
| 97 | 19 | 106 | 103 | ||||
| 98 | 19.2 | 107 | |||||
| 98 | 19.3 | 107 | |||||
| 100 | 19.4 | 108 | |||||
Note: Table 3 source: Baber Colman
| Brinell hardness (HB) 10mm 3000kgf | Vickers hardness (HV) | Rockwell hardness | Shore hardness (HS) | Tensile strength (approx.) MPa | ||||
|---|---|---|---|---|---|---|---|---|
| Standard ball | Tungsten carbide ball | Load 60kgf (HRA) | Load 100kgf (HRB) | Load 100kgf (HRC) | Load 150kgf (HRD) | |||
| – | – | 940 | 85.6 | – | 68 | 76.9 | 97 | – |
| – | – | 920 | 85.3 | – | 67.5 | 76.5 | 96 | – |
| – | – | 900 | 85 | – | 67 | 76.1 | 95 | – |
| – | -767 | 880 | 84.7 | – | 66.4 | 75.7 | 93 | – |
| – | -757 | 860 | 84.4 | – | 65.9 | 75.3 | 92 | – |
| – | -745 | 840 | 84.1 | – | 65.3 | 74.8 | 91 | – |
| – | -733 | 820 | 83.8 | – | 64.7 | 74.3 | 90 | – |
| – | -722 | 800 | 83.4 | – | 64 | 73.8 | 88 | – |
| – | -712 | – | – | – | – | – | – | – |
| – | -710 | 780 | 83 | – | 63.3 | 73.3 | 87 | – |
| – | -698 | 760 | 82.6 | – | 62.5 | 72.6 | 86 | – |
| – | -684 | 740 | 82.2 | – | 61.8 | 72.1 | – | – |
| – | -682 | 737 | 82.2 | – | 61.7 | 72 | 84 | – |
| – | -670 | 720 | 81.8 | – | 61 | 71.5 | 83 | – |
| – | -656 | 700 | 81.3 | – | 60.1 | 70.8 | – | – |
| – | -653 | 697 | 81.2 | – | 60 | 70.7 | 81 | – |
| – | -647 | 690 | 81.1 | – | 59.7 | 70.5 | – | – |
| – | -638 | 680 | 80.8 | – | 59.2 | 70.1 | 80 | – |
| – | 630 | 670 | 80.6 | – | 58.8 | 69.8 | – | – |
| – | 627 | 667 | 80.5 | – | 58.7 | 69.7 | 79 | – |
| – | – | 677 | 80.7 | – | 59.1 | 70 | – | – |
| – | 601 | 640 | 79.8 | – | 57.3 | 68.7 | 77 | – |
| – | – | 640 | 79.8 | – | 57.3 | 68.7 | – | – |
| – | 578 | 615 | 79.1 | – | 56 | 67.7 | 75 | – |
| – | – | 607 | 78.8 | – | 55.6 | 67.4 | – | – |
| – | 555 | 591 | 78.4 | – | 54.7 | 66.7 | 73 | 2055 |
| – | – | 579 | 78 | – | 54 | 66.1 | – | 2015 |
| – | 534 | 569 | 77.8 | – | 53.5 | 65.8 | 71 | 1985 |
| – | – | 533 | 77.1 | – | 52.5 | 65 | – | 1915 |
| – | 514 | 547 | 76.9 | – | 52.1 | 64.7 | 70 | 1890 |
| -495 | – | 539 | 76.7 | – | 51.6 | 64.3 | – | 1855 |
| – | – | 530 | 76.4 | – | 51.1 | 63.9 | – | 1825 |
| – | 495 | 528 | 76.3 | – | 51 | 63.8 | 68 | 1820 |
| -477 | – | 516 | 75.9 | – | 50.3 | 63.2 | – | 1780 |
| – | – | 508 | 75.6 | – | 49.6 | 62.7 | – | 1740 |
| – | 477 | 508 | 75.6 | – | 49.6 | 62.7 | 66 | 1740 |
| -461 | – | 495 | 75.1 | – | 48.8 | 61.9 | – | 1680 |
| – | – | 491 | 74.9 | – | 48.5 | 61.7 | – | 1670 |
| – | 461 | 491 | 74.9 | – | 48.5 | 61.7 | 65 | 1670 |
| 444 | – | 474 | 74.3 | – | 47.2 | 61 | – | 1595 |
| – | – | 472 | 74.2 | – | 47.1 | 60.8 | – | 1585 |
| – | 444 | 472 | 74.2 | – | 47.1 | 60.8 | 63 | 1585 |
| 429 | 429 | 455 | 73.4 | – | 45.7 | 59.7 | 61 | 1510 |
| 415 | 415 | 440 | 72.8 | – | 44.5 | 58.8 | 59 | 1460 |
| 401 | 401 | 425 | 72 | – | 43.1 | 57.8 | 58 | 1390 |
| 388 | 388 | 410 | 71.4 | – | 41.8 | 56.8 | 56 | 1330 |
| 375 | 375 | 396 | 70.6 | – | 40.4 | 55.7 | 54 | 1270 |
| 363 | 363 | 383 | 70 | – | 39.1 | 54.6 | 52 | 1220 |
| 352 | 352 | 372 | 69.3 | -110 | 37.9 | 53.8 | 51 | 1180 |
| 341 | 341 | 360 | 68.7 | -109 | 36.6 | 52.8 | 50 | 1130 |
| 331 | 331 | 350 | 68.1 | -108.5 | 35.5 | 51.9 | 48 | 1095 |
| 321 | 321 | 339 | 67.5 | -108 | 34.3 | 51 | 47 | 1060 |
| 311 | 311 | 328 | 66.9 | -107.5 | 33.1 | 50 | 46 | 1025 |
| 302 | 302 | 319 | 66.3 | -107 | 32.1 | 49.3 | 45 | 1005 |
| 293 | 293 | 309 | 65.7 | -106 | 30.9 | 48.3 | 43 | 970 |
| 285 | 285 | 301 | 65.3 | -105.5 | 29.9 | 47.6 | – | 950 |
| 277 | 277 | 292 | 64.6 | -104.5 | 28.8 | 46.7 | 41 | 925 |
| 269 | 269 | 284 | 64.1 | -104 | 27.6 | 45.9 | 40 | 895 |
| 262 | 262 | 276 | 63.6 | -103 | 26.6 | 45 | 39 | 875 |
| 255 | 255 | 269 | 63 | -102 | 25.4 | 44.2 | 38 | 850 |
| 248 | 248 | 261 | 62.5 | -101 | 24.2 | 43.2 | 37 | 825 |
| 241 | 241 | 253 | 61.8 | 100 | 22.8 | 42 | 36 | 800 |
| 235 | 235 | 247 | 61.4 | 99 | 21.7 | 41.4 | 35 | 785 |
| 229 | 229 | 241 | 60.8 | 98.2 | 20.5 | 40.5 | 34 | 765 |
| 223 | 223 | 234 | – | 97.3 | -18.8 | – | – | |
| 217 | 217 | 228 | – | 96.4 | -17.5 | – | 33 | 725 |
| 212 | 212 | 222 | – | 95.5 | -16 | – | – | 705 |
| 207 | 207 | 218 | – | 94.6 | -15.2 | – | 32 | 690 |
| 201 | 201 | 212 | – | 93.8 | -13.8 | – | 31 | 675 |
| 197 | 197 | 207 | – | 92.8 | -12.7 | – | 30 | 655 |
| 192 | 192 | 202 | – | 91.9 | -11.5 | – | 29 | 640 |
| 187 | 187 | 196 | – | 90.7 | -10 | – | – | 620 |
| 183 | 183 | 192 | – | 90 | -9 | – | 28 | 615 |
| 179 | 179 | 188 | – | 89 | -8 | – | 27 | 600 |
| 174 | 174 | 182 | – | 87.8 | -6.4 | – | – | 585 |
| 170 | 170 | 178 | – | 86.8 | -5.4 | – | 26 | 570 |
| 167 | 167 | 175 | – | 86 | -4.4 | – | – | 560 |
| 163 | 163 | 171 | – | 85 | -3.3 | – | 25 | 545 |
| 156 | 156 | 163 | – | 82.9 | -0.9 | – | – | 525 |
| 149 | 149 | 156 | – | 80.8 | – | – | 23 | 505 |
| 143 | 143 | 150 | – | 78.7 | – | – | 22 | 490 |
| 137 | 137 | 143 | – | 76.4 | – | – | 21 | 460 |
| 131 | 131 | 137 | – | 74 | – | – | – | 450 |
| 126 | 126 | 132 | – | 72 | – | – | 20 | 435 |
| 121 | 121 | 127 | – | 69.8 | – | – | 19 | 415 |
| 116 | 116 | 122 | – | 67.6 | – | – | 18 | 400 |
| 111 | 111 | 117 | – | 65.7 | – | – | 15 | 385 |
The hardness test is a simple and easy method to test mechanical properties.
To substitute some mechanical property tests with hardness tests, a more accurate conversion relationship between hardness and strength is required in production.
Empirical evidence has shown that there is an approximate correlation between the various hardness values of metal materials, as well as between hardness and strength values.
Since the hardness value is determined by both the initial and continuous plastic deformation resistance, a material with higher strength will exhibit higher plastic deformation resistance and therefore higher hardness values.
| HLD | HRC | HRB | HV | HB[1] | HB[2] | HSD | HLD | HRC | HRB | HV | HB[1] | HB[2] | HSD |
| 300 | 83 | 596 | 33.9 | 322 | 314 | 315 | 46.3 | ||||||
| 302 | 84 | 598 | 34.2 | 325 | 316 | 318 | 46.6 | ||||||
| 304 | 85 | 600 | 34.5 | 328 | 319 | 320 | 46.9 | ||||||
| 306 | 85 | 602 | 34.8 | 330 | 322 | 323 | 47.2 | ||||||
| 308 | 86 | 604 | 35.1 | 333 | 324 | 325 | 47.5 | ||||||
| 310 | 87 | 606 | 35.4 | 336 | 327 | 328 | 47.8 | ||||||
| 312 | 87 | 608 | 35.7 | 338 | 330 | 331 | 48.2 | ||||||
| 314 | 88 | 610 | 35.9 | 341 | 332 | 333 | 48.5 | ||||||
| 316 | 89 | 612 | 36.2 | 344 | 335 | 336 | 48.8 | ||||||
| 318 | 90 | 614 | 36.5 | 346 | 338 | 339 | 49.1 | ||||||
| 320 | 90 | 616 | 36.8 | 349 | 340 | 341 | 49.4 | ||||||
| 322 | 91 | 618 | 37.1 | 352 | 343 | 344 | 49.7 | ||||||
| 324 | 92 | 620 | 37.4 | 355 | 346 | 346 | 50.1 | ||||||
| 326 | 93 | 622 | 37.6 | 357 | 349 | 349 | 50.4 | ||||||
| 328 | 94 | 624 | 37.9 | 360 | 351 | 352 | 50.7 | ||||||
| 330 | 94 | 626 | 38.2 | 363 | 354 | 355 | 51 | ||||||
| 332 | 95 | 628 | 38.5 | 366 | 357 | 357 | 51.3 | ||||||
| 334 | 96 | 630 | 38.7 | 369 | 360 | 360 | 51.7 | ||||||
| 336 | 97 | 632 | 39 | 372 | 363 | 363 | 52 | ||||||
| 338 | 98 | 634 | 39.3 | 375 | 366 | 366 | 52.3 | ||||||
| 340 | 99 | 636 | 39.6 | 377 | 369 | 369 | 52.6 | ||||||
| 342 | 100 | 638 | 39.8 | 380 | 371 | 371 | 52.9 | ||||||
| 344 | 101 | 640 | 40.1 | 383 | 374 | 374 | 53.3 | ||||||
| 346 | 101 | 642 | 40.4 | 386 | 377 | 377 | 53.6 | ||||||
| 348 | 102 | 644 | 40.7 | 389 | 380 | 380 | 53.9 | ||||||
| 350 | 59.6 | 103 | 646 | 40.9 | 392 | 383 | 383 | 54.2 | |||||
| 352 | 60.3 | 104 | 648 | 41.2 | 395 | 386 | 386 | 54.6 | |||||
| 354 | 61 | 105 | 650 | 41.5 | 398 | 389 | 389 | 54.9 | |||||
| 356 | 61.7 | 106 | 652 | 41.7 | 401 | 392 | 392 | 55.2 | |||||
| 358 | 62.4 | 107 | 654 | 42 | 404 | 395 | 395 | 55.6 | |||||
| 360 | 63.1 | 108 | 656 | 42.3 | 407 | 398 | 398 | 55.8 | |||||
| 362 | 63.8 | 109 | 658 | 42.6 | 411 | 401 | 401 | 56.2 | |||||
| 364 | 64.5 | 110 | 660 | 42.8 | 414 | 404 | 404 | 56.5 | |||||
| 366 | 65.1 | 111 | 662 | 43.1 | 417 | 407 | 407 | 56.9 | |||||
| 368 | 65.8 | 112 | 664 | 43.4 | 420 | 410 | 410 | 57.2 | |||||
| 370 | 66.4 | 114 | 666 | 43.6 | 423 | 413 | 413 | 57.5 | |||||
| 372 | 67 | 115 | 668 | 43.9 | 426 | 417 | 417 | 57.9 | |||||
| 374 | 67.7 | 116 | 670 | 44.1 | 429 | 420 | 420 | 58.2 | |||||
| 376 | 68.3 | 117 | 672 | 44.4 | 433 | 423 | 423 | 58.5 | |||||
| 378 | 68.9 | 118 | 674 | 44.7 | 436 | 426 | 426 | 58.9 | |||||
| 380 | 69.5 | 119 | 676 | 44.9 | 439 | 429 | 429 | 59.2 | |||||
| 382 | 70.1 | 120 | 678 | 45.2 | 442 | 432 | 432 | 59.5 | |||||
| 384 | 70.6 | 121 | 680 | 45.5 | 446 | 435 | 435 | 59.9 | |||||
| 386 | 71.2 | 123 | 682 | 45.7 | 449 | 439 | 439 | 60.2 | |||||
| 388 | 71.8 | 124 | 684 | 46 | 452 | 442 | 442 | 60.5 | |||||
| 390 | 72.3 | 125 | 686 | 46.2 | 456 | 445 | 445 | 60.9 | |||||
| 392 | 72.9 | 126 | 688 | 46.5 | 459 | 448 | 448 | 61.2 | |||||
| 394 | 73.4 | 127 | 690 | 46.8 | 463 | 451 | 451 | 61.6 | |||||
| 396 | 74 | 129 | 692 | 47 | 466 | 455 | 455 | 61.9 | |||||
| 398 | 74.5 | 130 | 694 | 47.3 | 469 | 458 | 458 | 62.2 | |||||
| 400 | 75 | 131 | 142 | 696 | 47.5 | 473 | 461 | 461 | 62.6 | ||||
| 402 | 75.5 | 133 | 144 | 698 | 47.8 | 476 | 465 | 465 | 62.9 | ||||
| 404 | 76 | 134 | 145 | 700 | 48 | 480 | 468 | 468 | 63.3 | ||||
| 406 | 76.5 | 135 | 147 | 702 | 48.3 | 483 | 471 | 471 | 63.6 | ||||
| 408 | 77 | 136 | 149 | 704 | 48.6 | 487 | 474 | 474 | 64 | ||||
| 410 | 77.5 | 138 | 150 | 706 | 48.8 | 491 | 478 | 478 | 64.3 | ||||
| 412 | 78 | 139 | 152 | 708 | 49.1 | 494 | 481 | 481 | 64.6 | ||||
| 414 | 78.4 | 141 | 153 | 710 | 49.3 | 498 | 485 | 485 | 65 | ||||
| 416 | 78.9 | 142 | 155 | 712 | 49.6 | 501 | 488 | 488 | 65.3 | ||||
| 418 | 79.3 | 143 | 156 | 714 | 49.8 | 505 | 491 | 491 | 65.7 | ||||
| 420 | 79.8 | 145 | 140 | 157 | 716 | 50.1 | 509 | 495 | 495 | 66 | |||
| 422 | 80.2 | 146 | 141 | 159 | 718 | 50.3 | 513 | 498 | 498 | 66.4 | |||
| 424 | 80.7 | 148 | 143 | 160 | 720 | 50.6 | 516 | 502 | 502 | 66.7 | |||
| 426 | 81.1 | 149 | 144 | 162 | 722 | 50.8 | 520 | 505 | 505 | 67.1 | |||
| 428 | 81.5 | 151 | 145 | 163 | 724 | 51.1 | 524 | 508 | 508 | 67.4 | |||
| 430 | 81.9 | 152 | 147 | 165 | 726 | 51.3 | 528 | 512 | 512 | 67.8 | |||
| 432 | 82.4 | 154 | 148 | 166 | 728 | 51.6 | 532 | 515 | 515 | 68.2 | |||
| 434 | 82.8 | 155 | 150 | 168 | 730 | 51.8 | 535 | 519 | 519 | 68.5 | |||
| 436 | 83.2 | 157 | 151 | 169 | 732 | 52.1 | 539 | 522 | 522 | 68.9 | |||
| 438 | 83.6 | 158 | 153 | 171 | 734 | 52.3 | 543 | 526 | 526 | 69.2 | |||
| 440 | 84 | 160 | 154 | 172 | 736 | 52.6 | 547 | 529 | 529 | 69.6 | |||
| 442 | 84.4 | 161 | 156 | 174 | 738 | 52.8 | 551 | 533 | 533 | 69.9 | |||
| 444 | 84.8 | 163 | 157 | 175 | 740 | 53.1 | 555 | 536 | 536 | 70.3 | |||
| 446 | 85.1 | 164 | 159 | 176 | 742 | 53.3 | 559 | 540 | 540 | 70.7 | |||
| 448 | 85.5 | 166 | 160 | 178 | 744 | 53.6 | 563 | 543 | 543 | 71 | |||
| 450 | 85.9 | 168 | 162 | 179 | 746 | 53.8 | 568 | 547 | 547 | 71.4 | |||
| 452 | 86.3 | 169 | 164 | 181 | 748 | 54.1 | 572 | 551 | 551 | 71.8 | |||
| 454 | 86.6 | 171 | 165 | 182 | 750 | 54.3 | 576 | 554 | 554 | 72.1 | |||
| 456 | 87 | 173 | 167 | 184 | 752 | 54.5 | 580 | 558 | 558 | 72.5 | |||
| 458 | 87.4 | 174 | 168 | 185 | 754 | 54.8 | 584 | 561 | 561 | 72.9 | |||
| 460 | 87.7 | 176 | 170 | 187 | 26.4 | 756 | 55 | 589 | 565 | 565 | 73.2 | ||
| 462 | 88.1 | 178 | 172 | 188 | 26.7 | 758 | 55.3 | 593 | 569 | 569 | 73.6 | ||
| 464 | 88.5 | 179 | 173 | 190 | 27 | 760 | 55.5 | 597 | 572 | 572 | 74 | ||
| 466 | 88.8 | 181 | 175 | 191 | 27.3 | 762 | 55.7 | 602 | 576 | 576 | 74.3 | ||
| 468 | 89.2 | 183 | 177 | 193 | 27.6 | 764 | 56 | 606 | 580 | 580 | 74.7 | ||
| 470 | 89.5 | 185 | 178 | 194 | 27.9 | 766 | 56.2 | 610 | 583 | 583 | 75.1 | ||
| 472 | 89.9 | 186 | 180 | 196 | 28.2 | 768 | 56.5 | 615 | 587 | 587 | 75.5 | ||
| 474 | 90.3 | 188 | 182 | 197 | 28.5 | 770 | 56.7 | 619 | 591 | 591 | 75.8 | ||
| 476 | 90.6 | 190 | 184 | 198 | 28.8 | 772 | 56.9 | 624 | 594 | 594 | 76.2 | ||
| 478 | 91 | 192 | 185 | 200 | 29.1 | 774 | 57.2 | 628 | 598 | 598 | 76.6 | ||
| 480 | 91.3 | 194 | 187 | 202 | 29.4 | 776 | 57.4 | 633 | 602 | 602 | 77 | ||
| 482 | 91.7 | 195 | 189 | 203 | 29.7 | 778 | 57.6 | 638 | 605 | 605 | 77.4 | ||
| 484 | 92.1 | 197 | 191 | 205 | 30 | 780 | 57.9 | 642 | 609 | 609 | 77.7 | ||
| 486 | 92.4 | 199 | 192 | 206 | 30.3 | 782 | 58.1 | 647 | 613 | 613 | 78.1 | ||
| 488 | 92.8 | 201 | 194 | 208 | 30.6 | 784 | 58.3 | 652 | 617 | 617 | 78.5 | ||
| 490 | 93.1 | 203 | 196 | 209 | 30.9 | 786 | 58.6 | 657 | 620 | 620 | 78.9 | ||
| 492 | 93.5 | 205 | 198 | 211 | 31.2 | 788 | 58.8 | 662 | 624 | 624 | 79.3 | ||
| 494 | 93.9 | 207 | 200 | 212 | 31.5 | 790 | 59 | 666 | 628 | 628 | 79.7 | ||
| 496 | 94.3 | 209 | 202 | 214 | 31.7 | 792 | 59.2 | 671 | 632 | 632 | 80.1 | ||
| 498 | 94.6 | 211 | 204 | 215 | 32 | 794 | 59.5 | 676 | 635 | 635 | 80.5 | ||
| 500 | 95 | 213 | 205 | 217 | 32.2 | 796 | 59.7 | 681 | 639 | 639 | 80.9 | ||
| 502 | 95.4 | 215 | 207 | 219 | 32.5 | 798 | 59.9 | 686 | 643 | 643 | 81.2 | ||
| 504 | 95.8 | 217 | 209 | 220 | 32.8 | 800 | 60.1 | 691 | 647 | 647 | 81.6 | ||
| 506 | 96.2 | 219 | 211 | 222 | 33.1 | 802 | 60.4 | 697 | 651 | 651 | 82 | ||
| 508 | 96.6 | 221 | 213 | 224 | 33.3 | 804 | 60.6 | 702 | 82.4 | ||||
| 510 | 19.8 | 97 | 223 | 215 | 225 | 33.6 | 806 | 60.8 | 707 | 82.8 | |||
| 512 | 20.2 | 97.4 | 225 | 217 | 227 | 33.9 | 808 | 61 | 712 | 83.2 | |||
| 514 | 20.6 | 97.9 | 227 | 219 | 229 | 34.2 | 810 | 61.2 | 718 | 83.7 | |||
| 516 | 21 | 98.3 | 229 | 221 | 230 | 34.4 | 812 | 61.4 | 723 | 84.1 | |||
| 518 | 21.3 | 98.7 | 231 | 223 | 232 | 34.7 | 814 | 61.7 | 728 | 84.5 | |||
| 520 | 21.7 | 99.2 | 233 | 225 | 234 | 35 | 816 | 61.9 | 734 | 84.9 | |||
| 522 | 22 | 99.6 | 235 | 227 | 235 | 35.3 | 818 | 62.1 | 739 | 85.3 | |||
| 524 | 22.4 | 237 | 229 | 237 | 35.6 | 820 | 62.3 | 745 | 85.7 | ||||
| 526 | 22.8 | 239 | 231 | 239 | 35.8 | 822 | 62.5 | 750 | 86.1 | ||||
| 528 | 23.1 | 241 | 234 | 241 | 36.1 | 824 | 62.7 | 756 | 86.5 | ||||
| 530 | 23.5 | 244 | 236 | 242 | 36.4 | 826 | 62.9 | 762 | 87 | ||||
| 532 | 23.8 | 246 | 238 | 244 | 36.7 | 828 | 63.1 | 768 | 87.4 | ||||
| 534 | 24.1 | 248 | 240 | 246 | 37 | 830 | 63.3 | 773 | 87.8 | ||||
| 536 | 24.5 | 250 | 242 | 248 | 37.3 | 832 | 63.5 | 779 | 88.2 | ||||
| 538 | 24.8 | 252 | 244 | 250 | 37.6 | 834 | 63.7 | 785 | 88.6 | ||||
| 540 | 25.2 | 255 | 246 | 252 | 37.9 | 836 | 63.9 | 791 | 89.1 | ||||
| 542 | 25.5 | 257 | 249 | 254 | 38.1 | 838 | 64.1 | 797 | 89.5 | ||||
| 544 | 25.8 | 259 | 251 | 256 | 38.4 | 840 | 64.3 | 803 | 89.9 | ||||
| 546 | 26.2 | 261 | 253 | 258 | 38.7 | 842 | 64.5 | 809 | 90.4 | ||||
| 548 | 26.5 | 264 | 255 | 259 | 39 | 844 | 64.7 | 816 | 90.8 | ||||
| 550 | 26.8 | 266 | 258 | 261 | 39.3 | 846 | 64.9 | 822 | 91.2 | ||||
| 552 | 27.1 | 268 | 262 | 263 | 39.6 | 848 | 65.1 | 828 | 91.7 | ||||
| 554 | 27.5 | 270 | 262 | 265 | 39.9 | 850 | 65.3 | 835 | 92.1 | ||||
| 556 | 27.8 | 273 | 265 | 268 | 40.2 | 852 | 65.4 | 841 | 92.6 | ||||
| 558 | 28.1 | 275 | 267 | 270 | 40.5 | 854 | 65.6 | 848 | 93 | ||||
| 560 | 28.4 | 278 | 269 | 272 | 40.8 | 856 | 65.8 | 854 | 93.5 | ||||
| 562 | 28.8 | 280 | 272 | 274 | 41.1 | 858 | 66 | 861 | 93.9 | ||||
| 564 | 29.1 | 282 | 274 | 276 | 41.4 | 860 | 66.2 | 867 | 94.4 | ||||
| 566 | 29.4 | 285 | 276 | 278 | 41.7 | 862 | 66.3 | 874 | 94.8 | ||||
| 568 | 29.7 | 287 | 279 | 280 | 42 | 864 | 66.5 | 881 | 95.3 | ||||
| 570 | 30 | 290 | 281 | 282 | 42.3 | 866 | 66.7 | 888 | 95.7 | ||||
| 572 | 30.3 | 292 | 283 | 285 | 42.6 | 868 | 66.8 | 895 | 96.2 | ||||
| 574 | 30.6 | 294 | 286 | 287 | 42.9 | 870 | 67 | 902 | 96.7 | ||||
| 576 | 30.9 | 297 | 288 | 289 | 43.2 | 872 | 67.2 | 909 | 97.1 | ||||
| 578 | 31.2 | 299 | 291 | 292 | 43.5 | 874 | 67.3 | 916 | 97.6 | ||||
| 580 | 31.5 | 302 | 293 | 294 | 43.8 | 876 | 67.5 | 923 | 98.1 | ||||
| 582 | 31.8 | 304 | 296 | 296 | 44.1 | 878 | 67.6 | 931 | 98.6 | ||||
| 584 | 32.1 | 307 | 298 | 299 | 44.4 | 880 | 67.8 | 938 | 99 | ||||
| 586 | 32.4 | 309 | 301 | 301 | 44.7 | 882 | 68 | 946 | 99.5 | ||||
| 588 | 32.7 | 312 | 303 | 304 | 45 | 884 | 68.1 | 953 | |||||
| 590 | 33 | 315 | 306 | 308 | 45.4 | 886 | 68.2 | 961 | |||||
| 592 | 33.3 | 317 | 308 | 310 | 45.7 | 888 | 68.4 | 968 | |||||
| 594 | 33.6 | 320 | 311 | 313 | 46 | 890 | 68.5 | 976 |
Tables are essential for converting hardness values between different scales and understanding the relationship between hardness and other mechanical properties, such as tensile strength.
Hardness testing is an essential method in material science and engineering to determine a material’s suitability for specific applications. By understanding the different methods and their appropriate uses, one can select the best testing technique to ensure material performance and reliability. This comprehensive guide aims to provide a deeper insight into hardness testing, enabling better material selection and quality control in various industries.
