Why do we measure hardness in materials? Understanding how Rockwell (HRC) and Brinell (HB) hardness scales compare is crucial for selecting the right materials in engineering. This article explores the differences between these two common hardness tests, explaining their applications and conversion methods. By the end, you’ll know how to interpret these hardness values for better material selection in your projects.
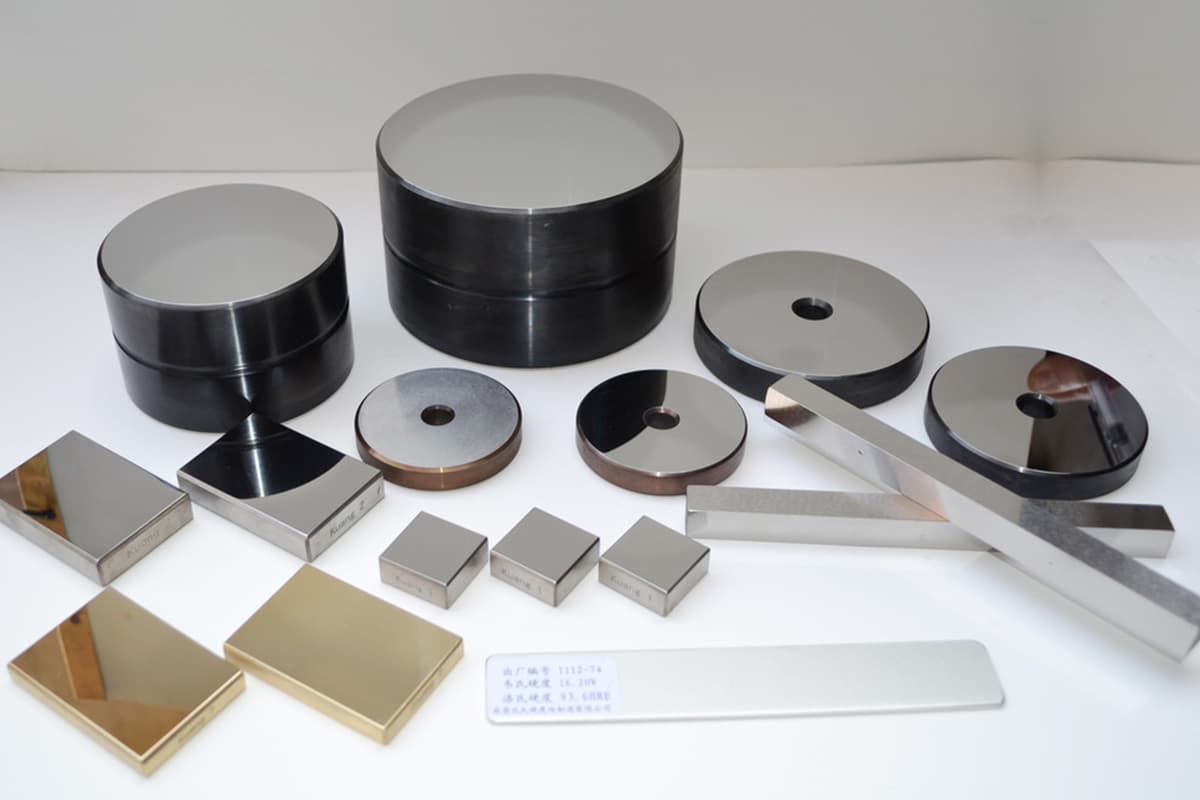
Hardness is a performance indicator used to gauge the softness or hardness of materials. There are many methods of hardness testing, each with different principles, resulting in hardness values and meanings that are not exactly alike.
The most common is the static load indentation hardness test, namely, Brinell Hardness (HB), Rockwell Hardness (HRA, HRB, HRC), Vickers Hardness (HV), and the hardness of rubber plastic Shore Hardness (HA, HD) among others. These hardness values represent the material’s surface resistance to being indented by a hard object.

The most popular Leeb Hardness (HL) and Shore Hardness (HS) belong to the rebound hardness test, their values representing the magnitude of the metal’s elastic deformation work.
Therefore, hardness is not a pure physical quantity, but a comprehensive performance indicator reflecting the elasticity, plasticity, strength, and toughness of the material.
The code for metal hardness (Hardness) is H. Depending on the hardness test method,
Brinell Hardness (HB) is generally used when the material is softer, such as non-ferrous metals, or steel before heat treatment or after annealing. Rockwell Hardness (HRC) is generally used for materials with higher hardness, such as post-heat treatment hardness.
Brinell Hardness (HB) uses a certain test load to press a hardened steel ball or hard alloy ball of a certain diameter into the metal surface to be tested, hold it for a specified time, then unload, and measure the diameter of the indentation on the tested surface.
The Brinell hardness value is the quotient obtained by dividing the load by the spherical surface area of the indentation.
It is typically: using a certain load (generally 3000kg) to press a certain size (usually 10mm in diameter) hardened steel ball into the material surface, maintain it for a while, unload, and the ratio of the load to its indentation area is the Brinell Hardness value (HB), unit is kgf/mm2 (N/mm2).
Rockwell Hardness (HR-) uses indentation plastic deformation depth to determine the hardness value index. A hardness unit is 0.002mm.
When HB > 450 or the sample is too small, Brinell hardness test cannot be used and Rockwell hardness measurement should be adopted instead.
It uses a diamond cone with a 120° apex angle or a steel ball with a diameter of 1.59, 3.18mm, under a certain load, to press into the material surface to be tested, and the material’s hardness is calculated from the depth of the indentation.
According to the different hardness of the test material, it is expressed in three different scales:
Furthermore:
(1)HRC refers to the Rockwell C scale.
(2)HRC and HB are widely used in production.
(3)The HRC range is HRC 20–67, equivalent to HB225–650.
If the hardness is higher than this range, Rockwell hardness A scale HRA is used. If the hardness is lower than this range, Rockwell hardness B scale HRB is used. The upper limit of Brinell hardness is HB650, it cannot exceed this value.
(4)The indenter of the Rockwell hardness tester C scale is a 120° diamond cone, and the test load is a fixed value, the Chinese standard is 150 kgf.
The indenter of the Brinell hardness tester is a hardened steel ball (HBS) or a hard alloy ball (HBW), and the test load varies with the ball diameter, ranging from 3000 to 31.25 kgf.
(5)Rockwell hardness has small indentations, the measured value is local, the average value should be obtained by measuring several points, suitable for finished products and thin plates, belonging to the category of non-destructive testing.
The indentation of Brinell hardness is larger, the measured value is accurate, not suitable for finished products and thin plates, generally not belonging to the category of non-destructive testing.
(6)Rockwell hardness value is a nameless number, without a unit. (Therefore, it is incorrect to refer to Rockwell hardness in terms of degrees.)
Brinell hardness has a unit, and it has a certain approximate relationship with tensile strength.
(7)Rockwell hardness is directly displayed on the dial or can be displayed digitally, it is convenient to operate, fast, intuitive, suitable for mass production.
Brinell hardness requires measuring the diameter of the indentation with a microscope, then looking up the table or calculating, the operation is more complicated.
(8)Under certain conditions, HB and HRC can be converted by looking up the table. The mental calculation formula can be approximately remembered as: 1HRC≈1/10HB.
According to the German standard DIN50150, below is the comparison table of tensile strength with Vickers Hardness, Brinell Hardness, and Rockwell Hardness for commonly used range of steel materials:
Tensile Strength Rm N/mm2 | HV | HB | HRC |
| 250 | 80 | 76.0 | – |
| 270 | 85 | 80.7 | – |
| 285 | 90 | 85.2 | – |
| 305 | 95 | 90.2 | – |
| 320 | 100 | 95.0 | – |
| 335 | 105 | 99.8 | – |
| 350 | 110 | 105 | – |
| 370 | 115 | 109 | – |
| 380 | 120 | 114 | – |
| 400 | 125 | 119 | – |
| 415 | 130 | 124 | – |
| 430 | 135 | 128 | – |
| 450 | 140 | 133 | – |
| 465 | 145 | 138 | – |
| 480 | 150 | 143 | – |
| 490 | 155 | 147 | – |
| 510 | 160 | 152 | – |
| 530 | 165 | 156 | – |
| 545 | 170 | 162 | – |
| 560 | 175 | 166 | – |
| 575 | 180 | 171 | – |
| 595 | 185 | 176 | – |
| 610 | 190 | 181 | – |
| 625 | 195 | 185 | – |
| 640 | 200 | 190 | – |
| 660 | 205 | 195 | – |
| 675 | 210 | 199 | – |
| 690 | 215 | 204 | – |
| 705 | 220 | 209 | – |
| 720 | 225 | 214 | – |
| 740 | 230 | 219 | – |
| 755 | 235 | 223 | – |
| 770 | 240 | 228 | 20.3 |
| 785 | 245 | 233 | 21.3 |
| 800 | 250 | 238 | 22.2 |
| 820 | 255 | 242 | 23.1 |
| 835 | 260 | 247 | 24.0 |
| 850 | 265 | 252 | 24.8 |
| 865 | 270 | 257 | 25.6 |
| 880 | 275 | 261 | 26.4 |
| 900 | 280 | 266 | 27.1 |
| 915 | 285 | 271 | 27.8 |
| 930 | 290 | 276 | 28.5 |
| 950 | 295 | 280 | 29.2 |
| 965 | 300 | 285 | 29.8 |
| 995 | 310 | 295 | 31.0 |
| 1030 | 320 | 304 | 32.2 |
| 1060 | 330 | 314 | 33.3 |
| 1095 | 340 | 323 | 34.4 |
| 1125 | 350 | 333 | 35.5 |
| 1115 | 360 | 342 | 36.6 |
| 1190 | 370 | 352 | 37.7 |
| 1220 | 380 | 361 | 38.8 |
| 1255 | 390 | 371 | 39.8 |
| 1290 | 400 | 380 | 40.8 |
| 1320 | 410 | 390 | 41.8 |
| 1350 | 420 | 399 | 42.7 |
| 1385 | 430 | 409 | 43.6 |
| 1420 | 440 | 418 | 44.5 |
| 1455 | 450 | 428 | 45.3 |
| 1485 | 460 | 437 | 46.1 |
| 1520 | 470 | 447 | 46.9 |
| 1555 | 480 | (456) | 47.7 |
| 1595 | 490 | (466) | 48.4 |
| 1630 | 500 | (475) | 49.1 |
| 1665 | 510 | (485) | 49.8 |
| 1700 | 520 | (494) | 50.5 |
| 1740 | 530 | (504) | 51.1 |
| 1775 | 540 | (513) | 51.7 |
| 1810 | 550 | (523) | 52.3 |
| 1845 | 560 | (532) | 53.0 |
| 1880 | 570 | (542) | 53.6 |
| 1920 | 580 | (551) | 54.1 |
| 1955 | 590 | (561) | 54.7 |
| 1995 | 600 | (570) | 55.2 |
| 2030 | 610 | (580) | 55.7 |
| 2070 | 620 | (589) | 56.3 |
| 2105 | 630 | (599) | 56.8 |
| 2145 | 640 | (608) | 57.3 |
| 2180 | 650 | (618) | 57.8 |
| 660 | 58.3 | ||
| 670 | 58.8 | ||
| 680 | 59.2 | ||
| 690 | 59.7 | ||
| 700 | 60.1 | ||
| 720 | 61.0 | ||
| 740 | 61.8 | ||
| 760 | 62.5 | ||
| 780 | 63.3 | ||
| 800 | 64.0 | ||
| 820 | 64.7 | ||
| 840 | 65.3 | ||
| 860 | 65.9 | ||
| 880 | 66.4 | ||
| 900 | 67.0 | ||
| 920 | 67.5 | ||
| 940 | 68.0 |
| Barcol | Brinell | Vickers | Webster | Rockwell | ||||
| GYZJ | 10mm | 5kg | B | |||||
| 934-1 | 500kg | B | E | F | H | |||
| 35 | 21 | 32 | ||||||
| 36 | 22 | 35 | ||||||
| 37 | 23 | 37 | ||||||
| 38 | 24 | 40 | ||||||
| 39 | 25 | 42 | ||||||
| 40 | 25 | 26 | 45 | |||||
| 41 | 25 | 27 | 47 | |||||
| 42 | 26 | 28 | 49 | |||||
| 43 | 27 | 29 | 51 | |||||
| 44 | 27 | 30 | 54 | |||||
| 45 | 28 | 30 | 56 | |||||
| 46 | 29 | 31 | 58 | |||||
| 47 | 30 | 32 | 23 | 60 | ||||
| 48 | 30 | 33 | 0.7 | 26 | 62 | |||
| 49 | 31 | 34 | 1.3 | 28 | 64 | |||
| 50 | 32 | 35 | 1.9 | 31 | 66 | |||
| 51 | 33 | 36 | 2.5 | 34 | 68 | |||
| 52 | 34 | 38 | 3.1 | 36 | 70 | |||
| 53 | 35 | 39 | 3.6 | 39 | 30 | 72 | ||
| 54 | 37 | 40 | 4.2 | 41 | 34 | 73 | ||
| 55 | 38 | 41 | 4.7 | 44 | 37 | 75 | ||
| 56 | 39 | 43 | 5.3 | 46 | 40 | 77 | ||
| 57 | 40 | 44 | 5.8 | 48 | 43 | 78 | ||
| 58 | 42 | 45 | 6.3 | 50 | 46 | 80 | ||
| 59 | 43 | 47 | 6.8 | 53 | 48 | 82 | ||
| 60 | 45 | 49 | 7.3 | 55 | 51 | 83 | ||
| 61 | 46 | 50 | 7.8 | 57 | 54 | 85 | ||
| 62 | 48 | 52 | 8.3 | 59 | 56 | 86 | ||
| 63 | 50 | 54 | 8.8 | 61 | 59 | 88 | ||
| 64 | 51 | 56 | 9.2 | 63 | 61 | 89 | ||
| 65 | 53 | 58 | 9.7 | 65 | 63 | 90 | ||
| 66 | 55 | 60 | 10.1 | 67 | 66 | 92 | ||
| 67 | 57 | 62 | 10.6 | 69 | 68 | 93 | ||
| Barcol | Vickers | Webster | Rockwell | ||||
| GYZJ | 10mm | 5kg | B | ||||
| 934-1 | 500kg | B | E | F | H | ||
| 68 | 60 | 65 | 11 | 71 | 70 | 94 | |
| 69 | 62 | 67 | 11.4 | 73 | 72 | 95 | |
| 70 | 64 | 70 | 11.8 | 17 | 75 | 74 | 97 |
| 71 | 67 | 72 | 12.2 | 23 | 76 | 75 | 98 |
| 72 | 69 | 75 | 12.6 | 28 | 78 | 77 | 99 |
| 73 | 72 | 78 | 12.9 | 33 | 80 | 79 | 100 |
| 74 | 75 | 81 | 13.3 | 38 | 81 | 80 | 101 |
| 75 | 78 | 85 | 13.7 | 42 | 83 | 82 | 102 |
| 76 | 80 | 88 | 14 | 47 | 84 | 83 | 103 |
| 77 | 84 | 92 | 14.3 | 51 | 86 | 85 | 104 |
| 78 | 87 | 95 | 14.7 | 55 | 87 | 86 | 105 |
| 79 | 90 | 99 | 15 | 59 | 89 | 88 | 106 |
| 80 | 94 | 103 | 15.3 | 63 | 90 | 89 | 106 |
| 81 | 97 | 108 | 15.6 | 66 | 91 | 90 | 107 |
| 82 | 101 | 112 | 15.9 | 70 | 92 | 91 | 108 |
| 83 | 105 | 117 | 16.2 | 73 | 94 | 92 | 109 |
| 84 | 109 | 121 | 16.4 | 76 | 95 | 93 | 109 |
| 85 | 113 | 126 | 16.7 | 79 | 96 | 94 | 110 |
| 86 | 117 | 131 | 16.9 | 81 | 97 | 95 | 111 |
| 87 | 121 | 137 | 17.2 | 84 | 98 | 96 | 111 |
| 88 | 126 | 142 | 17.4 | 86 | 99 | 97 | 112 |
| 89 | 130 | 17.6 | 88 | 100 | 98 | 112 | |
| 90 | 135 | 17.8 | 90 | 101 | 98 | 113 | |
| 91 | 140 | 18 | 102 | 99 | 114 | ||
| 92 | 145 | 18.2 | 103 | 100 | |||
| 93 | 18.4 | 103 | 100 | ||||
| 94 | 18.6 | 104 | 101 | ||||
| 95 | 18.7 | 105 | 102 | ||||
| 96 | 18.9 | 106 | 102 | ||||
| 97 | 19 | 106 | 103 | ||||
| 98 | 19.2 | 107 | |||||
| 98 | 19.3 | 107 | |||||
| 100 | 19.4 | 108 | |||||
| HB | HV | HRA | HRB | HRC | HRD | HS | Tensile Strength MPa | |
| Standard Sphere | Tungsten Carbide Sphere | |||||||
| – | – | 940 | 85.6 | – | 68 | 76.9 | 97 | – |
| – | – | 920 | 85.3 | – | 67.5 | 76.5 | 96 | – |
| – | – | 900 | 85 | – | 67 | 76.1 | 95 | – |
| – | -767 | 880 | 84.7 | – | 66.4 | 75.7 | 93 | – |
| – | -757 | 860 | 84.4 | – | 65.9 | 75.3 | 92 | – |
| – | -745 | 840 | 84.1 | – | 65.3 | 74.8 | 91 | – |
| – | -733 | 820 | 83.8 | – | 64.7 | 74.3 | 90 | – |
| – | -722 | 800 | 83.4 | – | 64 | 73.8 | 88 | – |
| – | -712 | – | – | – | – | – | – | – |
| – | -710 | 780 | 83 | – | 63.3 | 73.3 | 87 | – |
| – | -698 | 760 | 82.6 | – | 62.5 | 72.6 | 86 | – |
| – | -684 | 740 | 82.2 | – | 61.8 | 72.1 | – | – |
| – | -682 | 737 | 82.2 | – | 61.7 | 72 | 84 | – |
| – | -670 | 720 | 81.8 | – | 61 | 71.5 | 83 | – |
| – | -656 | 700 | 81.3 | – | 60.1 | 70.8 | – | – |
| – | -653 | 697 | 81.2 | – | 60 | 70.7 | 81 | – |
| – | -647 | 690 | 81.1 | – | 59.7 | 70.5 | – | – |
| – | -638 | 680 | 80.8 | – | 59.2 | 70.1 | 80 | – |
| – | 630 | 670 | 80.6 | – | 58.8 | 69.8 | – | – |
| – | 627 | 667 | 80.5 | – | 58.7 | 69.7 | 79 | – |
| – | – | 677 | 80.7 | – | 59.1 | 70 | – | – |
| – | 601 | 640 | 79.8 | – | 57.3 | 68.7 | 77 | – |
| – | – | 640 | 79.8 | – | 57.3 | 68.7 | – | – |
| – | 578 | 615 | 79.1 | – | 56 | 67.7 | 75 | – |
| – | – | 607 | 78.8 | – | 55.6 | 67.4 | – | – |
| – | 555 | 591 | 78.4 | – | 54.7 | 66.7 | 73 | 2055 |
| – | – | 579 | 78 | – | 54 | 66.1 | – | 2015 |
| – | 534 | 569 | 77.8 | – | 53.5 | 65.8 | 71 | 1985 |
| – | – | 533 | 77.1 | – | 52.5 | 65 | – | 1915 |
| – | 514 | 547 | 76.9 | – | 52.1 | 64.7 | 70 | 1890 |
| -495 | – | 539 | 76.7 | – | 51.6 | 64.3 | – | 1855 |
| – | – | 530 | 76.4 | – | 51.1 | 63.9 | – | 1825 |
| – | 495 | 528 | 76.3 | – | 51 | 63.8 | 68 | 1820 |
| -477 | – | 516 | 75.9 | – | 50.3 | 63.2 | – | 1780 |
| – | – | 508 | 75.6 | – | 49.6 | 62.7 | – | 1740 |
| – | 477 | 508 | 75.6 | – | 49.6 | 62.7 | 66 | 1740 |
| -461 | – | 495 | 75.1 | – | 48.8 | 61.9 | – | 1680 |
| – | – | 491 | 74.9 | – | 48.5 | 61.7 | – | 1670 |
| – | 461 | 491 | 74.9 | – | 48.5 | 61.7 | 65 | 1670 |
| 444 | – | 474 | 74.3 | – | 47.2 | 61 | – | 1595 |
| – | – | 472 | 74.2 | – | 47.1 | 60.8 | – | 1585 |
| – | 444 | 472 | 74.2 | – | 47.1 | 60.8 | 63 | 1585 |
| 429 | 429 | 455 | 73.4 | – | 45.7 | 59.7 | 61 | 1510 |
| 415 | 415 | 440 | 72.8 | – | 44.5 | 58.8 | 59 | 1460 |
| 401 | 401 | 425 | 72 | – | 43.1 | 57.8 | 58 | 1390 |
| 388 | 388 | 410 | 71.4 | – | 41.8 | 56.8 | 56 | 1330 |
| 375 | 375 | 396 | 70.6 | – | 40.4 | 55.7 | 54 | 1270 |
| 363 | 363 | 383 | 70 | – | 39.1 | 54.6 | 52 | 1220 |
| 352 | 352 | 372 | 69.3 | -110 | 37.9 | 53.8 | 51 | 1180 |
| 341 | 341 | 360 | 68.7 | -109 | 36.6 | 52.8 | 50 | 1130 |
| 331 | 331 | 350 | 68.1 | -108.5 | 35.5 | 51.9 | 48 | 1095 |
| 321 | 321 | 339 | 67.5 | -108 | 34.3 | 51 | 47 | 1060 |
| 311 | 311 | 328 | 66.9 | -107.5 | 33.1 | 50 | 46 | 1025 |
| 302 | 302 | 319 | 66.3 | -107 | 32.1 | 49.3 | 45 | 1005 |
| 293 | 293 | 309 | 65.7 | -106 | 30.9 | 48.3 | 43 | 970 |
| 285 | 285 | 301 | 65.3 | -105.5 | 29.9 | 47.6 | – | 950 |
| 277 | 277 | 292 | 64.6 | -104.5 | 28.8 | 46.7 | 41 | 925 |
| 269 | 269 | 284 | 64.1 | -104 | 27.6 | 45.9 | 40 | 895 |
| 262 | 262 | 276 | 63.6 | -103 | 26.6 | 45 | 39 | 875 |
| 255 | 255 | 269 | 63 | -102 | 25.4 | 44.2 | 38 | 850 |
| 248 | 248 | 261 | 62.5 | -101 | 24.2 | 43.2 | 37 | 825 |
| 241 | 241 | 253 | 61.8 | 100 | 22.8 | 42 | 36 | 800 |
| 235 | 235 | 247 | 61.4 | 99 | 21.7 | 41.4 | 35 | 785 |
| 229 | 229 | 241 | 60.8 | 98.2 | 20.5 | 40.5 | 34 | 765 |
| 223 | 223 | 234 | – | 97.3 | -18.8 | – | – | |
| 217 | 217 | 228 | – | 96.4 | -17.5 | – | 33 | 725 |
| 212 | 212 | 222 | – | 95.5 | -16 | – | – | 705 |
| 207 | 207 | 218 | – | 94.6 | -15.2 | – | 32 | 690 |
| 201 | 201 | 212 | – | 93.8 | -13.8 | – | 31 | 675 |
| 197 | 197 | 207 | – | 92.8 | -12.7 | – | 30 | 655 |
| 192 | 192 | 202 | – | 91.9 | -11.5 | – | 29 | 640 |
| 187 | 187 | 196 | – | 90.7 | -10 | – | – | 620 |
| 183 | 183 | 192 | – | 90 | -9 | – | 28 | 615 |
| 179 | 179 | 188 | – | 89 | -8 | – | 27 | 600 |
| 174 | 174 | 182 | – | 87.8 | -6.4 | – | – | 585 |
| 170 | 170 | 178 | – | 86.8 | -5.4 | – | 26 | 570 |
| 167 | 167 | 175 | – | 86 | -4.4 | – | – | 560 |
| 163 | 163 | 171 | – | 85 | -3.3 | – | 25 | 545 |
| 156 | 156 | 163 | – | 82.9 | -0.9 | – | – | 525 |
| 149 | 149 | 156 | – | 80.8 | – | – | 23 | 505 |
| 143 | 143 | 150 | – | 78.7 | – | – | 22 | 490 |
| 137 | 137 | 143 | – | 76.4 | – | – | 21 | 460 |
| 131 | 131 | 137 | – | 74 | – | – | – | 450 |
| 126 | 126 | 132 | – | 72 | – | – | 20 | 435 |
| 121 | 121 | 127 | – | 69.8 | – | – | 19 | 415 |
| 116 | 116 | 122 | – | 67.6 | – | – | 18 | 400 |
| 111 | 111 | 117 | – | 65.7 | – | – | 15 | 385 |
